Is HelloFresh Worth it?

Truth time- I hate cooking. I'm a creative gal, so I know I should love it. But, cooking is not really crafting and I seriously hate doing it. I've recently started crock pot cooking, which is awesome because you dump everything in a pot and let it sit for 8 hours and it comes out delicious. But, that doesn't really work when you're at work all day. I'm a lucky lady and my husband cooks for us pretty much everyday, but I wanted to try to cook too. I mean, I'm planning to have kids someday and they have to eat, right?

Hello Fresh 2a.jpg

Through a friend, I got a free trial of HelloFresh and I decided to give it a go. HelloFresh is a meal delivery service, where they send over the ingredients and instructions and you get to cook it. Before I dive into my thoughts, here's a few fun facts about me:

1. I hate cooking. It's confusing, boring, and doesn't taste as good as I expect it to.
2. Cooking takes way too long. Time spent cooking is time I'd rather spend on anything else. Ordering in takes about 10 minutes with zero cleanup.
3. I hate measuring and trying to manage 18 things all at once and not burn them.

Any of these sound like you? Please tell me I'm not alone here! Haha. So, I'll talk about HelloFresh from my perspective as the casual cook. 

Packaging:

Hello Fresh 1.jpg

Each meal comes in its own little box, which is nice for keeping everything organized. Each box came labelled (except the chicken for some reason...) and fit nicely in the fridge. All the ingredients inside are packaged nicely and labelled as well. The meat comes outside the box, which is more of a fun fact about it than anything else.

Hello Fresh 6.jpg

Monty definitely wanted to try some food!

Selection:

If you choose their classic plan, you get 6 meal choices. For the vegetarian and family plan, there are 3 handpicked meals but no choices. For the classic plan, they have a variety of meats and fish. to choose from. Personally, I don't really like seafood, and I don't eat beef or pork, so this really limited my options. I wish you could mix up the vegetarian and meat selections, since I don't always want meat. If you're trying to transition to being a vegetarian, I think signing up for this program would be great! You'd get a whole bunch of new and tasty recipes, so you're not just eating mac and cheese everyday. Yea... that's what I did when I tried to be a vegetarian years ago!

Hello Fresh 7.jpg

Since everything is individually packaged, you can replace or omit any ingredients you don't like. For example, we got a shrimp dish and a beef one that we replaced with chicken and turkey. Also, I HATE onions, so we didn't include them in any of the recipes that called for it.

Portions:

At first glance, my fiancé said the portions seem really small. He's a big dude, and he eats a lot. He said the chicken seemed like enough just for him. However, once we made it he said that it felt like a good portion. I found that it was just enough food for the both of us without any leftovers, which was perfect for me. I'm not a big fan of leftovers!

Hello Fresh 8.jpg

Time: 

I started cooking at 7:30 on the dot, although I preheated the oven while drafting up this blog post. Or at least... I thought I did. I think I turned on a 4 hr timer instead of turning it to 400 degrees. I hate cooking... Anyway, it took about one hour to cook. I did take some occasional notes snd snapped some photos, but most of that time was spent prepping or cooking. I think that an hour to cook isn't the longest time, but I was kinda hoping it would only take about 30 minutes. After 1.5 hours commuting home, I don't really want to cook for an hour too! However, I will say that having everything nicely together and not having to rummage through the cabinets to find things was great, especially since I usually find that I'm missing an ingredient I thought I had. With this, I never have to worry about that!

Hello Fresh 3.jpg

So I'm not sure if this is done on purpose, but some of the items are just enough for you to have, and others have some extra. Like the pistachios, which were not chopped. Maybe this is to give you that whole "look, I'm on a cooking show! vibe, but I found it to be time consuming. I finished chopping the pistachios just in time for the oven to heat up, but by the time I got the chicken in the oven, the quinoa had just finished cooking. Not the greatest timing, since the chicken needed 20 mins to cook. 

Hello Fresh 4.jpg

Look ma, no hands [were harmed while chopping the pistachios].

Pricing:

Depending on which plan you choose, Hello Fresh is $8.74-$9.99 per person, per meal. If the price is too steep, you have the option to switch to a monthly or bi-weekly delivery. At $10/person, I found that the cost was almost the same as ordering in. While it's definitely healthier than ordering in, it still requires me to cook, which I don't really enjoy. My main reason for not ordering in is the cost, so ordering from here doesn't really help that. However, compared to similar services, HelloFresh is a good deal. It's in the median price range and the food is good quality.

Hello Fresh 9.jpg

Final Thoughts- Is HelloFresh worth it?

I think this depends. If you're looking for a huge selection to choose from, are a very picky eater (like me) or trying to stay within a budget, then HelloFresh might not be for you.

If you're trying to start cooking, transitioning to being a vegetarian, and not very picky, then YES! HelloFresh is definitely for you. I also think if you don't have the time or desire to go to the supermarket, but still want to cook, this is definitely a great service. If you're trying to stop ordering in so much but need something to break the habit, I think it's a great start!

Hello Fresh 10.jpg

The long and short of it?

YES- busy professionals, new vegetarians, those learning to cook, non-picky eaters, those trying to explore new recipes

MAYBE NOT- those on a budget, extremely picky eaters, 

Lisa Frank Tie-Dye Waffle Sundae

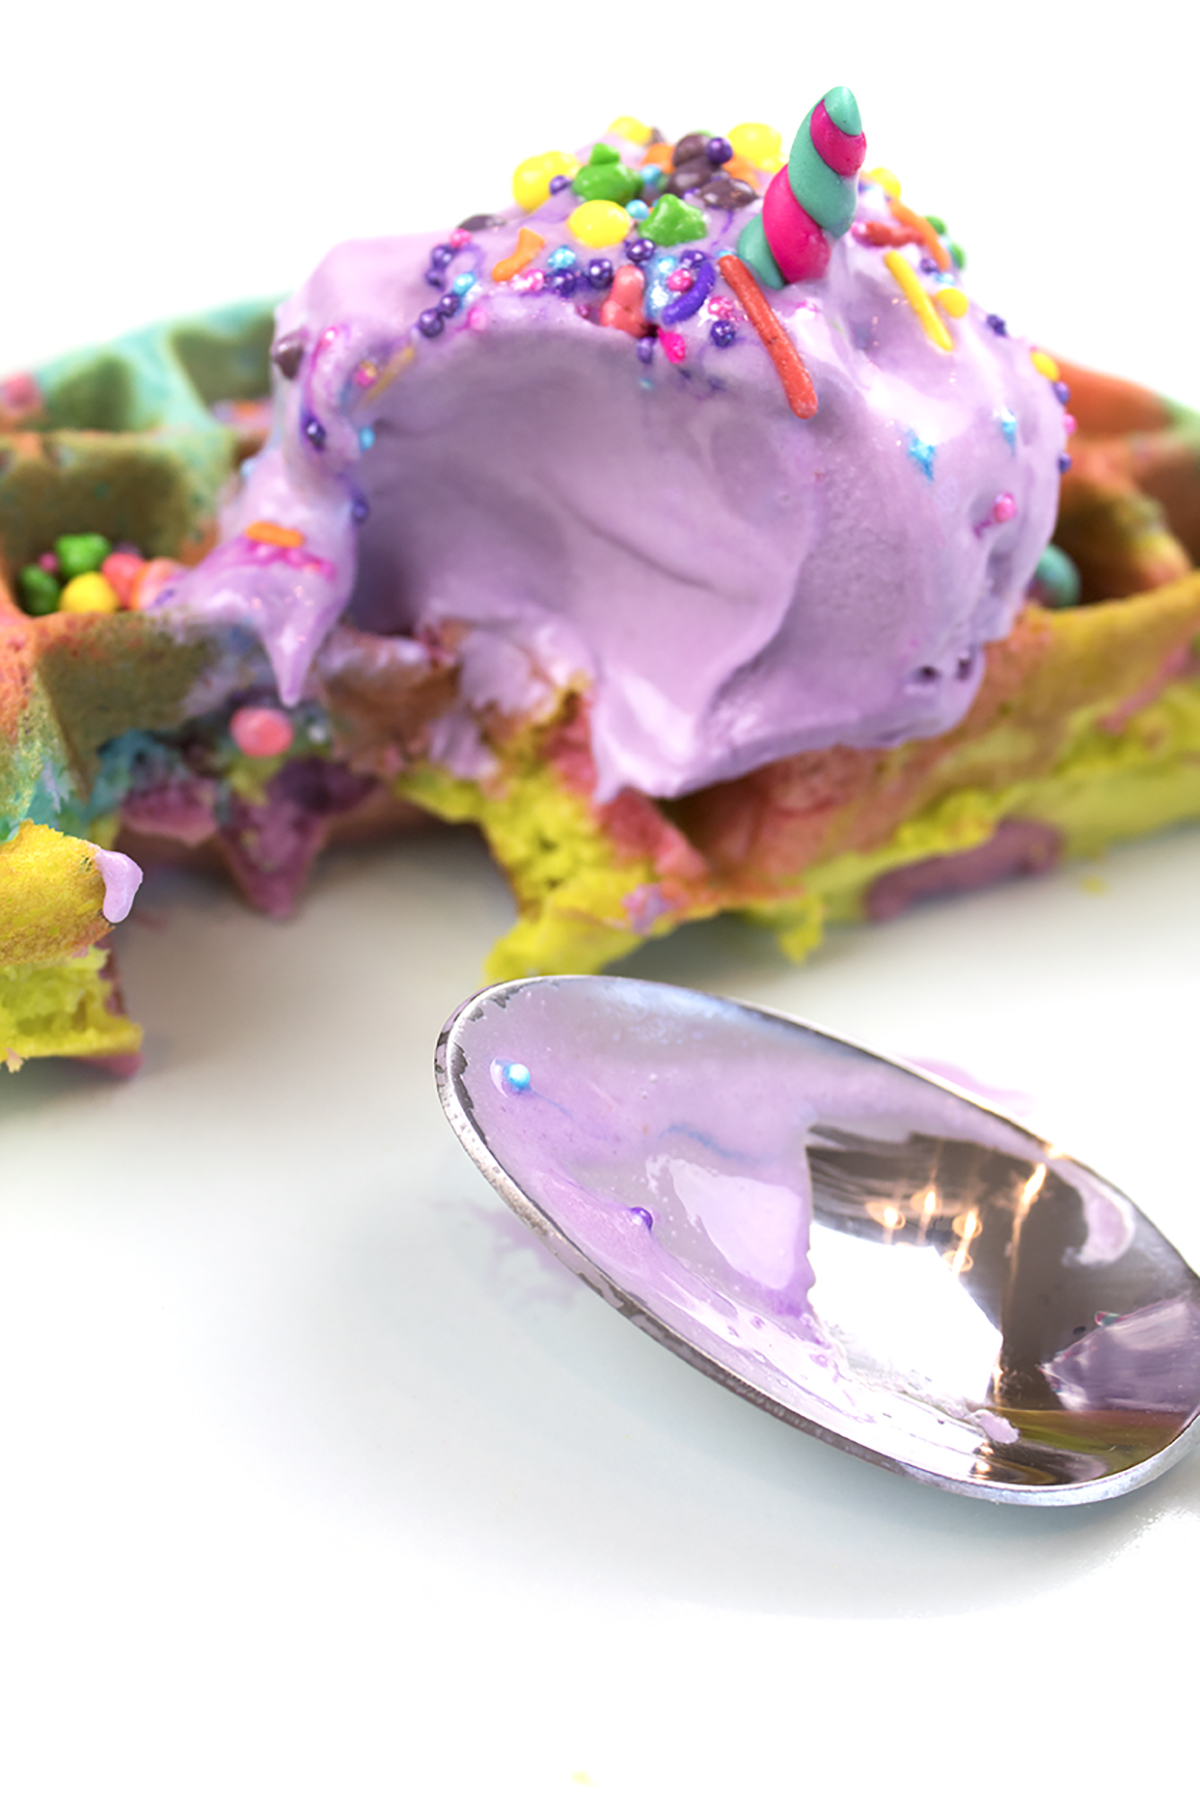
Lisa Frank is making a comeback, and it's everything our cutesy technicolor dreams were made of. I can still remember being a kid/pre-teen and going to Eckerd (remember that store?!) and browsing their back to school section, hunting for the absolute perfect Lisa Frank school supplies.  Folder with two kissing fish? Check. Lisa Frank stickers to cover absolutely everything I own? For sure. Binder with cool teenage aliens? DUH. Lisa Frank was such an important part of my childhood. I loved the creativity and the color of her products. So, when it came time to collaborate with Holly from ClubCrafted on a 90's inspired ice cream post, I just had to do something Lisa Frank! It's got tie-dye, ice cream, sprinkles, unicorns and candy. What more could you ask for?!

You've got to try this recipe for a Lisa Frank Tie-Dye Waffle Sundae! It’s perfect for a 90’s theme slumber party or a fun breakfast for the kiddos! #tiedye #lisafrank #icecreamsundae

You will need:

Waffle Maker (I have this one)
Neon food coloring (here)
4 spoons and bowls (here)
Waffle batter (I used the Classic Waffle Recipe on page 9)
Whisk and Spatula (similar here and here)
Ice cream (I used Friendly's black raspberry)
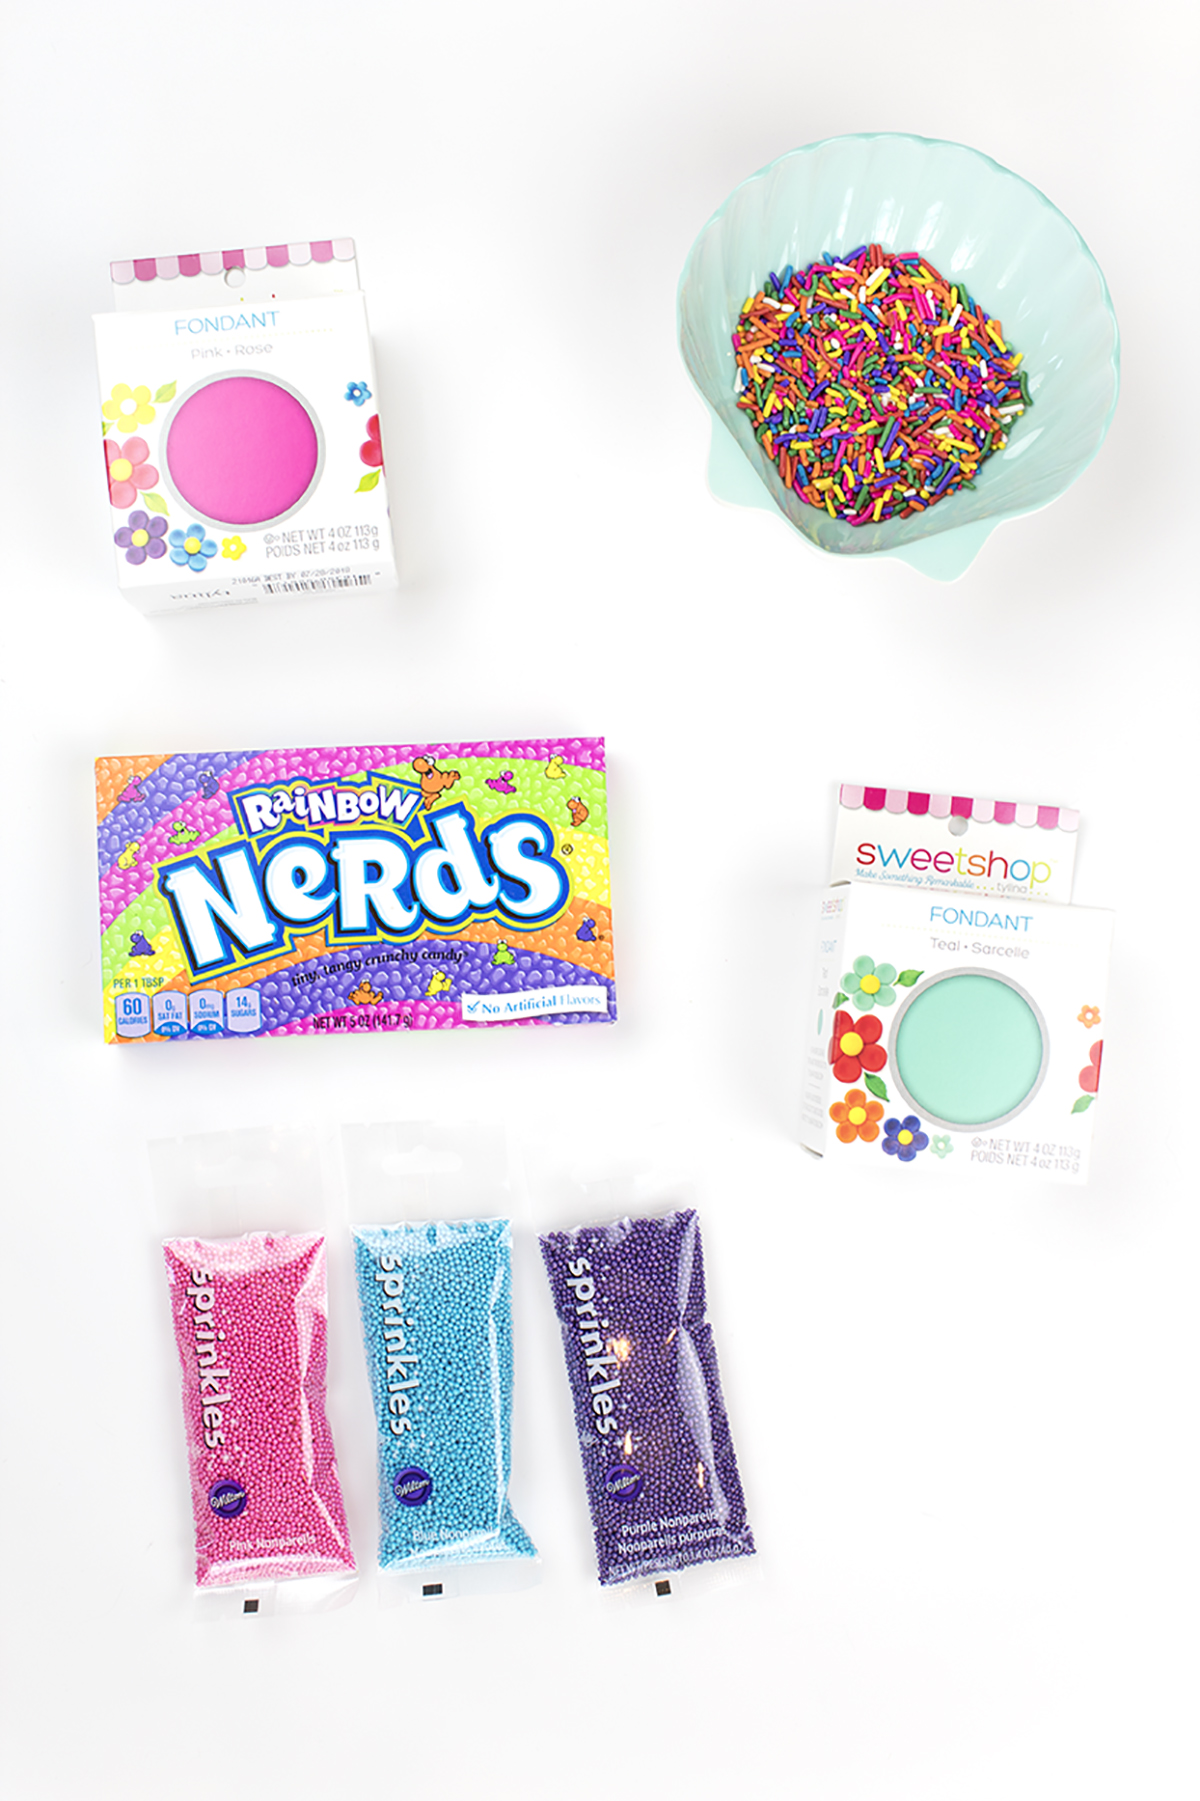
Fondant (I purchased Sweet Shop brand from Michael's)
Sprinkles and toppings

Directions:

How to make a tie-dye waffle:

1. Create your favorite waffle batter. Separate the waffle mix evenly into 4 bowls. Mix in your food coloring until it hits the right shade. I kept mine bright!

You've got to try this recipe for a Lisa Frank Tie-Dye Waffle Sundae!

2. Once your waffle iron has heated up, drop small globs of batter onto your waffle iron. Mix up the order of colors, but work quickly so that you don't burn half the waffle while the other half is raw.

You've got to try this recipe for a Lisa Frank Tie-Dye Waffle Sundae!

Just look at those colors! Seriously gorgeous.

You've got to try this recipe for a Lisa Frank Tie-Dye Waffle Sundae!

Making the fondant unicorn

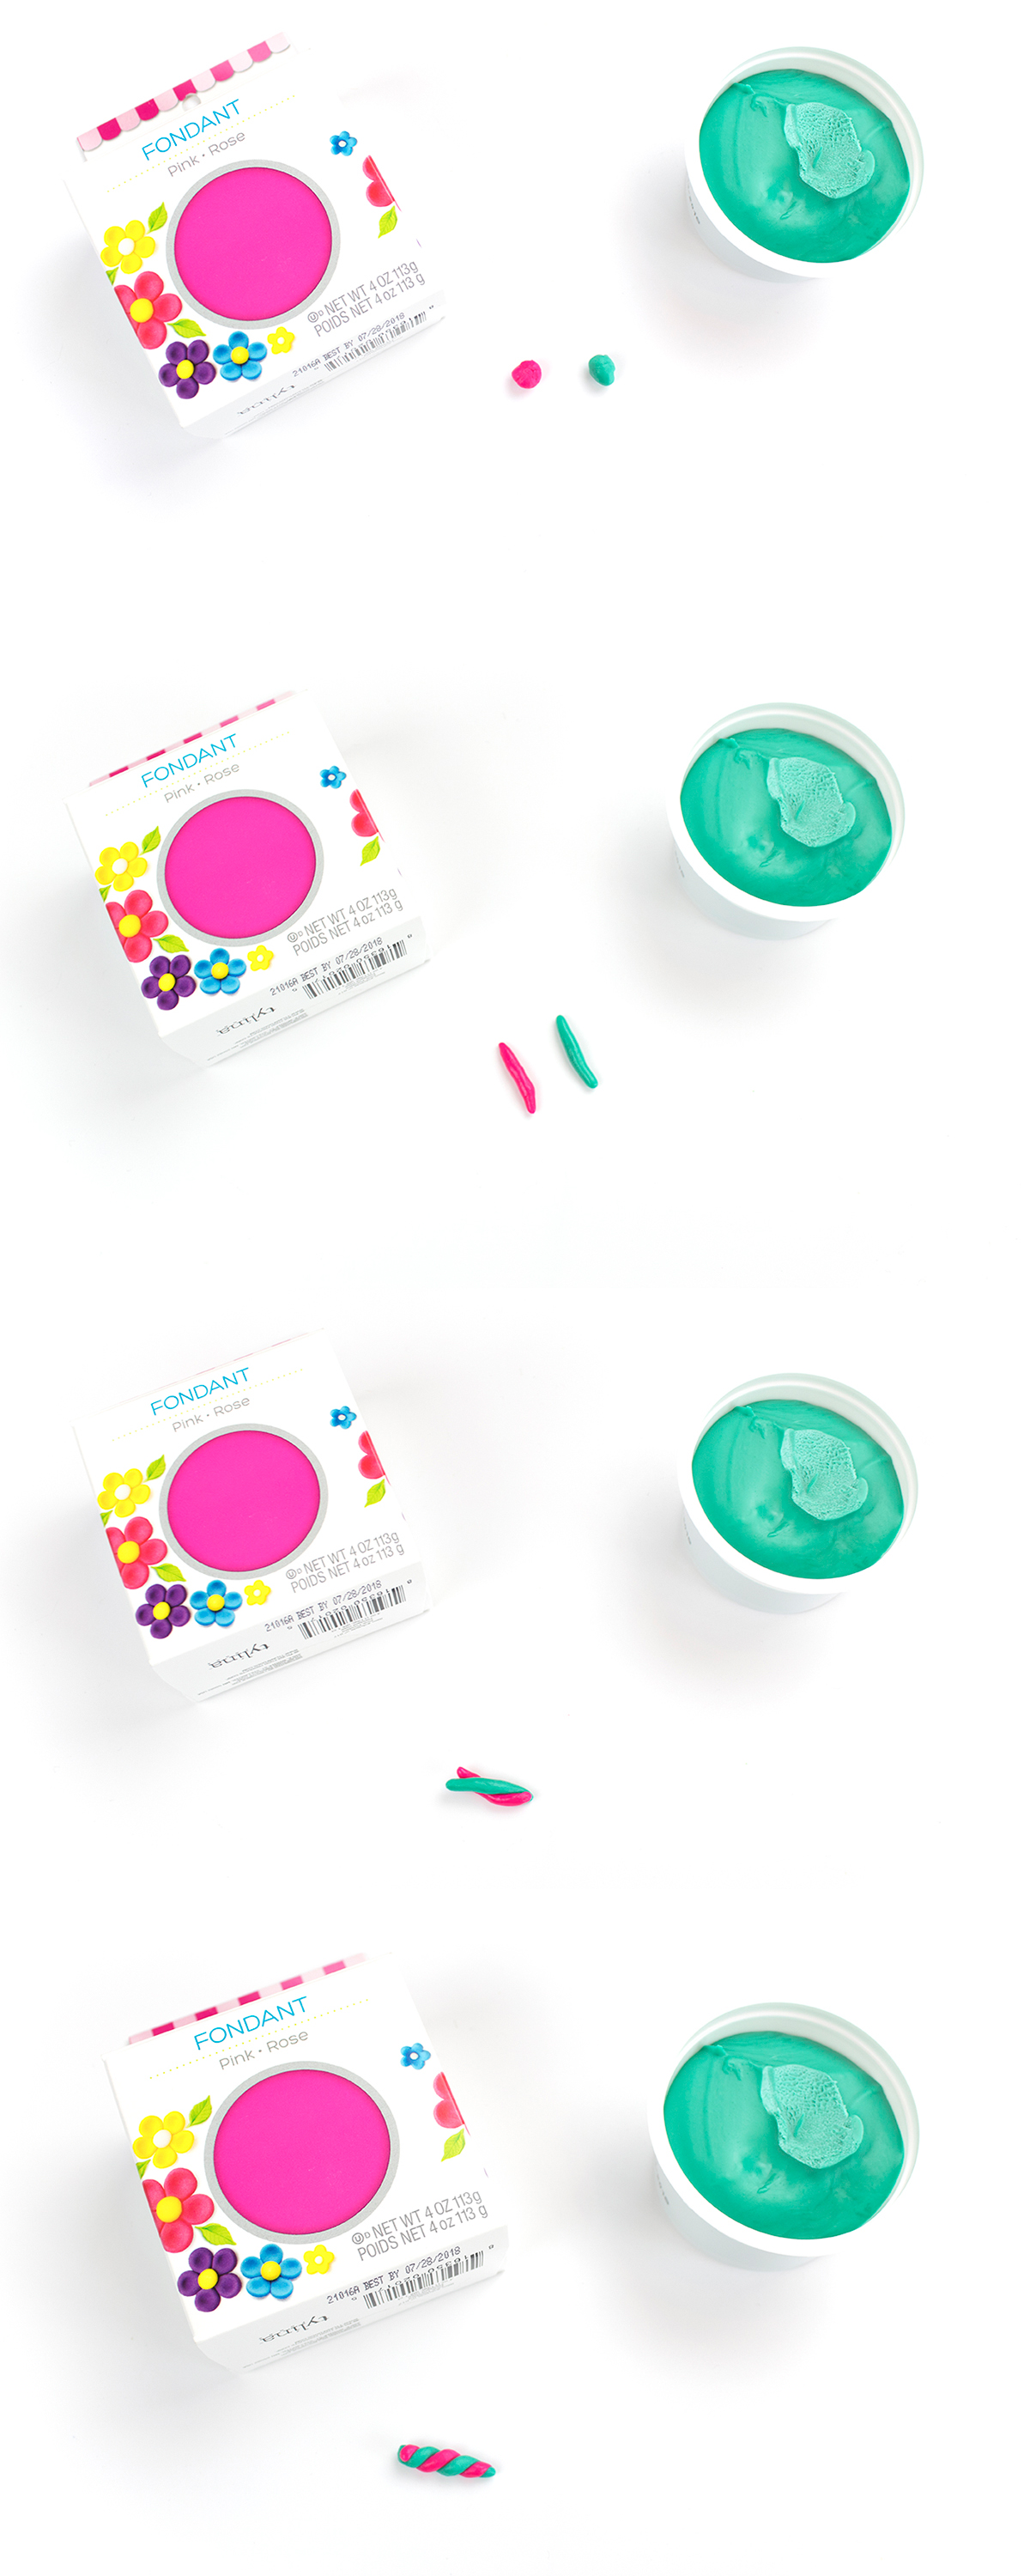
1. Take a small scoop of your fondant in a ball and knead it with your fingers.

You've got to try this recipe for a Lisa Frank Tie-Dye Waffle Sundae!

They look like tasty little Marino's ices, don't they?!

You've got to try this recipe for a Lisa Frank Tie-Dye Waffle Sundae!

2. Pinch off a small piece of fondant. Roll your fondant in a ball, then into a cylinder shape. It helps if the cylinder is tapered, so that one side is slightly thinner. Twist the 2 cylinders together, then flatten the bottom slightly to create your horn.

You've got to try this recipe for a Lisa Frank Tie-Dye Waffle Sundae!

3. For the ears, take your ball of fondant and split it in half. Make it into a triangle shape. Repeat for the other color, creating a sightly smaller triangle. Then, press them together in the center of the larger triangle. Do this carefully, otherwise it totally warps the shape into a circle. They don't need to match perfectly, either!

You've got to try this recipe for a Lisa Frank Tie-Dye Waffle Sundae!

Assembling your sundae:

You've got to try this recipe for a Lisa Frank Tie-Dye Waffle Sundae!

1. Once your waffles have cooled, add a scoop of ice cream on top. (Similar shell bowls here and here)

You've got to try this recipe for a Lisa Frank Tie-Dye Waffle Sundae!

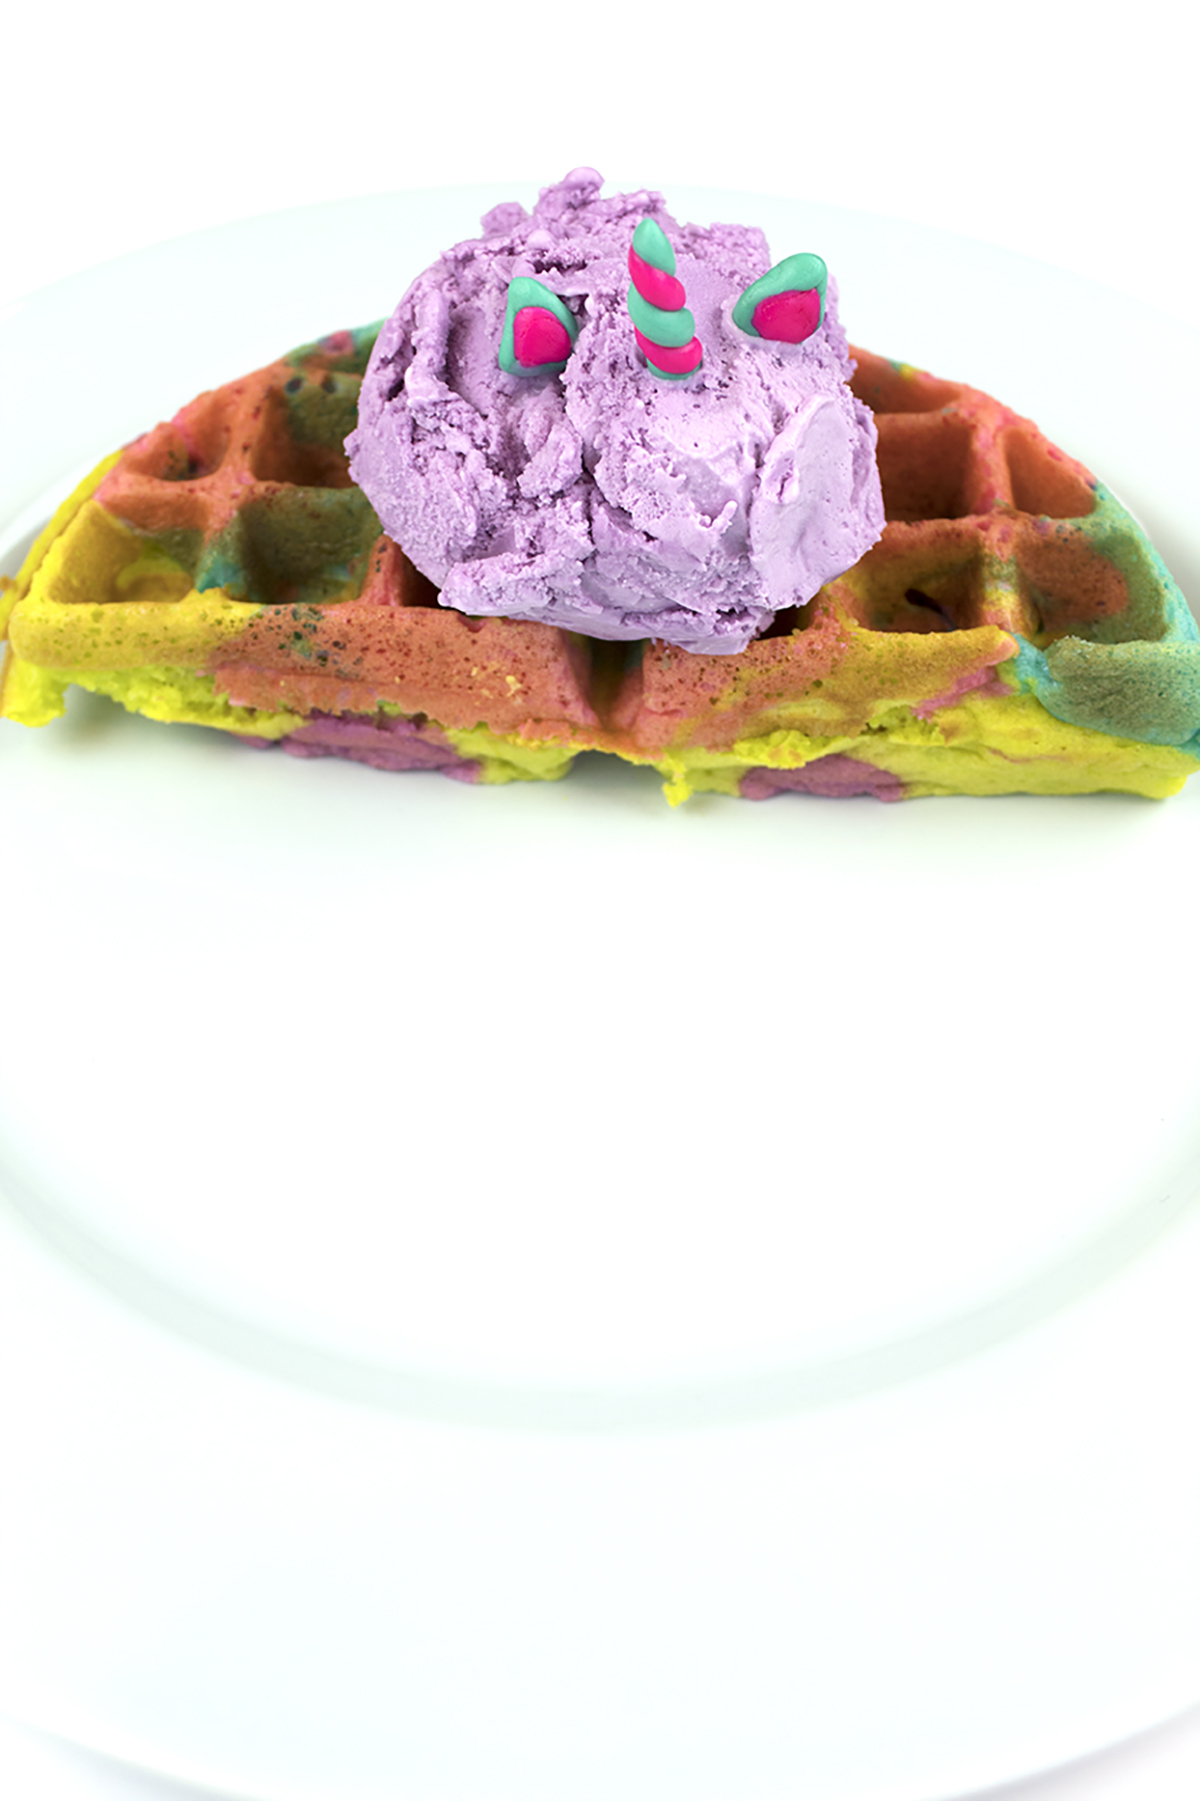
2. Carefully place in your unicorn horn, then the ears.

You've got to try this recipe for a Lisa Frank Tie-Dye Waffle Sundae! It’s perfect for a 90’s theme slumber party or a fun breakfast for the kiddos! #tiedye #lisafrank #icecreamsundae

3. Add your choice of sprinkles and candy to the top. I used regular rainbow sprinkles, nerds, and small dot sprinkles. To make the plate more festive, I poured on the sprinkles. I can never get enough!

You've got to try this recipe for a Lisa Frank Tie-Dye Waffle Sundae! It’s perfect for a 90’s theme slumber party or a fun breakfast for the kiddos! #tiedye #lisafrank #icecreamsundae

YUM. Sprinkles and candy makes everything better. The fondant is actually really easy to use. Kinda like sweet and edible play-doh. Plus, I love that the round sprinkles landed perfectly to make a face on this little guy.

You've got to try this recipe for a Lisa Frank Tie-Dye Waffle Sundae! It’s perfect for a 90’s theme slumber party or a fun breakfast for the kiddos! #tiedye #lisafrank #icecreamsundae
You've got to try this recipe for a Lisa Frank Tie-Dye Waffle Sundae!

Now you can get your Lisa Frank fix and help that sugar craving all in one shot. I loved the Lisa Frank stickers, and still have them. I've hoarded them for like 20 years now! Jeez, that makes me feel OLD. What was your favorite Lisa Frank thing you ever owned? Let me know in the comments!

DIY Cotton Candy Garland

Ok guys, I have a confession to make. I'm a cotton candy addict. I loooove cotton candy. I know I shouldn't love it quite so much- it's pure sugar, and I'm a 27 year old woman. But something about that magical and fluffy cloud of candy tastes so good. Yes, I actually still eat it. Most people just admire it or decorate things with it, but I eat it. The only negative thing about cotton candy (besides the inevitable cavities) is the fact that the colored ones turn your mouth all kinds of colors. Then I get to walk around all day after a sporting event with blue lips, while people stare and my fiancé laughs at me. Oh well, c'est la vie. Luckily for you guys, this cotton candy won't turn your mouth any kinds of colors! Well, unless you try to eat it... I can't speak to that. With only a few steps, this garland is the cutest and easiest way to display your love for cotton candy. 

Zebra Tray 15.jpg

You will need:

Cotton Candy Picks (from Oriental Trading)
Ribbon (Mine was from Michael's on clearance)
Glue gun
Scissors (here)
 

1. Peel the sticks off the cotton candy picks. I recommend starting at the bottom tip of the cone, since it's the most delicate part. 

2. Cut off the tabs on the fluffy part of the cotton candy that keep it open. They're the teardrop shaped parts in the photo above.

3. Glue the honeycomb top open. Hold in place for a few seconds until the glue dries.

4. Once you've glued all your honeycombs open, grab your ribbon. Leave a few inches on the end so that you can hang it up. Then, glue the cotton candy evenly spaced out.

5. Hang it up and enjoy!

cotton candy garland 2.jpg

And there you have it! A quick and simple banner DIY that'll sweeten up any party. It would also make a really sweet addition to a little girl's room, your desk at work, basically anywhere you'd want to declare your love for cotton candy.

cotton candy garland 4.jpg

Do you still eat cotton candy, or do you have a different guilty snack you love? Let me know in the comments below!

Rock Candy Christmas Tree Cake Topper

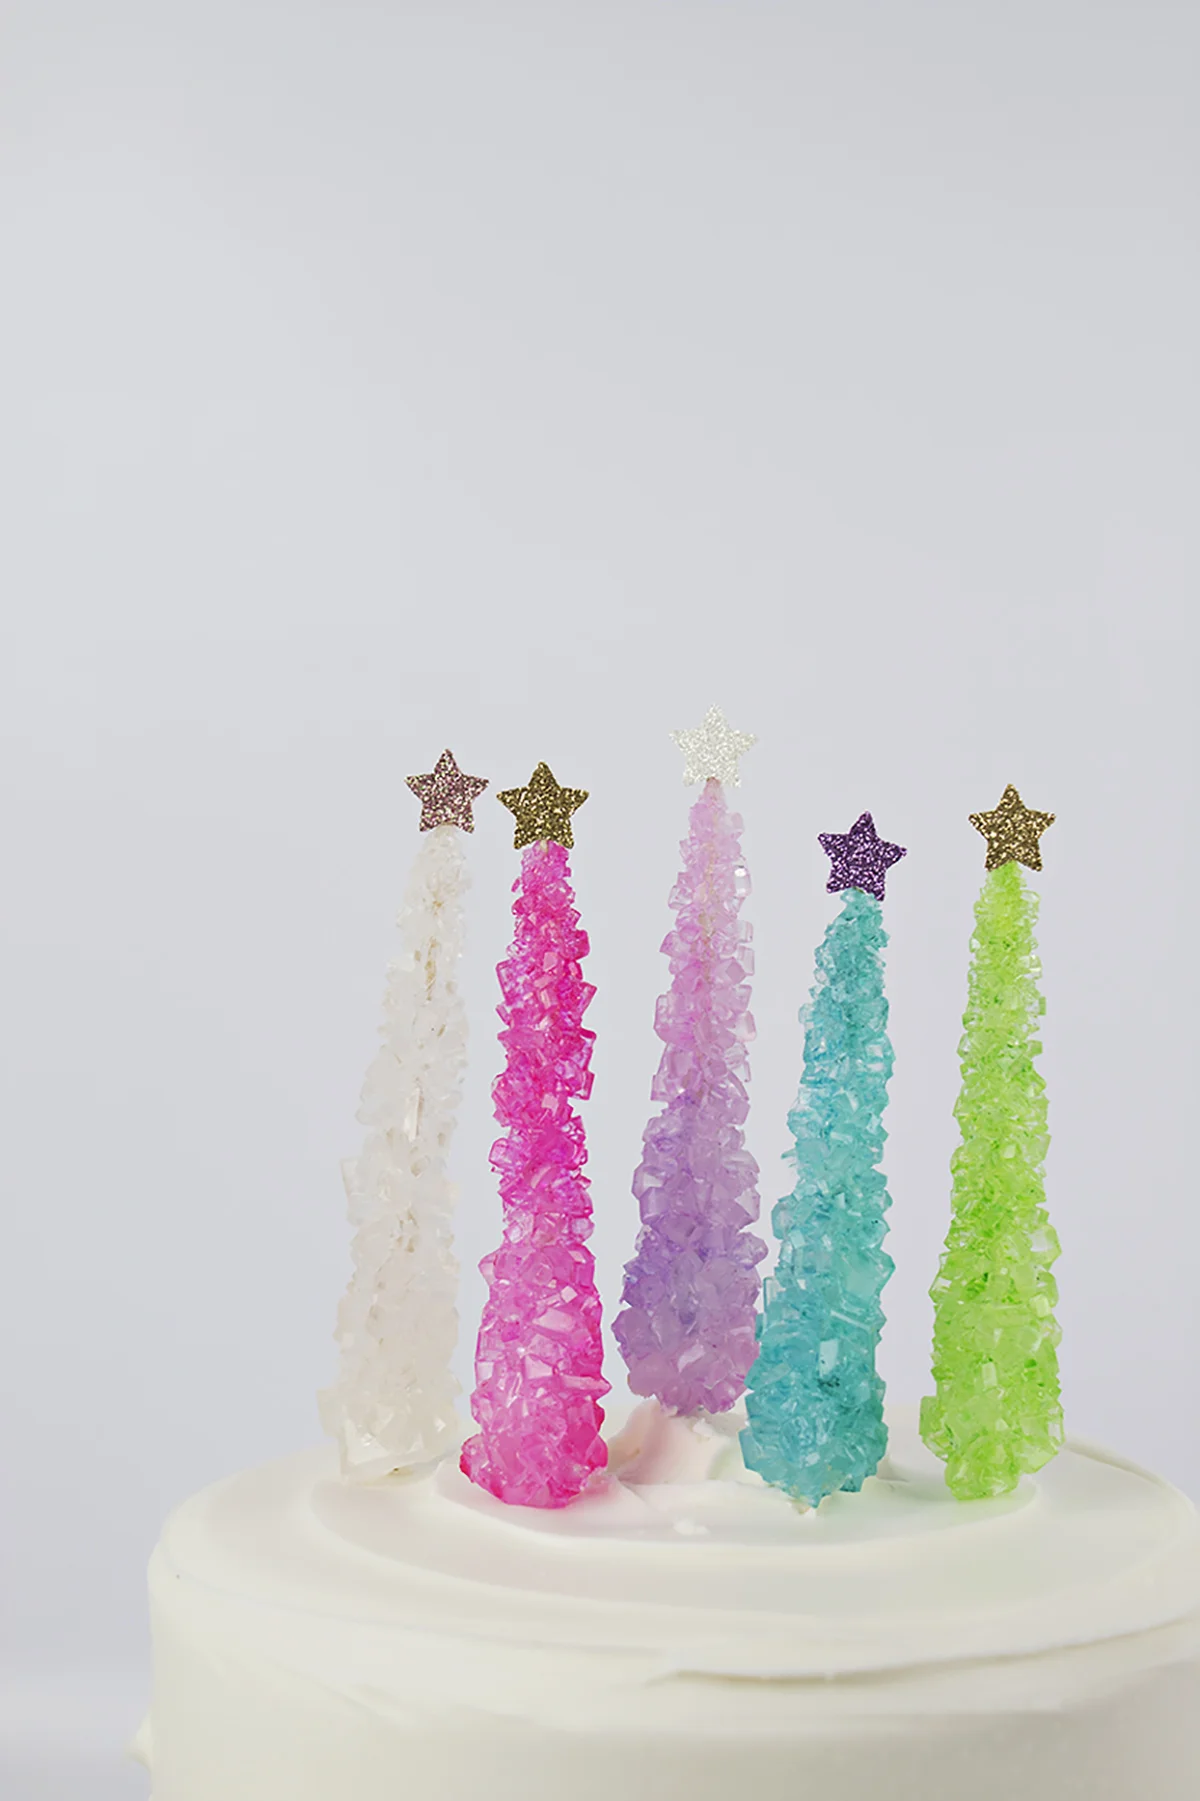
No one knows exactly why rock candy has gotten so popular, but I have some theories. 1, it's gorgeous and it's like glitter candy on a stick. 2, it tastes delicious. 3, it's a classy addition to any cocktail. But really I think its popularity is due to 4, its uncanny resemblance to a Christmas tree. Yes, you read that right. No, I'm not crazy. It's like Christmas in disguise, a tree hiding in the ordinary candy we all love. Subliminal messaging at its finest. And somehow no one noticed. We went around all these years blind to the fact that Christmas was right under our noses, disguised as something as ordinary and unassuming as rocks.

Everyone's favorite party candy has a whole new look. Lucky for you, this tutorial is as gorgeous as it is easy. Click to see the full tutorial for these rock candy Christmas trees.

Full disclosure: this post was supposed to go live around Christmas time, but I wanted to give it the cake it deserved. Since I'm not really ready to give up on Christmas quite yet, and it's pretty darn cold here, I'm posting it now. Let's call this a winter tutorial and suddenly it's right on time ;)

Everyone's favorite party candy has a whole new look. Lucky for you, this tutorial is as gorgeous as it is easy. Click to see the full tutorial for these rock candy Christmas trees.

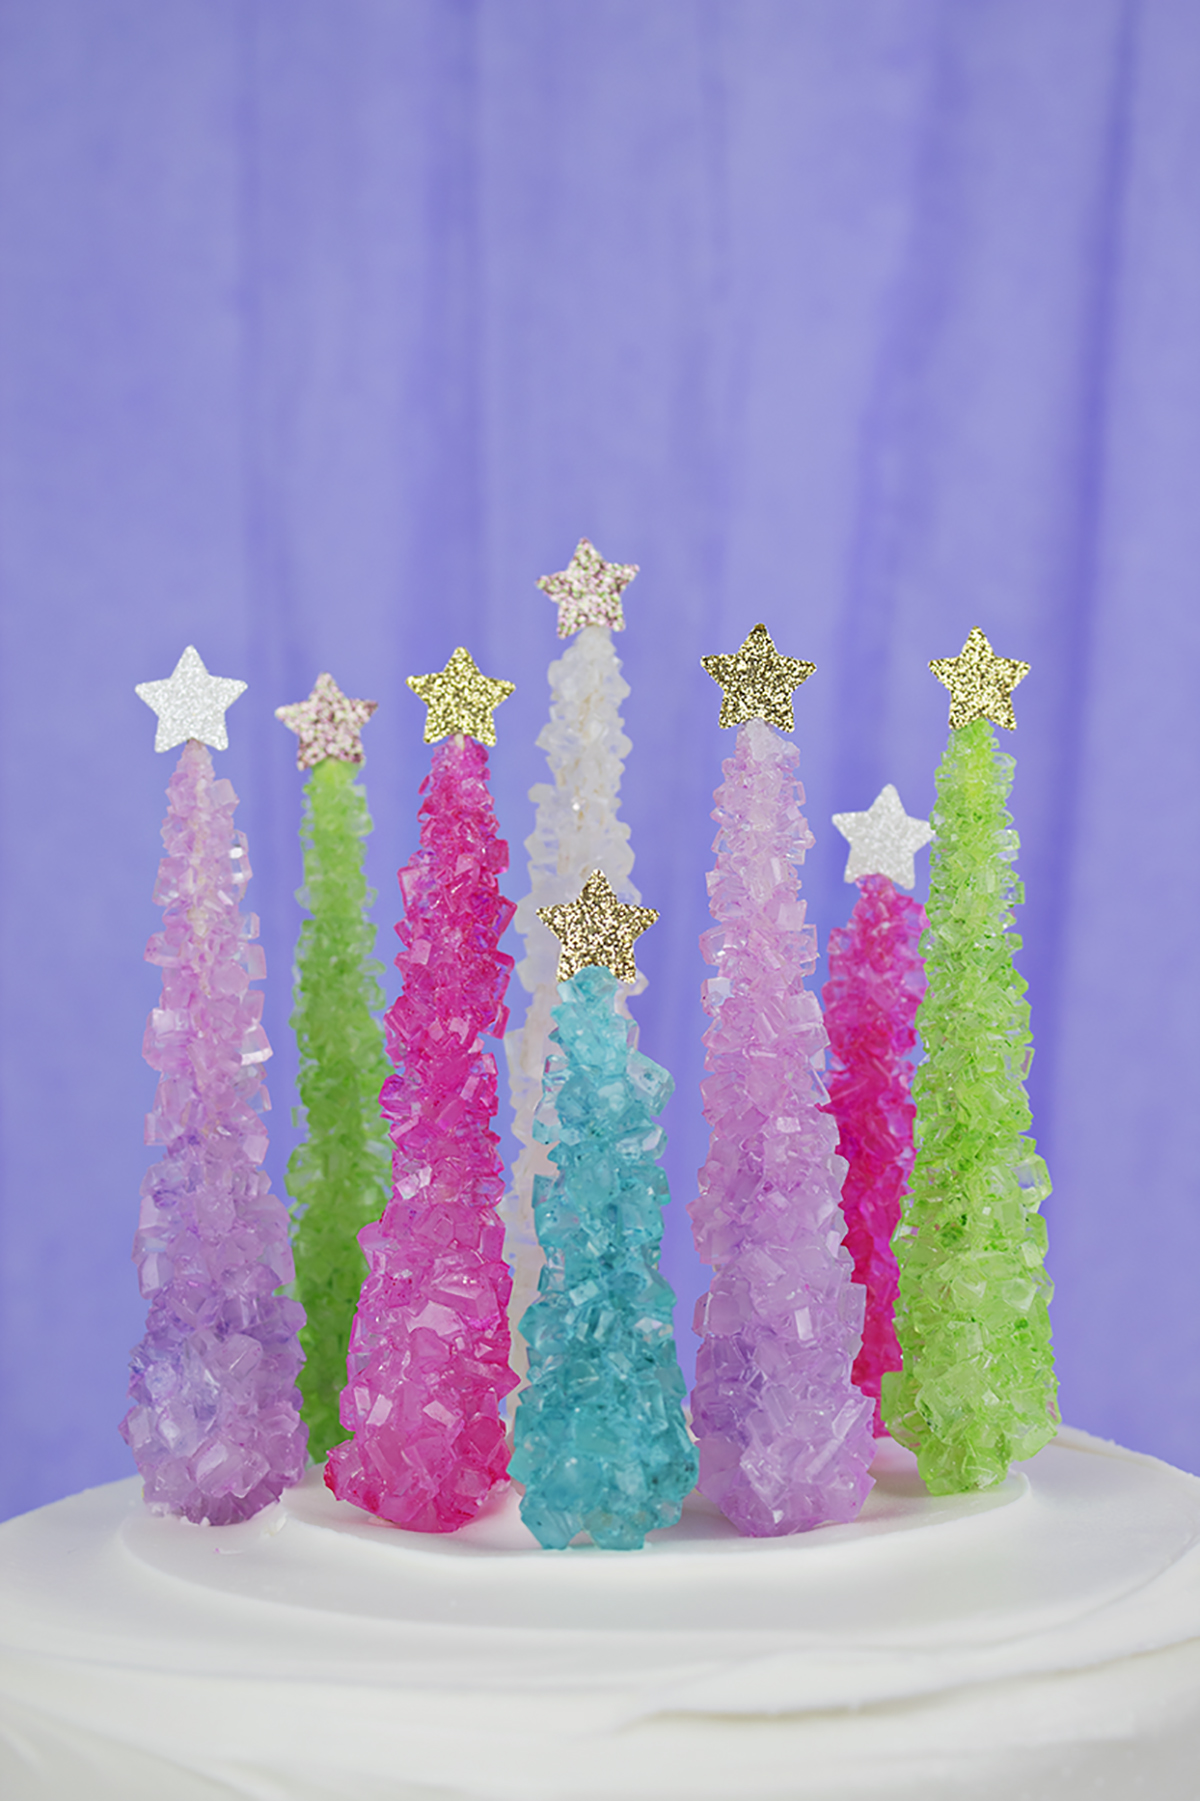
One of the things I like most about this project is that it's like a magical glittering Christmas forest! Plus there are so many color options out there for rock candy, so you can match any decor.

Everyone's favorite party candy has a whole new look. Lucky for you, this tutorial is as gorgeous as it is easy. Click to see the full tutorial for these rock candy Christmas trees.

You will need:

Rock Candy (here)
Toothpicks
Scissors (here)
Glue Gun
Glitter Paper (similar here)
Star Punch (similar here)
Nail File

Directions:

Everyone's favorite party candy has a whole new look. Lucky for you, this tutorial is as gorgeous as it is easy. Click to see the full tutorial for these rock candy Christmas trees.

Using scissors, carefully cut the sticks off your rock candy, leaving about 1/4 inch of wood. I recommend cutting while holding it up off the table and twirling the stick to prevent pieces of candy from breaking off.

Everyone's favorite party candy has a whole new look. Lucky for you, this tutorial is as gorgeous as it is easy. Click to see the full tutorial for these rock candy Christmas trees.

Ta-da! A perfect little tree in the making.

Everyone's favorite party candy has a whole new look. Lucky for you, this tutorial is as gorgeous as it is easy. Click to see the full tutorial for these rock candy Christmas trees.

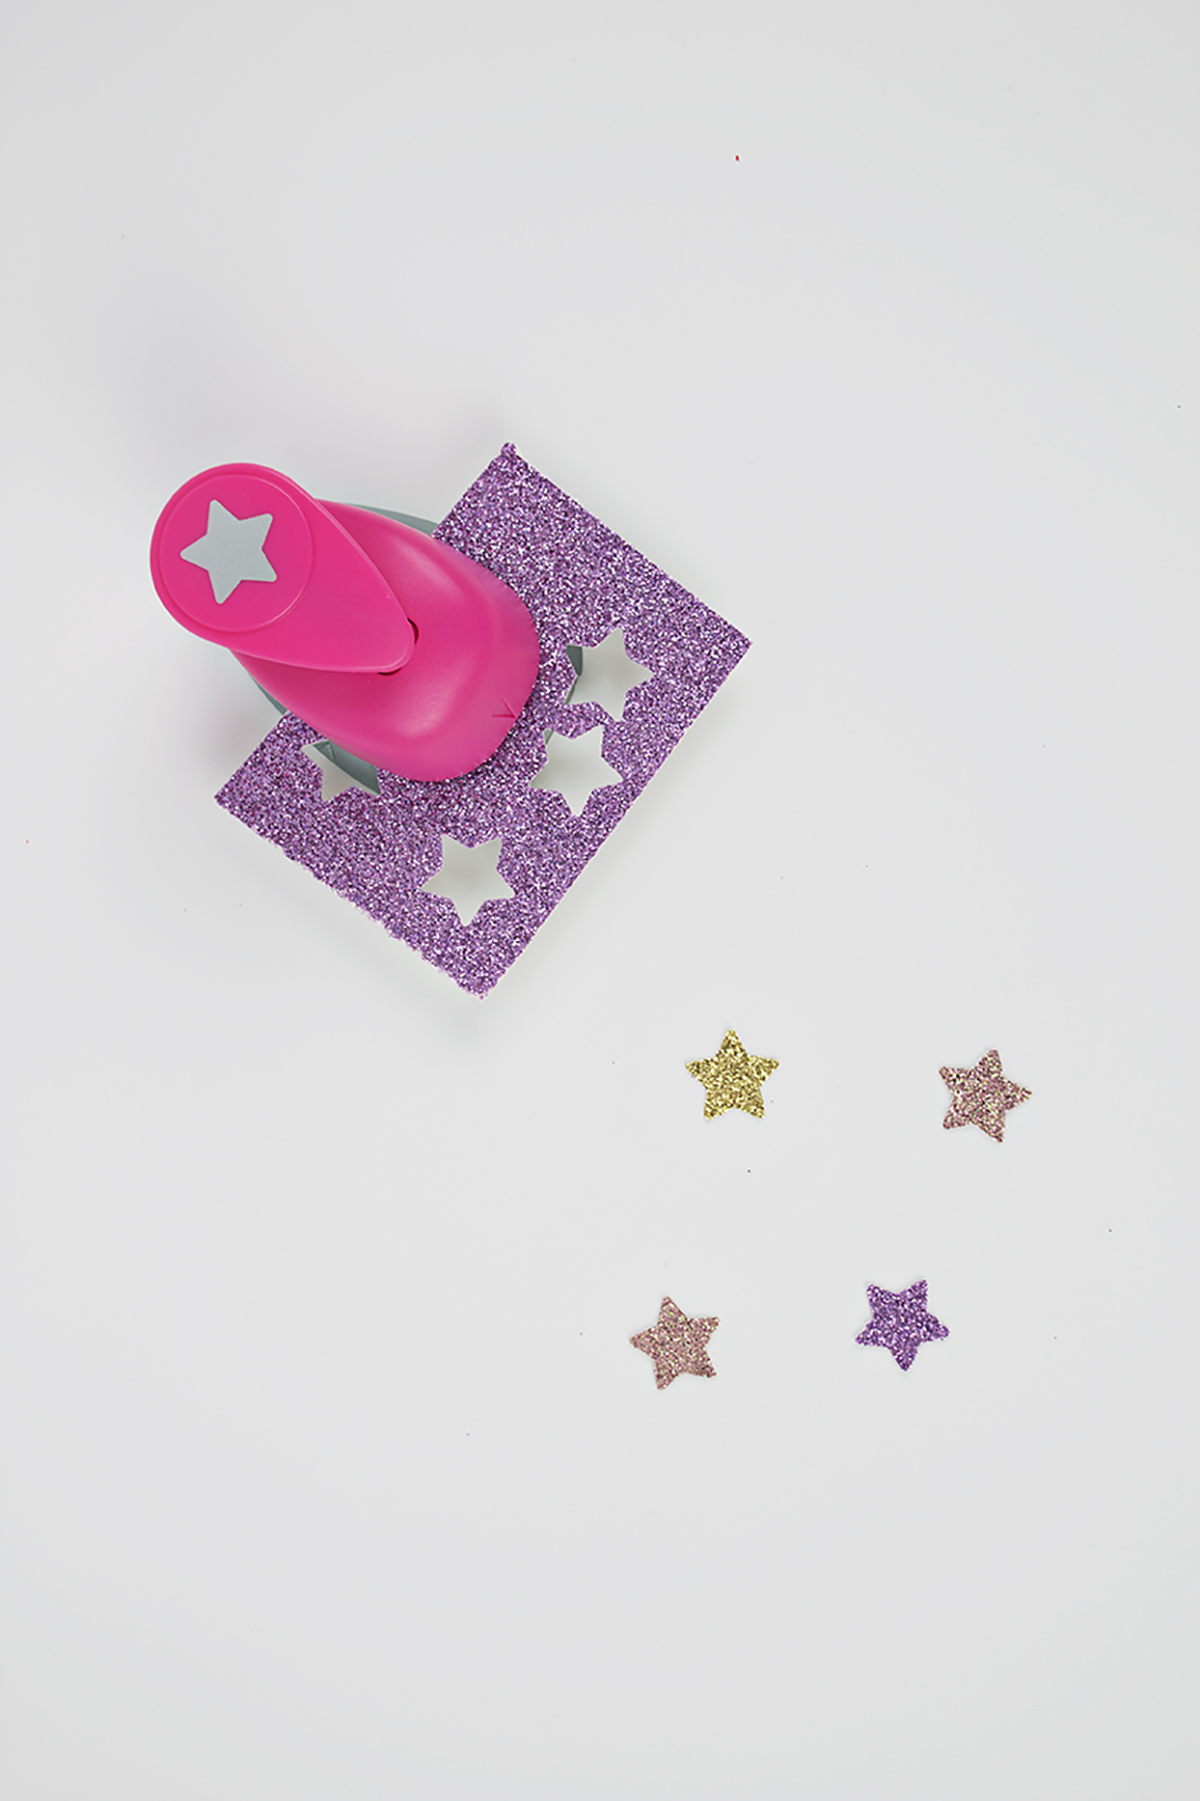
Use the star punch to cut the glitter paper. I picked neutral colors that would enhance the colors of my trees without clashing with them.

Everyone's favorite party candy has a whole new look. Lucky for you, this tutorial is as gorgeous as it is easy. Click to see the full tutorial for these rock candy Christmas trees.

Cut a toothpick in half, then use the nail file to sand the edge smooth.

Everyone's favorite party candy has a whole new look. Lucky for you, this tutorial is as gorgeous as it is easy. Click to see the full tutorial for these rock candy Christmas trees.

Using your glue gun, stick the star and toothpick onto your tree. I recommend gluing the toothpick to a large and covered crevice of the rock candy to create a strong but hidden base. Use varying lengths to keep it interesting.  

Everyone's favorite party candy has a whole new look. Lucky for you, this tutorial is as gorgeous as it is easy. Click to see the full tutorial for these rock candy Christmas trees.

So cute! That white one marches to the beat of its own drum though....

Everyone's favorite party candy has a whole new look. Lucky for you, this tutorial is as gorgeous as it is easy. Click to see the full tutorial for these rock candy Christmas trees.

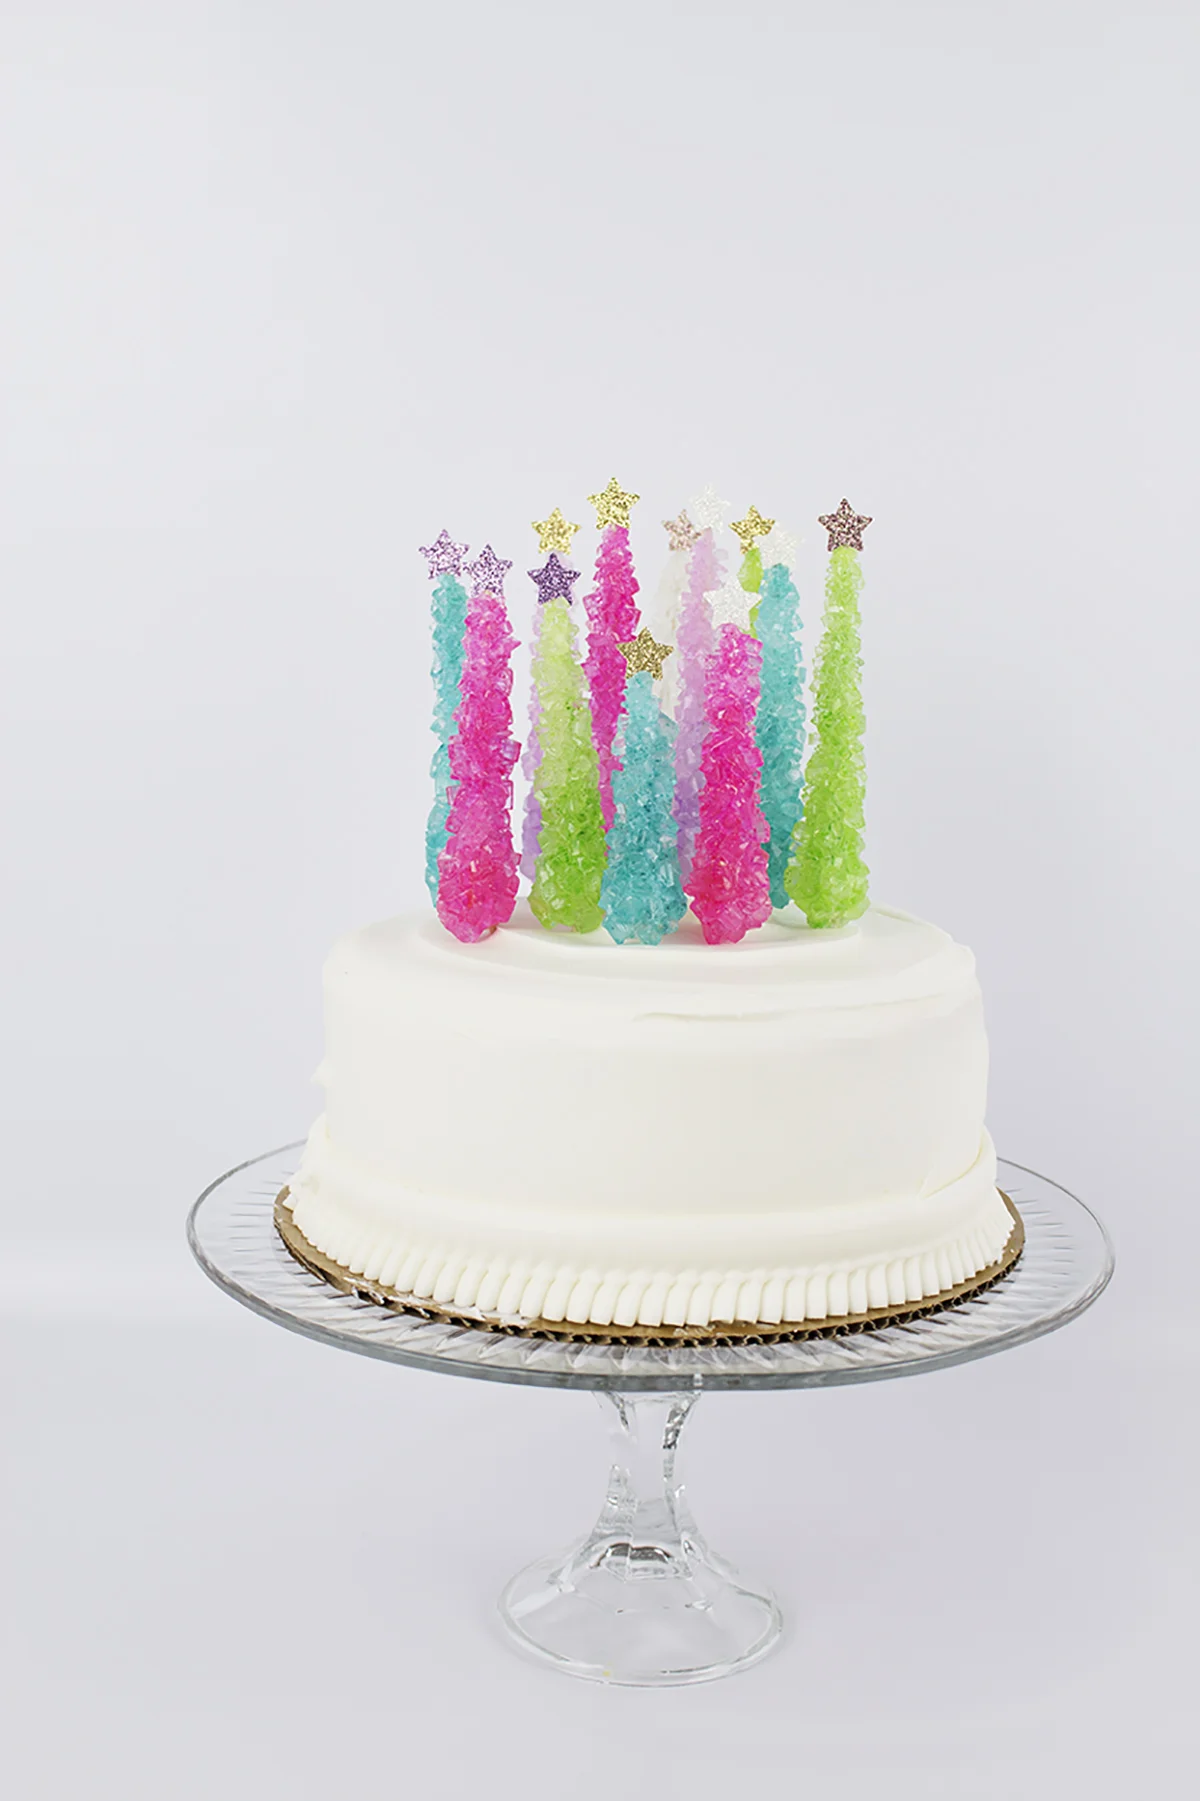
Once they're all done, carefully nestle your rock candy trees into your cake. You can keep it simple with just a few for a pop of color, or create your own little forest.

Everyone's favorite party candy has a whole new look. Lucky for you, this tutorial is as gorgeous as it is easy. Click to see the full tutorial for these rock candy Christmas trees.

These are super cute for a winter birthday party or holiday gathering with friends. They really would fit in well all winter, especially if you put a different shape at the top of the tree. Maybe a heart for Valentine's day?!

And that's all there is to it folks. Once you're done, you can probably still eat the rock candy. Ya know, if you don't mind eating around the glue and paper ;)

I hope you enjoyed Cathy's crazy/amazing idea of the week. If you create your own toppers using this tutorial, I have to see it! Tag me on instagram and your picture might get featured. So what do you think? Do you see trees in your rock candy now? Let me know in the comments below!