Easy Football Party Crafts

Is it football season yet? I only know the fall for pumpkin picking, apple cider everything, and the ability to totally switch up my wardrobe. However, I know there's a whoooole bunch of people that love it for football! My fiancé is one of those people, so once in a while we hang out with the gang and watch a football game. He's a "less is more" type of guy, and I'm a "what else can we add?" type of gal, so I came up with a happy medium. 

Is it football season yet? I whipped up these easy crafts for your next football gathering. They're quick to make, and feature craft supplies you probably have at home. They're perfect for a mini football party! Click for the DIY.

I whipped up these easy crafts for Mariah at Giggles Galore. They're quick to make, and feature craft supplies you probably have at home. They're perfect for a mini football party. This month, I did not one, but TWO blog posts for her! You can find them here and here.

Is it football season yet? I whipped up these easy crafts for your next football gathering. They're quick to make, and feature craft supplies you probably have at home. They're perfect for a mini football party! Click for the DIY.

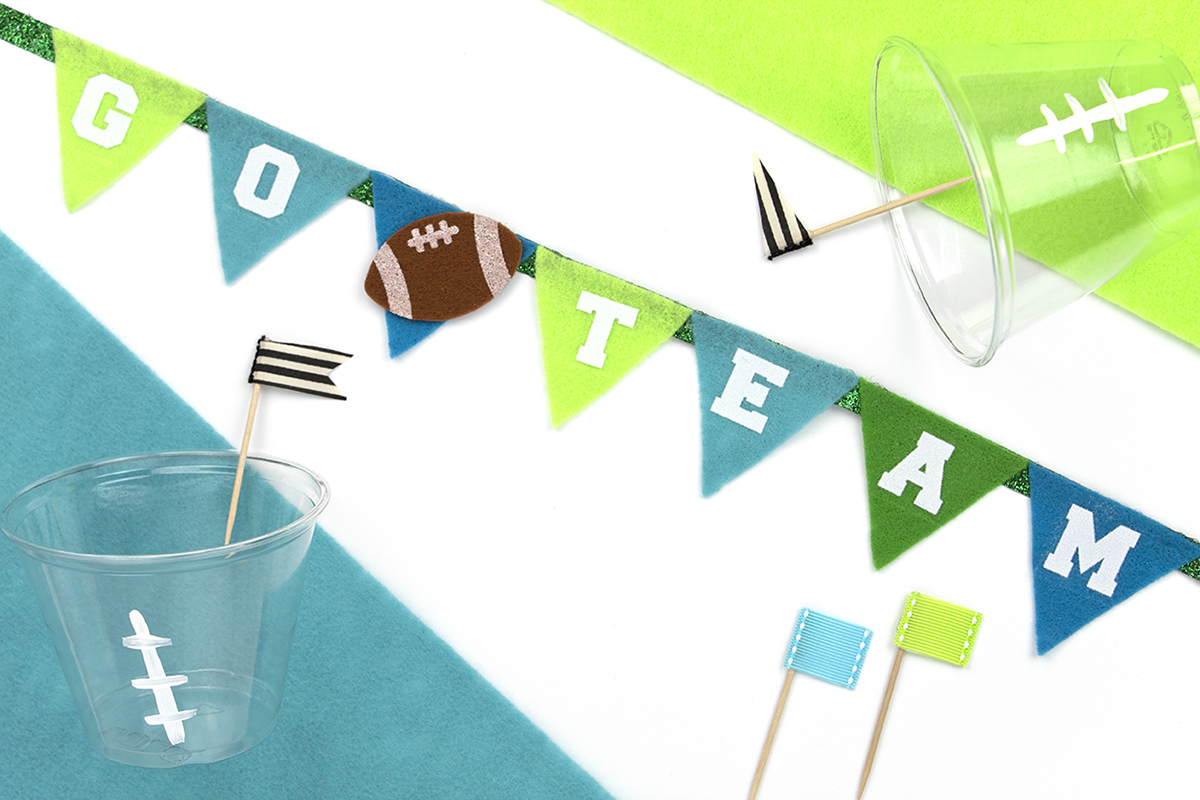
So be sure to head over to Giggles Galore now to see how to make these Easy Football Party Crafts and Football Flag Stirrers and Cups.

DIY Cotton Candy Garland

Ok guys, I have a confession to make. I'm a cotton candy addict. I loooove cotton candy. I know I shouldn't love it quite so much- it's pure sugar, and I'm a 27 year old woman. But something about that magical and fluffy cloud of candy tastes so good. Yes, I actually still eat it. Most people just admire it or decorate things with it, but I eat it. The only negative thing about cotton candy (besides the inevitable cavities) is the fact that the colored ones turn your mouth all kinds of colors. Then I get to walk around all day after a sporting event with blue lips, while people stare and my fiancé laughs at me. Oh well, c'est la vie. Luckily for you guys, this cotton candy won't turn your mouth any kinds of colors! Well, unless you try to eat it... I can't speak to that. With only a few steps, this garland is the cutest and easiest way to display your love for cotton candy. 

Zebra Tray 15.jpg

You will need:

Cotton Candy Picks (from Oriental Trading)
Ribbon (Mine was from Michael's on clearance)
Glue gun
Scissors (here)
 

1. Peel the sticks off the cotton candy picks. I recommend starting at the bottom tip of the cone, since it's the most delicate part. 

2. Cut off the tabs on the fluffy part of the cotton candy that keep it open. They're the teardrop shaped parts in the photo above.

3. Glue the honeycomb top open. Hold in place for a few seconds until the glue dries.

4. Once you've glued all your honeycombs open, grab your ribbon. Leave a few inches on the end so that you can hang it up. Then, glue the cotton candy evenly spaced out.

5. Hang it up and enjoy!

cotton candy garland 2.jpg

And there you have it! A quick and simple banner DIY that'll sweeten up any party. It would also make a really sweet addition to a little girl's room, your desk at work, basically anywhere you'd want to declare your love for cotton candy.

cotton candy garland 4.jpg

Do you still eat cotton candy, or do you have a different guilty snack you love? Let me know in the comments below!

Easy Pineapple Garland DIY

A few weeks ago, I did a Michael's party supplies haul and I picked up some awesome tropical party supplies! Did you see those decorative straw balls and wonder what they can be used for? Well, wonder no more! I've created a super cute and super easy tutorial for a pineapple garland made from those kooky straw balls you see everywhere. The best part? This is a super easy and super affordable project that anyone can do! 

*Contains affiliate links

The perfect summer craft idea for a BBQ, end of summer party, or backyard decor! This easy garland only needs a few supplies and can even be strung up in your dorm room! #pineapplecrafts #summercrafts #garland
DIY Pineapple Garland- Cute and Easy!

 For this project, you will need:

Spray paint (here)
Green felt (here)
Faux Suede cord (here)
Straw balls (similar here)
Tweezers
Scissors (here)
Glue gun 

DIY Pineapple Garland- Cute and Easy! | WellKeptChaos

Step 1: Spray paint the balls yellow. You can also use paint but it's harder to get the inside of the balls

DIY Pineapple Garland- Cute and Easy! | WellKeptChaos

Step 2: Cut pineapple toppers out of the green felt. To do this, I cut a long rectangle out of the felt, then cut 2 triangles out the middle. Finally, I angled the sides so that it was long and narrow. This helps you have enough surface area to glue it down. 

DIY Pineapple Garland- Cute and Easy! | WellKeptChaos
Try this super cute and super easy tutorial for a pineapple garland made from those kooky straw balls you see everywhere. The best part? This is a super easy and super affordable project that anyone can do! Click for the full how-to.

Step 3: Find the front of the ball by picking the part that looks most oval. Be sure there is a good spot to glue the topper on. 

DIY Pineapple Garland- Cute and Easy! | WellKeptChaos

Step 4: Put a thin line of glue on the ball and place the topper on. Hold a few seconds until it dries. 

DIY Pineapple Garland- Cute and Easy! | WellKeptChaos

Step 5: Thread the faux suede through the ball in the area near the topper. Use tweezers to carefully pull the end through the holes. 

DIY Pineapple Garland- Cute and Easy! | WellKeptChaos

Step 6: Hang up and enjoy!

DIY Pineapple Garland- Cute and Easy! | WellKeptChaos

This is a super cute and easy DIY project that's perfect for summer. I think this project would also be adorable if you made the pineapples in all kinds of colors too! 

DIY Pineapple Garland- Cute and Easy! | WellKeptChaos

Dying to make more garlands? Check out my Pinterest board

Nautical Notecard Birthday Banner Tutorial

This weekend, I went into Michaels on a mission to find some cute party supplies and projects. When I saw these ADORABLE note cards in their dollar section, I couldn't resist getting them! They're part nautical, part 4th of July, and 100% perfect for summer. I made them into a birthday banner that can also double for Independence Day, and can be kept up all summer long. This is a quick and easy DIY you can make in just minutes, for only $6! Any note cards can be used for this tutorial, but I think you should run on over to Michael's and grab a set of these before they run out!

*Contains affiliate links

Part nautical, part 4th of July, and 100% perfect for summer, this quick and easy DIY can be made in just minutes! Click to find out how we crafted this banner with just $6 and some note cards.

How cute are these cards on their own as well?! Each pack comes with 5 cards of the same design, so even after you've made your banner, you can send some fun notes to your friends or use them as invitations. And the best part? Each pack is only $1.50!

And now, onto the directions!

Part nautical, part 4th of July, and 100% perfect for summer, this quick and easy DIY can be made in just minutes! Click to find out how we crafted this banner with just $6 and some note cards.

For this project, you'll need:
Notecards (similar here)
Paper Cutter (similar here)
Scissors (here)
Ribbon or Twine (here)
3-Hole Punch (here)
Shaped Paper Punches (similar here)
Tape

Part nautical, part 4th of July, and 100% perfect for summer, this quick and easy DIY can be made in just minutes! Click to find out how we crafted this banner with just $6 and some note cards.

Step 1: Unfold your note card and cut off the back, making sure to cut before the fold to create a nice smooth surface. I prefer to use a paper cutter for this instead of scissors to ensure a straight line.

Part nautical, part 4th of July, and 100% perfect for summer, this quick and easy DIY can be made in just minutes! Click to find out how we crafted this banner with just $6 and some note cards.

Step 2: Take the back of the card and cut off the excess paper around the drawing, making sure to leave enough of a border to create an even circle.

Part nautical, part 4th of July, and 100% perfect for summer, this quick and easy DIY can be made in just minutes! Click to find out how we crafted this banner with just $6 and some note cards.

Step 3: Using your round paper punch, center the drawing and cut it out. I used a 2-inch circle punch for this.

Part nautical, part 4th of July, and 100% perfect for summer, this quick and easy DIY can be made in just minutes! Click to find out how we crafted this banner with just $6 and some note cards.

Step 4: Using a handheld hole punch, make a small hole at the top of your circular drawings. If you don't have a handheld one, use your 3-hole punch. Just be sure to remove the hole "catcher" if yours has one so that you can flip it over to center the hole.

Part nautical, part 4th of July, and 100% perfect for summer, this quick and easy DIY can be made in just minutes! Click to find out how we crafted this banner with just $6 and some note cards.

Step 5: Let's get back to the front of the card. Using your 3-hole punch, line up the card to make two even holes. Repeat for all the cards.

Part nautical, part 4th of July, and 100% perfect for summer, this quick and easy DIY can be made in just minutes! Click to find out how we crafted this banner with just $6 and some note cards.

Step 6: Weave the notecards onto the ribbon, passing the string through the back to create a clean design in the front. Alternate between the circular drawings and the notecards in an appealing pattern.

Part nautical, part 4th of July, and 100% perfect for summer, this quick and easy DIY can be made in just minutes! Click to find out how we crafted this banner with just $6 and some note cards.

BONUS: If you want to get even more fun out of your cards, punch some small circles and stars out of the back of the cards and tape them onto twine for a playful garland!

Part nautical, part 4th of July, and 100% perfect for summer, this quick and easy DIY can be made in just minutes! Click to find out how we crafted this banner with just $6 and some note cards.

And that, mateys, is how you make an awesome nautical birthday banner for only $6!

Part nautical, part 4th of July, and 100% perfect for summer, this quick and easy DIY can be made in just minutes! Click to find out how we crafted this banner with just $6 and some note cards.

Hung up on the need for more banner tutorials? Be sure to check out my Garlands and Banners board on Pinterest!

How do you plan to use your banner? Tag me in your Instagram photos!