DIY & Affordable Photo Backdrops

Today I want to talk about something a little different- photography backdrops! As you know, good photography is very important (especially here at Party HarDIY!) and sometimes you need to be creative about your photo backdrops. I had written a blog post about my favorite photography items a few months ago, so I wanted to follow up with some other backdrop options that you can try! These backdrops come in a variety of prices from all sorts of places. I hope it helps you to think about your photos in a new way!

*This post contains affiliate links

DIY & Affordable Photo Backdrops. Sometimes you need to be creative about your photo backdrops. These backdrops come in a variety of prices from all sorts of places. I hope it helps you to think about your photos in a new way! #backdrops #photob…

Paper Backdrops

DIY & Affordable Photo Backdrops

DIY Polly Pocket Iron-On Tee with Backdrop Paper in No. 37 Tulip

Backdrop Paper 
Probably the easiest to use, this backdrop paper is meant for photography! It's got a wide variety of colors and it's matte, so you don't need to worry about weird reflections in your photos. Also, it comes on super wide rolls, so you can have a seamless backdrop without having to photoshop out weird edges or seams. I even used it to make my wall look pink once! It can be a bit pricey but if you're careful, you can get maximum usage out of it.

Scrapbook Paper 
Available at any craft store or online, in literally any color or pattern you can think of, scrapbook paper is an affordable way to create a backdrop for small items. You can also layer the paper in interesting ways or angle it, etc.

Colored Cardstock
Colored cardstock is great for photographing small items like jewelry. I made a small hole in mine for the earrings, and I was able to keep the earrings in place while also keeping the look consistent across the different colors of paper and style of earrings. 

DIY & Affordable Photo Backdrops

DIY No Sew Embellished Shirt with wrapping paper backdrop

Wrapping Paper 
A nice mix of the papers above, I think wrapping paper is a great way to add some color or pattern affordably. It does have a slight sheen to it, so it can add a colorful "glow" to your items, but it's cheap enough to get tossed away. I love using it for DIY posts, which can get pretty messy. You can easily gather up the paper and toss it out- barely any cleanup needed!

Easel Paper Roll
Again, this type of paper is great for when you're making a mess! I used it when I was painting my colorful blocks and I wanted to keep the backdrop neutral. It allowed me to paint freely without having a bunch of cleanup after. It's also great for making a clean white backdrop or covering a table with some scratches on it.

Wood & Paint

DIY & Affordable Photo Backdrops

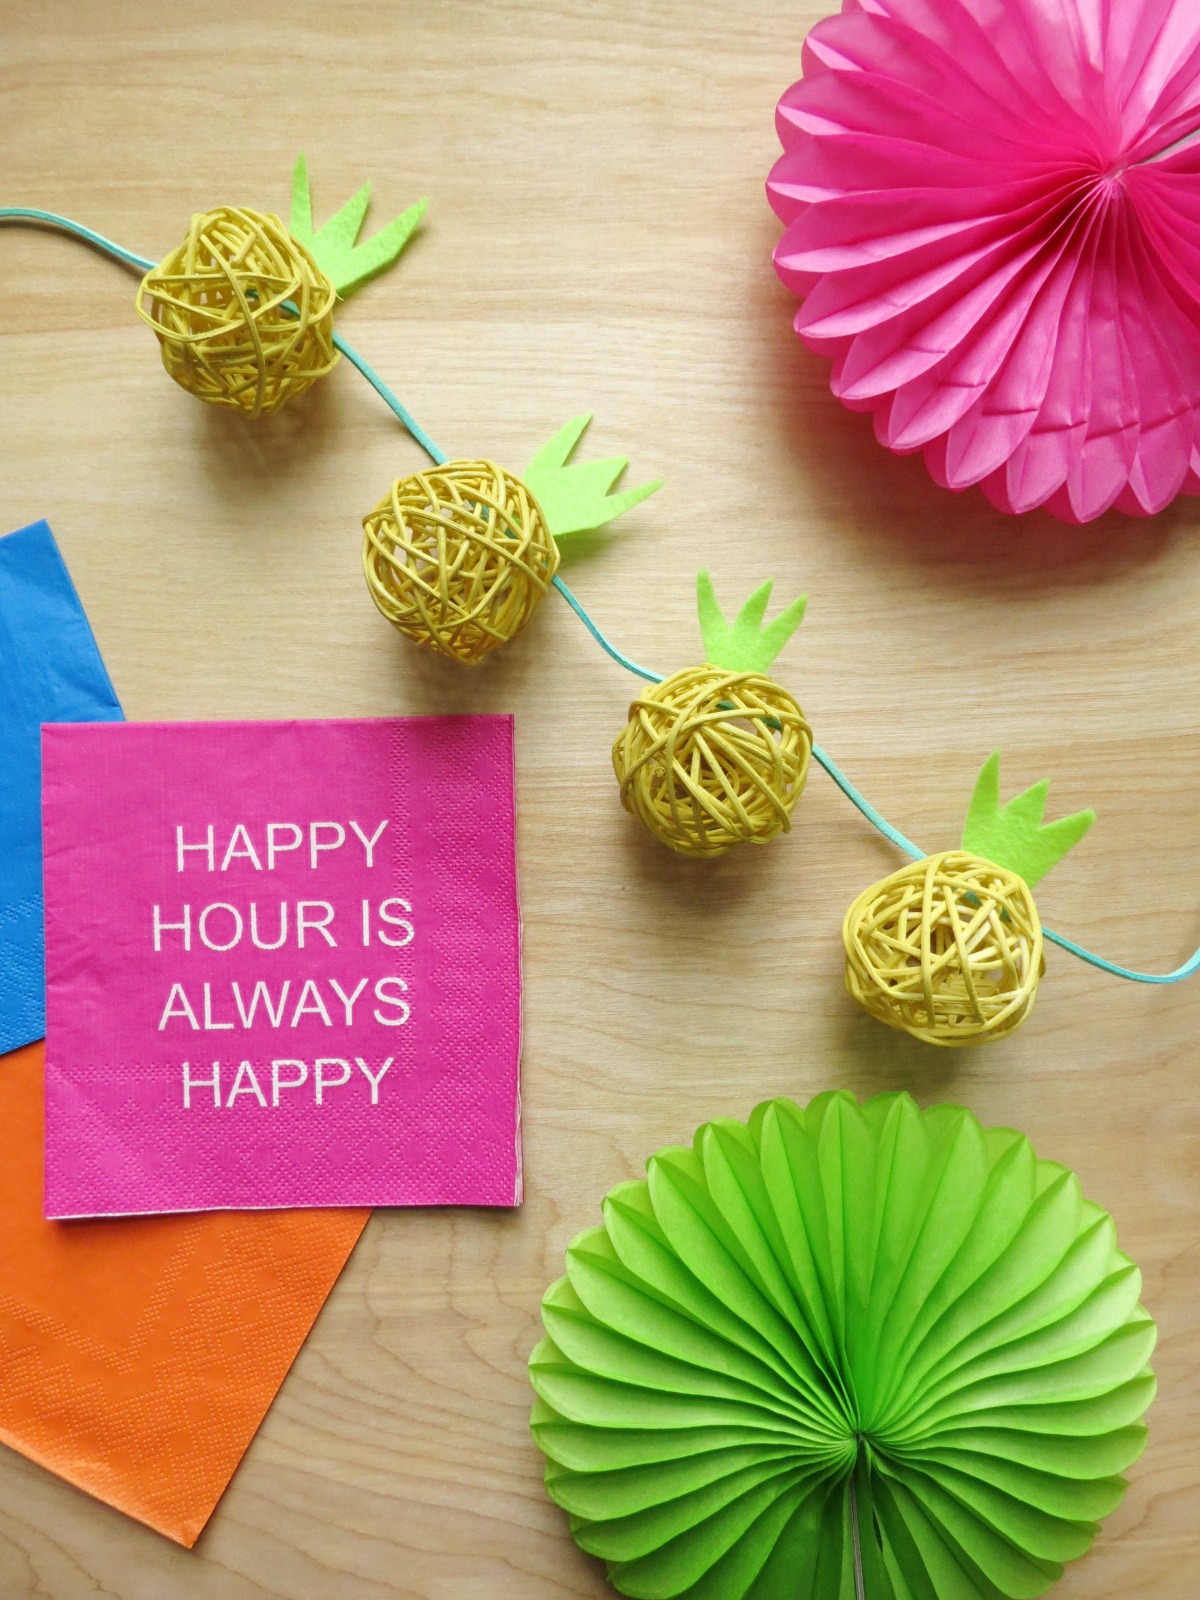
Pineapple Garland DIY with a Wood Backdrop

Painted Abstract Backdrop
If you're looking for something quirky and fun, this painted backdrop is for you! Damask Love used it as a large backdrop for portraits but you could totally make a smaller tabletop version if you wanted! 

Solid Color Photo Backdrops
If durable but simple is more your jam, try this painted wood backdrop! It's really easy to make using plywood panels and house paint samples. 

Stained Wood Backdrop
If you like something a little more rustic, try a stained wood backdrop! This tutorial shows you how to whitewash as well as how to add a colored tint to your wood. 

Colored Wood Paneling
If you like the look of paneling, or if you want it to look like a floor/wall, try this colored paneling DIY. This one is so cute, I think I may just have to make one for myself!
 

Party Backdrops

DIY & Affordable Photo Backdrops

Hey Girl: Ryan Gosling Gender Reveal with Paper Fan Backdrop

Paper Fans
Paper fans are such a cool and easy way to make a statement! I have used them countless times, as both a small photo backdrop or a large scale party table backdrop. I never use the glue it comes with and instead prefer to paper clip them or staple them so that they're reusable! More info on that here.

Balloons
Although they aren't great for the environment, balloons can be such a cool way to make a statement! You can do a balloon arch, make them into letters or numbers... the possibilities are endless! Check out my Balloon Pinterest board for some fun ideas.

Sequin Tablecloths & Runners
If you've got a sequin table runner or tablecloth, they make a PERFECT sparkly backdrop for your pics! You can see how I used it here and here (scroll down).

DIY & Affordable Photo Backdrops

DIY Disco Ball Earrings with Fringe Curtain Backdrop

Fringe Curtains
These are a super cheap and easy way to transform an ordinary wall. They're fairly large and come in all sorts of colors, so they make the perfect backdrop! They're sold everywhere- Amazon, Party City, even the dollar store!

Crepe Paper Streamers
Another dollar store staple, these party streamers make a really cool backdrop! You can mix and match colors, do various shades of the same color, or do all one color to create some depth as a backdrop. You can use them hanging on the wall with a piece of tape, or you can lay them down on a tabletop and place your item on top of them. Works either way!

Misc

DIY & Affordable Photo Backdrops

Mean Girls Conversation Hearts and Fabric Backdrop

Fabric
Although it can be wrinkled sometimes, a piece of fabric is a great way to add a pop of color to your photos. It comes in all sorts of colors, patterns adn textures, plus everyone has it lying around their house somewhere. For one post, I even used the fabric from my ironing board as a backdrop! You can also grab a curtain, a blanket or a tablecloth too!

Foam Boards
In what is probably the easiest and cheapest backdrop of all, you can grab some foam boards from your local dollar store or Target and use those for a backdrop. They're also great for bouncing light, so be sure to place them around your subject while facing the window (aka... don't block the window light with a foam board!) to maximize the light coming in.

DIY & Affordable Photo Backdrops

Tissue Paper
I think I've only used tissue paper as a backdrop once, but I really liked the look so I have to try it again! Since tissue paper is somewhat sheer, it can give you an interesting look if you layer it over another pattern/paper. Mine had some folds, and it made for a great, lightly textured background. And best of all, it's cheap!

Vinyl Backdrop & Stand
I have my vinyl backdrop and stand permanently set up in my attic studio. Since the walls are sloped up there, it acts as a "fake wall" so that there isn't a giant shadow where the ceiling bends (see before pics here). It's large and wide, and can be even wider if you placed it the other way! I've used it on nearly every  and you can't even tell it's a fake wall most of the time!

DIY & Affordable Photo Backdrops

Cutting Mat
If you're a DIY blogger, chances are you'll be cutting something at some point! If you use a cutting mat, why not incorporate it as the backdrop of a photo? Mine is this really cool, bright pink color and it really adds a pop of color to a photo.

Matte PVC Backdrop
I saved the best for last! This is my most used backdrop, hands down. It's literally the backdrop in nearly every single photo I have. It cleans easily, it's bright white, and it's the perfect size for nearly every flatlay and DIY shoot I do. I purchased the entire collection of them, but I really only use the white one. I've had it for nearly 2 years now and I only had to replace it once because I spilled oil paint on it and it just wouldn't come off. After that, I made sure to use a cover in case things got too messy.

Well, there you have it! Tons of backdrop options for your next photo shoot. If you're looking to improve your photos further, I'm creating a FREE photography e-course to help you do just that! Be sure to sign up and get your workbook by clicking the photo below!

DIY Tooth Fairy Costume

Do you ever have a weird accident that turns into something pretty awesome? Well, I did. I was writing out my schedule for the day, and I wrote how long each task would take. For one task, I wrote 2 plus hours- "2+H". When I read the list back over, I thought I wrote 2th. And that's when I realized 2th=tooth!! This really silly idea came after, and I kinda love how cheesy it is. You can be either a tooth with a crown, or a tooth fairy. The choice is yours!

Do you ever have a weird accident that turns into something pretty awesome? Well, I did. This really silly idea came after, and I kinda love how cheesy it is. You can be either a tooth with a crown, or a tooth fairy. The choice is yours! Click for t…

This costume is the second one in my easy t-shirt costume series. For this one, I went with a tried and trusted t-shirt made for customizing- Gildan! They're the ones you find at craft stores in pretty much any color you want. They're 100% cotton and really comfy. No, this post wasn't sponsored by them. I genuinely think they're awesome! Plus this t-shirt cost like $4. Can't beat that! It's a great last-minute costume for that Halloween party you've got coming up!

Do you ever have a weird accident that turns into something pretty awesome? Well, I did. This really silly idea came after, and I kinda love how cheesy it is. You can be either a tooth with a crown, or a tooth fairy. The choice is yours! Click for t…

You will need:

Do you ever have a weird accident that turns into something pretty awesome? Well, I did. This really silly idea came after, and I kinda love how cheesy it is. You can be either a tooth with a crown, or a tooth fairy. The choice is yours! Click for t…

White T-shirt (Gildan recommended)
Gold paper (you can use glitter paper or metallic, the choice is yours!)
Small piece of felt
Hair clip or headband
Scissors
Ruler
Printer (I have this one and love it)
Tape
Pencil

Directions:

Shirt:

Do you ever have a weird accident that turns into something pretty awesome? Well, I did. This really silly idea came after, and I kinda love how cheesy it is. You can be either a tooth with a crown, or a tooth fairy. The choice is yours! Click for t…
  1. Print out 2th as a template. I used the font Abadi MT condensed super bold, size 200.

  2. Place your template printed side down on your gold paper and tape it in place. You'll want to use a few small pieces of tape in different places so it doesn't fly off while you're cutting.

  3. Cut out your 2th, being careful to stay within the lines. You can also use an x-acto knife if that's easier, but I found the scissors worked just fine.

  4. Try on your shirt and mark lightly with a pencil where you want the letters to go.

  5. Using a gluegun, glue the letters onto your shirt. For a more temporary option, use double stick tape, but it might not adhere as well.


Crown:

Do you ever have a weird accident that turns into something pretty awesome? Well, I did. This really silly idea came after, and I kinda love how cheesy it is. You can be either a tooth with a crown, or a tooth fairy. The choice is yours! Click for t…
  1. Cut a rectangle measuring 3 inches by 6 inches

  2. Draw small lines going 1.5 inches from the top, and make dashes every 1 inch.

  3. Connect the lines to the top in a triangle shape.

  4. Cut out the triangles

  5. Roll the crown into a circle and glue the seam shut. Trim any excess from where the two ends meet

  6. Glue your crown onto a piece of felt. Trim the excess.

  7. Cut a small piece of felt and glue it onto your hair clip or headband, then glue the felt to your crown.

Do you ever have a weird accident that turns into something pretty awesome? Well, I did. This really silly idea came after, and I kinda love how cheesy it is. You can be either a tooth with a crown, or a tooth fairy. The choice is yours! Click for t…

Fun fact: I am the queen of making weird and unattractive faces in photos. My sister and friends have a folder labeled "ugly Cathy photos", where I try to be silly but end up looking plain hideous. My sister, on the other hand, is great at looking silly but AMAZING. So... there's that haha. 

You can wear this costume with a pair of white jeans, or a tutu. The choice is yours! Add a pair of wings if you want, and you're ready to go!

T-shirt: $4
Gold Paper: $2
Headband/Hair Clip: $1
Felt: $1

Total cost: $8

Now you're ready for Halloween! It's in just a few days!!!

DIY Cloud Costume

Ok guys.... if you don't have a costume yet, you better get cracking! Lucky for you, I have some really easy last minute costumes coming your way. And, they feature something we all have in our closets- a T-shirt!! Let's start off with that spare baby blue tee way in the back of your drawers.

First, a backstory. When I was a kid, I had this blue cloud dress (with a matching sheer shrug thing like all the dresses had) and I loved it. Well, imagine my delight when I found a matching pair of sandals with a cloud print on them too! You can bet that I wore those two together, because clearly it matched so well. In case you're new around here, I clearly love a theme... Anyway, this cloud costume is just a touch classier than that, topped off with a ridiculously bright and bouncy sun balloon. 

Looking for a quick and easy Halloween costume? Look no further! This last-minute cloud costume is made from a staple everyone has in their closet- a t-shirt! Click for the easy DIY. #halloweencostume #diycostume #lastminutecostume

You will need:

Shirt:

Blue t-shirt (similar here)
White fabric paint (here)
Cotton balls (here)
Cardboard
 

Earrings: 

Earring hooks (or an old pair of dangly earrings) (here)
Thin cardstock (like a manilla folder or notebook cover)
Cotton balls (here)
Small pliers (here)
Glue gun (similar here)
Heart punch (similar here)
 

Headband:

Yellow balloon (similar here)
Balloon pump (similar here)
Yellow glitter cardstock (similar here)
Headband (similar here)
Scissors (here)
Glue gun (similar here)


Looking for a quick and easy Halloween costume? Look no further! This last-minute cloud costume is made from a staple everyone has in their closet- a t-shirt! Click for the easy DIY. #halloweencostume #diycostume #lastminutecostume


Directions:

T-Shirt

Looking for a quick and easy Halloween costume? Look no further! This last-minute cloud costume is made from a staple everyone has in their closet- a t-shirt! Click for the easy DIY.
  1. Place a piece of cardboard inside the shirt to prevent the paint from leaking through. Try to find a smooth piece, otherwise you'll end up with some weird textured stripes like mine had.

  2. Paint clouds onto your shirt using a dotter or a cotton ball. I found that the cotton ball made it more "pillowy". I used a dotter for the pocket cloud and a cotton ball for pretty much all the rest.

  3. Let dry, according to directions, then set the paint if the instructions calls for it. Mine advised ironing your shirt, but yours may be different.

Earrings

Looking for a quick and easy Halloween costume? Look no further! This last-minute cloud costume is made from a staple everyone has in their closet- a t-shirt! Click for the easy DIY.
  1. Draw or punch a heart shape onto your cardstock or thin cardboard. You can probably use any shape, but that was the punch I had handy. A simple circle would probably work too.

  2. Using your pushpin, make a tiny hole at the tip of your heart shape. (Love these Barbie shoe pushpins? Get the DIY here)

  3. Attach your earring hook onto the cardstock. If you're using an old pair or earrings, remove the hook and the first jump ring. Slide it through the hole, then be sure to clamp it closed so it's securely fastened.

  4. Break up your cotton ball into tiny pieces. Try to keep them round and billowy.

  5. Glue your mini cotton balls onto both sides of the cloud. The cotton balls are super light, so don't worry- they won't be too heavy!

Looking for a quick and easy Halloween costume? Look no further! This last-minute cloud costume is made from a staple everyone has in their closet- a t-shirt! Click for the easy DIY. #halloweencostume #diycostume #lastminutecostume

Headband:

*note: make this headband just before you're going to wear it. Mine started deflating within a day. You can always open it up and re-inflate it though! 

Looking for a quick and easy Halloween costume? Look no further! This last-minute cloud costume is made from a staple everyone has in their closet- a t-shirt! Click for the easy DIY.
  1. Blow up your mini balloon so that it's not overinflated. You want it to be nice and round.

  2. Cut triangles of various sizes out of your cardstock. I made a template with a large triangle and cut out 3 of those. Then, I made 2 smaller sizes by moving the template slightly off the page to make the triangles smaller.

  3. Glue your cardstock to your balloon. You'll want to place the glue on the cardstock, not the balloon itself. We don't want it to pop!

  4. Put some glue on the part where you blew it up, and fold the knot inside to keep it as flat as possible.

  5. Place some glue on your headband and attach the sun. Hold it in place until it cools.

Looking for a quick and easy Halloween costume? Look no further! This last-minute cloud costume is made from a staple everyone has in their closet- a t-shirt! Click for the easy DIY. #halloweencostume #diycostume #lastminutecostume

Then, all you have to do is put on all these pieces with a pair of white or light blue jeans, and your costume is complete! I also think a pair of bright & sunny yellow shoes would be the perfect additional, along with this rainbow tassel necklace. Lastly, pop on a pair of sunglasses and you're all ready to go!

Looking for a quick and easy Halloween costume? Look no further! This last-minute cloud costume is made from a staple everyone has in their closet- a t-shirt! Click for the easy DIY. #halloweencostume #diycostume #lastminutecostume

T-shirt: $12
White Fabric Paint: $8
Cotton Balls: $2
Balloons: $3
Yellow Glitter Paper: $2
Headband: $1

Total cost: $28

And that's all folks! An easy DIY costume that you can whip up in time for Halloween :)

Painted Corkboard and Barbie Push Pins

I have a sliiight obsession with desk items. I've got a whole bunch of pens, some cute tape dispensers, and even a cute felt cactus on my desk. Hoarder is one word that can be used to describe me, but I prefer collector. Luckily the differentiator between a hoarder and a collector is how your items are presented and stored. As long as it's neat, there's nothing to worry about, right? 

I tend to hold onto papers and fortune cookie fortunes that are all too relatable, so I needed somewhere to keep them where I could actually see and use them. In addition, I wanted to have it be something really fun! In what is one of my easiest tutorials to date, I'll show you how to make your very own painted cork board and Barbie push pins!

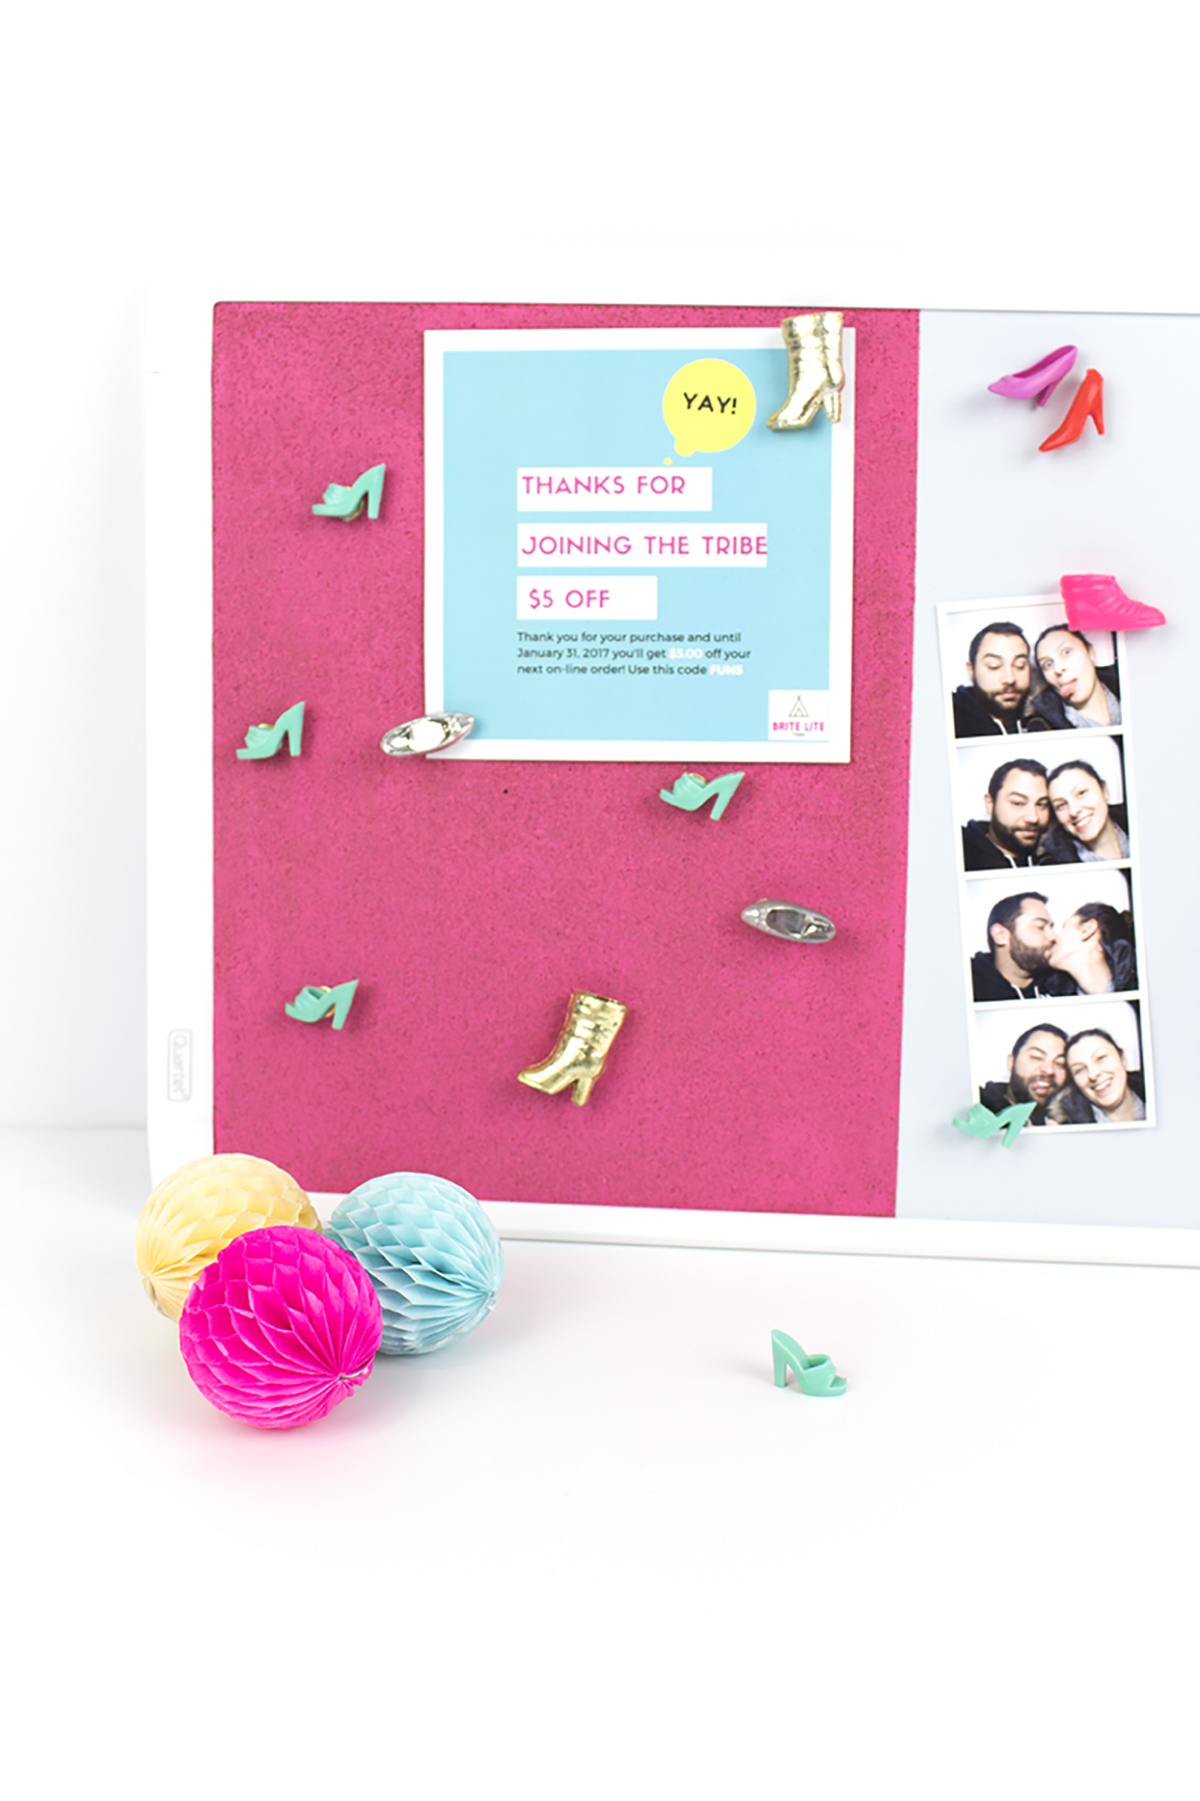
I decided to use my slight obsession with Barbie to create this awesome pink cork board with matching Barbie shoe magnets and thumbtacks. Click for the full tutorial! #deskorganization #barbieclothes #corkboardideas
I decided to use my slight obsession with Barbie to create this awesome pink cork board with matching Barbie shoe magnets and thumbtacks. Click for the full tutorial!

You will need:

Corkboard/magnetic whiteboard combo (here)
Small magnets (here)
thumbtacks (I used gold, but these are nice too!)
E6000 glue (here)
pink paint
toothpick
painters tape (here)
Barbie Shoes (authentic vintage ones from Ebay, or similar here)

Directions:

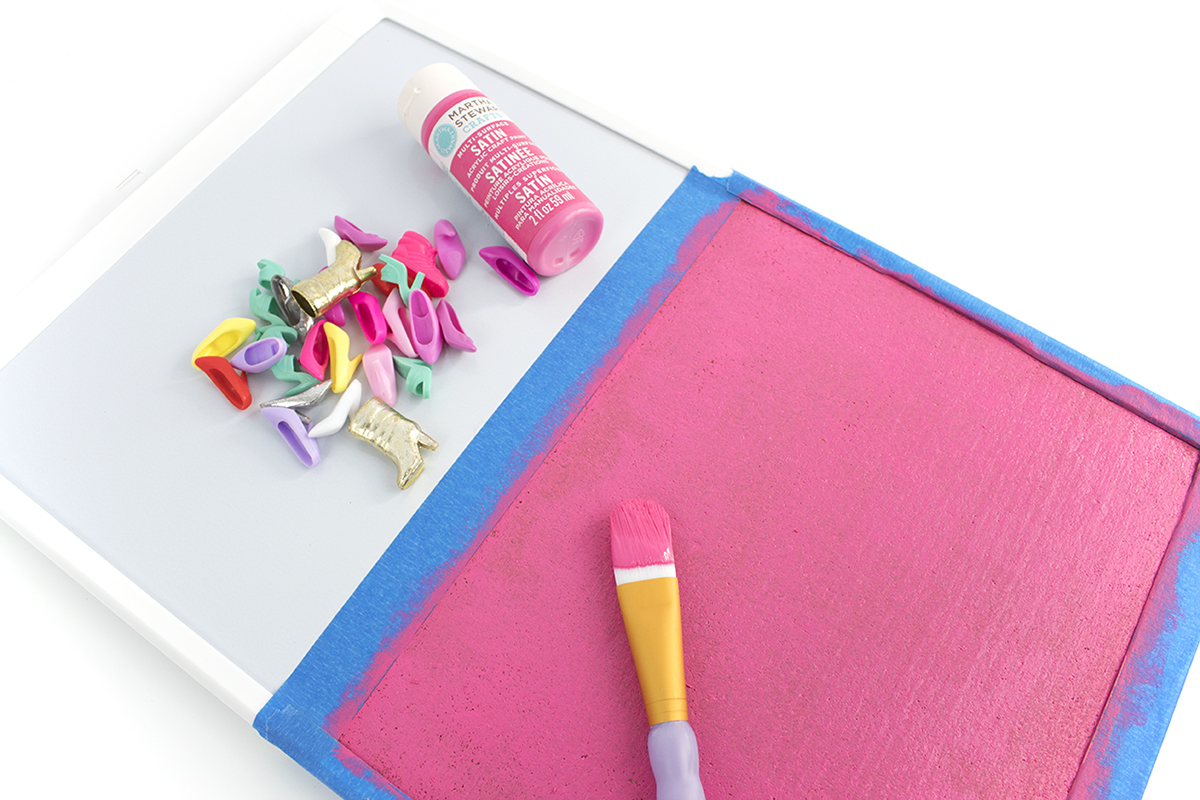
1. Tape off the sides of the corkboard.

I decided to use my slight obsession with Barbie to create this awesome pink cork board with matching Barbie shoe magnets and thumbtacks. Click for the full tutorial!

2. Paint the corkboard pink. I used Martha Stewart Satin Paint in Pink Dahlia.

I decided to use my slight obsession with Barbie to create this awesome pink cork board with matching Barbie shoe magnets and thumbtacks. Click for the full tutorial!

4. Peel off the tape while the paint is still kinda wet. Touch up the paint and use a toothpick to remove any extra paint from sides.

I decided to use my slight obsession with Barbie to create this awesome pink cork board with matching Barbie shoe magnets and thumbtacks. Click for the full tutorial!

5. Space out your magnets on the whiteboard and place a small glob of glue on each. Let cure for 2 minutes (or according to instructions) then place the shoe onto it. Hold for 30 seconds, then let dry for 24-48 hours. Please note that not all whiteboards are magnetic, so make sure you find one that is!

I decided to use my slight obsession with Barbie to create this awesome pink cork board with matching Barbie shoe magnets and thumbtacks. Click for the full tutorial!

 I did the opposite for all the thumbtacks, putting a small glob of glue onto the shoe itself, then placing a thumbtack on after it cured. Hold for 30 seconds, then let dry for 24-48 hours.

I decided to use my slight obsession with Barbie to create this awesome pink cork board with matching Barbie shoe magnets and thumbtacks. Click for the full tutorial!

Now, gather up all your cutest photos and postcards, and hang them up!

I decided to use my slight obsession with Barbie to create this awesome pink cork board with matching Barbie shoe magnets and thumbtacks. Click for the full tutorial! #deskorganization #barbieclothes #corkboardideas

You can also scribble notes on your whiteboard, like dinner dates and brunches with friends!

If you want more Barbie fun, be sure to check out my Barbie Shoes Tote Bag and Gift Guide for the Barbie Girl!

I decided to use my slight obsession with Barbie to create this awesome pink cork board with matching Barbie shoe magnets and thumbtacks. Click for the full tutorial! #deskorganization #barbieclothes #corkboardideas

I know I'm way too old for this, but I still really love Barbies. I peruse the doll aisle at Target every once in a while to see what they have. This cork board is a fun and nostalgic way to show off your Barbie love. So what do you think, will you be making one of these for your desk? Did you love Barbies as a kid, or were you over her faster than you can say "Barbie Dream House"? Do you still have a soft spot for her? Let me know in the comments below!

DIY Cotton Candy Garland

Ok guys, I have a confession to make. I'm a cotton candy addict. I loooove cotton candy. I know I shouldn't love it quite so much- it's pure sugar, and I'm a 27 year old woman. But something about that magical and fluffy cloud of candy tastes so good. Yes, I actually still eat it. Most people just admire it or decorate things with it, but I eat it. The only negative thing about cotton candy (besides the inevitable cavities) is the fact that the colored ones turn your mouth all kinds of colors. Then I get to walk around all day after a sporting event with blue lips, while people stare and my fiancé laughs at me. Oh well, c'est la vie. Luckily for you guys, this cotton candy won't turn your mouth any kinds of colors! Well, unless you try to eat it... I can't speak to that. With only a few steps, this garland is the cutest and easiest way to display your love for cotton candy. 
Zebra Tray 15.jpg

You will need:

Cotton Candy Picks (from Oriental Trading)
Ribbon (Mine was from Michael's on clearance)
Glue gun
Scissors (here)
 

1. Peel the sticks off the cotton candy picks. I recommend starting at the bottom tip of the cone, since it's the most delicate part. 

2. Cut off the tabs on the fluffy part of the cotton candy that keep it open. They're the teardrop shaped parts in the photo above.

3. Glue the honeycomb top open. Hold in place for a few seconds until the glue dries.

4. Once you've glued all your honeycombs open, grab your ribbon. Leave a few inches on the end so that you can hang it up. Then, glue the cotton candy evenly spaced out.

5. Hang it up and enjoy!

cotton candy garland 2.jpg

And there you have it! A quick and simple banner DIY that'll sweeten up any party. It would also make a really sweet addition to a little girl's room, your desk at work, basically anywhere you'd want to declare your love for cotton candy.

cotton candy garland 4.jpg

Do you still eat cotton candy, or do you have a different guilty snack you love? Let me know in the comments below!