DIY Cotton Candy Garland

Ok guys, I have a confession to make. I'm a cotton candy addict. I loooove cotton candy. I know I shouldn't love it quite so much- it's pure sugar, and I'm a 27 year old woman. But something about that magical and fluffy cloud of candy tastes so good. Yes, I actually still eat it. Most people just admire it or decorate things with it, but I eat it. The only negative thing about cotton candy (besides the inevitable cavities) is the fact that the colored ones turn your mouth all kinds of colors. Then I get to walk around all day after a sporting event with blue lips, while people stare and my fiancé laughs at me. Oh well, c'est la vie. Luckily for you guys, this cotton candy won't turn your mouth any kinds of colors! Well, unless you try to eat it... I can't speak to that. With only a few steps, this garland is the cutest and easiest way to display your love for cotton candy. 

Zebra Tray 15.jpg

You will need:

Cotton Candy Picks (from Oriental Trading)
Ribbon (Mine was from Michael's on clearance)
Glue gun
Scissors (here)
 

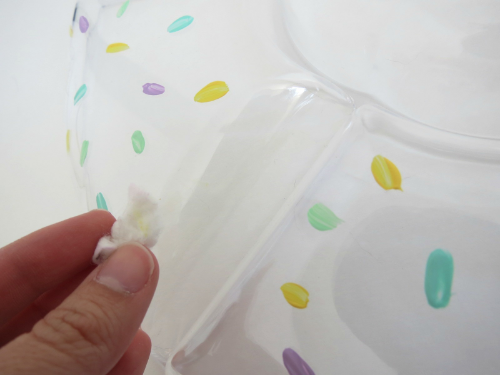
1. Peel the sticks off the cotton candy picks. I recommend starting at the bottom tip of the cone, since it's the most delicate part. 

2. Cut off the tabs on the fluffy part of the cotton candy that keep it open. They're the teardrop shaped parts in the photo above.

3. Glue the honeycomb top open. Hold in place for a few seconds until the glue dries.

4. Once you've glued all your honeycombs open, grab your ribbon. Leave a few inches on the end so that you can hang it up. Then, glue the cotton candy evenly spaced out.

5. Hang it up and enjoy!

cotton candy garland 2.jpg

And there you have it! A quick and simple banner DIY that'll sweeten up any party. It would also make a really sweet addition to a little girl's room, your desk at work, basically anywhere you'd want to declare your love for cotton candy.

cotton candy garland 4.jpg

Do you still eat cotton candy, or do you have a different guilty snack you love? Let me know in the comments below!

Rock Candy Christmas Tree Cake Topper

No one knows exactly why rock candy has gotten so popular, but I have some theories. 1, it's gorgeous and it's like glitter candy on a stick. 2, it tastes delicious. 3, it's a classy addition to any cocktail. But really I think its popularity is due to 4, its uncanny resemblance to a Christmas tree. Yes, you read that right. No, I'm not crazy. It's like Christmas in disguise, a tree hiding in the ordinary candy we all love. Subliminal messaging at its finest. And somehow no one noticed. We went around all these years blind to the fact that Christmas was right under our noses, disguised as something as ordinary and unassuming as rocks.

Everyone's favorite party candy has a whole new look. Lucky for you, this tutorial is as gorgeous as it is easy. Click to see the full tutorial for these rock candy Christmas trees.

Full disclosure: this post was supposed to go live around Christmas time, but I wanted to give it the cake it deserved. Since I'm not really ready to give up on Christmas quite yet, and it's pretty darn cold here, I'm posting it now. Let's call this a winter tutorial and suddenly it's right on time ;)

Everyone's favorite party candy has a whole new look. Lucky for you, this tutorial is as gorgeous as it is easy. Click to see the full tutorial for these rock candy Christmas trees.

One of the things I like most about this project is that it's like a magical glittering Christmas forest! Plus there are so many color options out there for rock candy, so you can match any decor.

Everyone's favorite party candy has a whole new look. Lucky for you, this tutorial is as gorgeous as it is easy. Click to see the full tutorial for these rock candy Christmas trees.

You will need:

Rock Candy (here)
Toothpicks
Scissors (here)
Glue Gun
Glitter Paper (similar here)
Star Punch (similar here)
Nail File

Directions:

Everyone's favorite party candy has a whole new look. Lucky for you, this tutorial is as gorgeous as it is easy. Click to see the full tutorial for these rock candy Christmas trees.

Using scissors, carefully cut the sticks off your rock candy, leaving about 1/4 inch of wood. I recommend cutting while holding it up off the table and twirling the stick to prevent pieces of candy from breaking off.

Everyone's favorite party candy has a whole new look. Lucky for you, this tutorial is as gorgeous as it is easy. Click to see the full tutorial for these rock candy Christmas trees.

Ta-da! A perfect little tree in the making.

Everyone's favorite party candy has a whole new look. Lucky for you, this tutorial is as gorgeous as it is easy. Click to see the full tutorial for these rock candy Christmas trees.

Use the star punch to cut the glitter paper. I picked neutral colors that would enhance the colors of my trees without clashing with them.

Everyone's favorite party candy has a whole new look. Lucky for you, this tutorial is as gorgeous as it is easy. Click to see the full tutorial for these rock candy Christmas trees.

Cut a toothpick in half, then use the nail file to sand the edge smooth.

Everyone's favorite party candy has a whole new look. Lucky for you, this tutorial is as gorgeous as it is easy. Click to see the full tutorial for these rock candy Christmas trees.

Using your glue gun, stick the star and toothpick onto your tree. I recommend gluing the toothpick to a large and covered crevice of the rock candy to create a strong but hidden base. Use varying lengths to keep it interesting.  

Everyone's favorite party candy has a whole new look. Lucky for you, this tutorial is as gorgeous as it is easy. Click to see the full tutorial for these rock candy Christmas trees.

So cute! That white one marches to the beat of its own drum though....

Everyone's favorite party candy has a whole new look. Lucky for you, this tutorial is as gorgeous as it is easy. Click to see the full tutorial for these rock candy Christmas trees.

Once they're all done, carefully nestle your rock candy trees into your cake. You can keep it simple with just a few for a pop of color, or create your own little forest.

Everyone's favorite party candy has a whole new look. Lucky for you, this tutorial is as gorgeous as it is easy. Click to see the full tutorial for these rock candy Christmas trees.

These are super cute for a winter birthday party or holiday gathering with friends. They really would fit in well all winter, especially if you put a different shape at the top of the tree. Maybe a heart for Valentine's day?!

And that's all there is to it folks. Once you're done, you can probably still eat the rock candy. Ya know, if you don't mind eating around the glue and paper ;)

I hope you enjoyed Cathy's crazy/amazing idea of the week. If you create your own toppers using this tutorial, I have to see it! Tag me on instagram and your picture might get featured. So what do you think? Do you see trees in your rock candy now? Let me know in the comments below!

My Sugar Sweet 27th Birthday Party

A month ago I celebrated my 27th birthday with a super fun Sugar Sweet Birthday Party. Armed with my pinterest board and list of tutorials, I created a DIY party that would satisfy any sweet tooth! I unfortunately had a really bad cold that day, which turned out to be sinusitis (and left me in bed for a week!) but I had SO MUCH fun planning this party and celebrating!

*This post contains Affiliate Links

Sugar Sweet Party Ideas. Donuts and cupcakes and ice cream, oh my! Check out this adorable party for ideas, decorations, and tutorials.

I bought some pink balloons and made them into donuts using this tutorial. I painted the sprinkles on instead of using tissue paper to save some time. The balloons were a huge hit. Everyone loved them and was amazed by the shape, and that I made them myself!

Sugar Sweet Party Ideas. Donuts and cupcakes and ice cream, oh my! Check out this adorable party for ideas, decorations, and tutorials.

We have some hooks in our living room that the previous homeowners had left, so I hung up some lanterns and a disco ball. The party never transitioned into a dance party like I had hoped, but since I was super sick, I didn't really mind that.

Sugar Sweet Party Ideas. Donuts and cupcakes and ice cream, oh my! Check out this adorable party for ideas, decorations, and tutorials.

Over the fireplace, I hung a DIY tassle garland. It was super easy to make and added a fun touch.

Sugar Sweet Party Ideas. Donuts and cupcakes and ice cream, oh my! Check out this adorable party for ideas, decorations, and tutorials.

And what's a Sugar Sweet party without a candy bar?! I kept mine small since there weren't any kids, and I knew my friends wouldn't be eating too much candy. I still have a lot left! To create your own dollar store candy bar, check out my tutorial.

Sugar Sweet Party Ideas. Donuts and cupcakes and ice cream, oh my! Check out this adorable party for ideas, decorations, and tutorials.

I loved making this donut platter.  It was a super fun and easy tutorial, and the tray can be used again and again.

Sugar Sweet Party Ideas. Donuts and cupcakes and ice cream, oh my! Check out this adorable party for ideas, decorations, and tutorials.

We rimmed some champagne glasses with sprinkles and added some cotton candy for a cute and a tasty beverage! Just pour some champagne over the cotton candy and enjoy.

Sugar Sweet Party Ideas. Donuts and cupcakes and ice cream, oh my! Check out this adorable party for ideas, decorations, and tutorials.

I made the festive 27 using sprinkles, mod podge, and cardboard numbers from the craft store. Everyone thought they were edible cookies!

For some fun, we played drinking games using these donut playing cards. How stinking cute are these?!

Sugar Sweet Party Ideas. Donuts and cupcakes and ice cream, oh my! Check out this adorable party for ideas, decorations, and tutorials.

To add some color to the walls, I hung up paper fans all around the house. We don't really have much artwork up yet, so this helped make the room more festive. It also ended up being a great photobooth backdrop!

Sugar Sweet Party Ideas. Donuts and cupcakes and ice cream, oh my! Check out this adorable party for ideas, decorations, and tutorials.

I also got these inflatable ice cream cones that served as decor and photobooth props. They were inexpensive and well worth it! To set up the photobooth, I propped up my camera on my tripod and we hit the timer button.  I really wish my clicker had arrived in time!

Sugar Sweet Party Ideas. Donuts and cupcakes and ice cream, oh my! Check out this adorable party for ideas, decorations, and tutorials.

I had a really great birthday, despite being so so sick. I just love planning parties! 

Be sure to follow my Sugar Sweet Party Pinterest board for more great ideas!

Easy DIY Dollar Store Candy Bar

Remember when you were a kid and you used to go in a candy store? The old-timey ones, with jars lined up along the walls of all different types of candies, sold by the pound. Your parents would hand you a bag and tell you "ok, get what you want. But not too much!" Or maybe your parents didn't trust you, so they'd ask you what you wanted and put tiny scoopfuls into the bag. Then for the next 10 hours, you were on a sugar high as you feasted on pretty much all the candy in one sitting. I loved this experience, so for my Sugar Sweet 27th birthday party, I had to have a candy bar! I wanted to do it on a budget so I could spend money elsewhere, especially since my party was all adults that don't have a big sweet tooth. I hit up my local dollar tree to find some supplies. P.S., there is some great glassware there for only a dollar!  Are you ready to make a candy bar for your next party?

*This post contains affiliate links.

Looking to add some fun to your next party? Check out this easy tutorial to create your own candy bar with items from the dollar store! #candybar #candybuffet #candytableideas

You'll need:

Candy Jars with lids (similar)
Vases or Fishbowls (similar vase and fishbowl)
Candlesticks (similar)
E6000 Glue (here)
Timer/Clock
Candy (and lots of it!) (similar here and here)
*Note: I purchased all my glass items from the Dollar Tree for only $1, but the Amazon links are for similar items

How to:

Looking to add some fun to your next party? Check out this easy tutorial to create your own candy bar with items from the dollar store! | Well Kept Chaos

1. First off, wash and thoroughly dry your supplies. I let mine dry overnight to be safe, but a good wipe and waiting a few minutes should work just as well.

Looking to add some fun to your next party? Check out this easy tutorial to create your own candy bar with items from the dollar store! | Well Kept Chaos

2. Using the E6000 glue, rim the perimeter of the candlestick. E6000 tends to ooze (a lot) so stop squeezing near the end of your perimeter, and store it tip-up between uses.

Looking to add some fun to your next party? Check out this easy tutorial to create your own candy bar with items from the dollar store! | Well Kept Chaos

3. Let the glue set for 2 minutes before attaching. This is so it gets tacky and sticks well.

Looking to add some fun to your next party? Check out this easy tutorial to create your own candy bar with items from the dollar store! | Well Kept Chaos

4. Hover the candy bowl over the candlestick and try to find the center. Place the bowl down and hold it for a few seconds so it can adhere.

Looking to add some fun to your next party? Check out this easy tutorial to create your own candy bar with items from the dollar store! | Well Kept Chaos

5. Wait 24-48 hours for the glue to fully cure. Then, pour in your candy and enjoy!

Looking to add some fun to your next party? Check out this easy tutorial to create your own candy bar with items from the dollar store! | Well Kept Chaos

I found that the lids for the candy bowls fit well with the vase and fishbowls, even though they were not airtight. 

Candy Tips:

-If you can, use name brand candy or something you've tried before. You don't want to get bags and bags of something that ends up tasting terrible!

-Get a mix of smaller and larger candies to create a visually appealing display.

-Pick a color scheme and stick to it. If you want to get all types of candies, then "rainbow" can be your theme. Just try not to have one candy/color that sticks out like a sore thumb.

-You'll probably need a lot more candy than you think. For most of my candies I bought 3 bags/boxes and it only fully filled one container. This wasn't a big deal to me because I had adults and figured they wouldn't be eating much candy anyway.

-Dollar store bags may be smaller than the bags from other stores, so grab the circulars and see if the candy might be cheaper elsewhere. Sometimes holiday candies go on sale, which can be great for a holiday themed party!

Do you have any tips for a candy bar on a budget? What's your favorite type of candy to put in the jars? Which is the most bang for your buck? Let me know!

DIY Donut Party Platter with Sprinkles

Updated: December 22, 2018

I had no idea when I made this post (my second DIY blog post, ever!) that it would become as popular as it did. I’ve since updated some of the photos, and will soon be re-creating the DIY for you so that you can have much better images to work with! Thank you for loving the post so much. Please be sure to tag me when posting on social media, or adding your photo to the “tried it” section on Pinterest!

If you’re looking for a fun way to update a plain old party platter, try this DIY Donut Party Platter with Sprinkles! All you need is some acrylic paint to give it a new look. #donutbirthdayparty #partyplatter #sprinkles

For my birthday, I had a Sugar Sweet birthday party. I had so much fun planning and setting up for this party. It had everything you need for a sugar coma, including cotton candy champagne and a DIY candy bar. To add to the ambiance, I decided to make a fun donut platter! The great news is that the platter is food safe and reusable. So what are you waiting for? Go grab your supplies and lets get started!

DIY Donut Party Platter with Sprinkles

You'll need:
Clear Round Platter (I got mine from Party City, similar here)
Acrylic Paint (similar here)
Foam Brushes (here)
Paintbrushes (similar here)
Mod Podge (here)
Qtips for cleanup
 

1. Thoroughly wash and dry your platter.  We'll be painting the underside.  This is to make sure it's food safe!

2. Place the platter food-side down. Using the acrylic paint and a thin paintbrush, draw the sprinkles on first. I found that thicker, more opaque sprinkles showed better.  Turn the plate over and make sure you're happy with the placement and quantity.  Let dry according to directions.

Did you make a sprinkle that's too fat or in the wrong place? Just wipe it off with water!

Paint on those sprinkles!

Paint on those sprinkles!

Let dry according to directions. Then it's time for frosting!

3. If you're using a divided platter, fill in the gaps carefully first. You can be sloppy about it and wipe it off with a q-tip like I did, but that's much harder- learn from my mistake!

Messy messy middle!

Messy messy middle!

Paint the frosting on in a zigzag shape. Let dry and add another coat to make sure it's thick. Be sure to turn it over and check for any gaps in the paint. Note: At this point, the paint is really delicate and scratches easily. Use caution when flipping it and maneuvering it.

4. Once your frosting is dry, paint the rim of the tray as your base donut color. If it's sheer, do another coat and let dry several hours or overnight if possible.

5. Put on a coat or two of mod podge.  This will seal the design and make it waterproof.  I did two coats, one going vertically and one going horizontally.

DIY Donut Party Platter with Sprinkles

And that's all folks!  I think this would look adorable in a little girls' room holding their hair clips or for tea parties.  How do you plan to use your new platter?  Let me know in the comments below!