DIY Cake Smash (& Milk Bath) Photoshoot
/Last week, Hailey turned one year old! It was a rough week because she had a cold or was teething, poor thing! There was one day that she was feeling slightly better, so I decided this was the day to do her cake smash session. You see, I had originally had these grand ideas of setting up a backdrop indoors, adding all this colorful stuff behind her, creating an amazing cake topper and making it an experience. However, life is what happens when you’re busy making plans. So, I took what I could get and figured if she was feeling slightly better right now, this was the time to do the cake smash pics!
Hailey was in a pretty good mood until I left her to set up the cake smash. By the time I was done setting up (which by the way I did in a super fast manner and totally different than my original plan) she was completely snotty nosed and red in the face. Instead of playing with all her toys in the playpen, she decided that she wanted to cry because she kept seeing me walk by her and not actually interact with her. All this to say, it doesn’t have to be perfect when you’re setting up your shoot. All that matters is that you get it done and have those memories to cherish. I could’ve given up in that moment, because let’s let’s face it I was READY to. But I kept it on, lived to tell the tale, and decided to share what I learned because it really isn’t as hard as it looks. I was even able to throw in a bonus milk bath photoshoot afterwards!
Setting Up For Your DIY Cake Smash Photoshoot
For starters, you’ll want to find a well-lit spot for your cake smash session to happen. Things can get really messy, so make sure that it’s somewhere that you don’t mind getting dirty. Doing it on your carpet would not be wise unless you have a tarp or plastic tablecloth of some sort to protect it. I have a backdrop stand that I was planning to use, but as I had mentioned there was no time for such shenanigans! Because of this, I took a look around my home (which by the way, was dark because it was cloudy and not the day I planned to take the pictures originally) and then took a look outside. I realized that taking the pictures outside would not only provide me with a natural backdrop stand ( the fence around our deck) but also had much better lighting than there was inside the house.

Lighting for Your Cake Smash Photoshoot
On that note, let’s talk about lighting. If you’re taking pictures outdoors you’ll want to make sure you do it either in a shady area or during golden hour, which is when the sun is going down. Make sure you don’t take the pictures right in the blinding sun, as your baby will be very cranky with the sun in their eyes and the pictures really won’t come out so good.
For indoor photos, keep the session near a window or a large sliding screen door. You want to find a room with the best lighting at that time of day so that the pictures come out as magical as possible. If your room is dark, your pictures may turn out OK with a cell phone or on automatic mode. However, when you go to edit them you’ll notice that they came out pretty grainy. That’s because your camera is struggling to find the light within a dark room. So, to avoid that, always find the best, most well-lit area for your photo shoot.

Cake Smash Backdrop
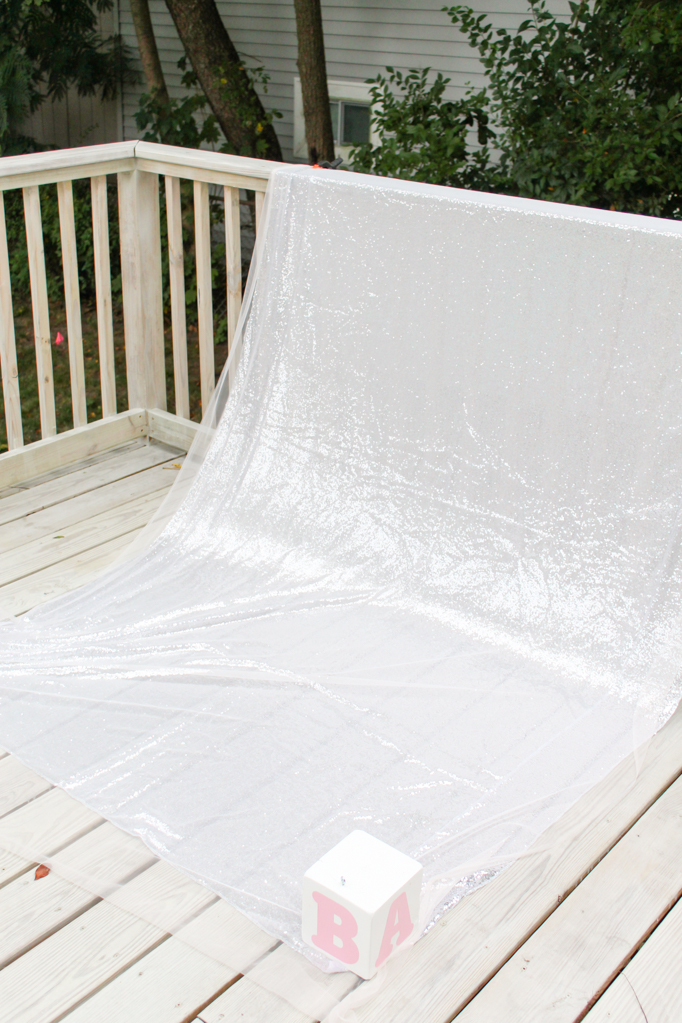
Next up is the backdrop. There are tons of options for what you can use as a backdrop. On Amazon you can find backdrops that you can purchase for this purpose, but very often those are filled with wrinkles. Make sure you reserve some time to remove them with a steamer or an iron. Personally, I absolutely loathe trying to get wrinkles out of things, especially the deep folds that always ends up on backdrops. For this reason, I would recommend either using a rolled-up vinyl backdrop (which you probably wouldn’t know unless you read the Amazon reviews or asked how it was shipped) or a paper backdrop. I have these at home and love them. Just know that as the baby is moving, the paper may end up with wrinkles or folds. If you have a very active child, this may not be your best choice. Another option is to use some fabric that you purchased at the store. But, I think the best way to do it is to use a tablecloth! For my pictures, I used a sequin tablecloth that I had on hand and I covered it with a piece of tulle that I had left over from trying to make a wedding veil and used at Hailey’s half birthday party. The tablecloth was the perfect length for the backdrop and added a little sparkle, while the tulle kind of diffused the shine and created a more matte surface that was less reflective. To prevent the backdrop from moving, I used backdrop clips that I had on hand and attached them to my deck railing. Then at the bottom, I used blocks from Hailey‘s baby shower. The wind was blowing and everything was flying up, so you want to make sure that everything is stuck in place so you don’t have to worry about it while you’re shooting. An important note to make, make sure that whatever you use to hold up the top part of the backdrop is not heavy. If your baby moves or pulls the tablecloth, you don’t want it to come crashing down on their head. It’s for that reason that I used a clip, but you could probably also use some other sort of clip like a hair clip, although it wouldn’t work as well. You could probably also tired up in someway with a knot, but I recommend investing in a pair of these clips as they’re the most effective route and won’t fall down.
Cake Smash Cake
I had gone to the grocery store and picked up a cake, but it had this very ugly dark purple icing all around the top edge. I bought it because I wasn’t sure if I would have time to find a better cake or make one, but I knew I didn’t want the cake to look like that. So, I went to my local home goods which is right next to the grocery store and picked up small cake pans. I wasn’t sure what I’d have time to do because I intended to do her photo shoot earlier in the week. However, since Hailey was so sick I had a few extra days to create the cake. I ended up making a strawberry cake and just used box cake and premade icing to cover it. I used a flat spatula to smooth out the edges so that it didn’t look totally horrible. While I was going to BJ’s looking for Hailey’s birthday party cake, I noticed that they actually have a lot of small “cake smash” cakes that actually come in a variety of colors. I managed to get a pink one for her party, but this is a great alternative if your grocery store only has hideous cakes like mine did.
Cake Smash Cake Topper
The cake topper was another funny part of it. You see, I was so concerned about having the right cake that I forgot all about the topper! So, I was scrambling around the attic looking for the right craft supplies to very quickly make my own cake topper while she was still in a good mood. This was, of course, before she started being very upset with me. I may do a blog post on how to create the cake topper I made, but overall it was really simple. I used wooden skewers, wood balls and a fringe embellishment/ribbon that went across it. Then I used wooden letters that I glued on to spell her name. To add a little more sparkle, I added some paper punched glitter card stock and put those on toothpicks. To be honest, the smaller sparkly stuff was totally unnecessary, so I’d recommend skipping it altogether. As soon as the baby starts eating a cake, hand over fist, you won’t want to pokey things in there and you’re going to remove them. I’d recommend picking one great topper or keeping it towards the front of the cake, letting them really feast on the cake towards the back.

Cake Smash- The Little Details
Now let’s talk about the little details. I went to her closet and picked out a dress for the shoot. I knew that my cake did not have any dyes, so I wasn’t too worried about it having a lot of staining. Either way, I figured that this is probably not something she would wear every day and wasn’t too concerned about it getting messed up. If you are worried, you can just do a tutu with a necklace on top or an affordable dress. Another option is to add a cute bib that will protect her dress or his little outfit, but also matches the theme. So anything about cake or it being the baby’s birthday is ideal. Then, I added a little hat that came with Hailey’s birthday party outfit. You can purchase a similar one on Amazon or Etsy, or you can make your own crown. I knew I wanted a little extra color in the photo shoot, since the background was just silver with that light peach overlay. So, I grabbed a tassel garland that I had left over from Hailey‘s half birthday party. I also attached the garland by sticking it under those backdrop clips so that everything was kept together nicely with no risk of falling. I put Hailey‘s cake on a plastic plate, because I was worried about her possibly knocking over a cakestand and breaking it. However, she actually was fairly tame the whole time and probably could’ve been fine with a glass plate. Use your discretion on that one!

DIY Cake Smash Photos
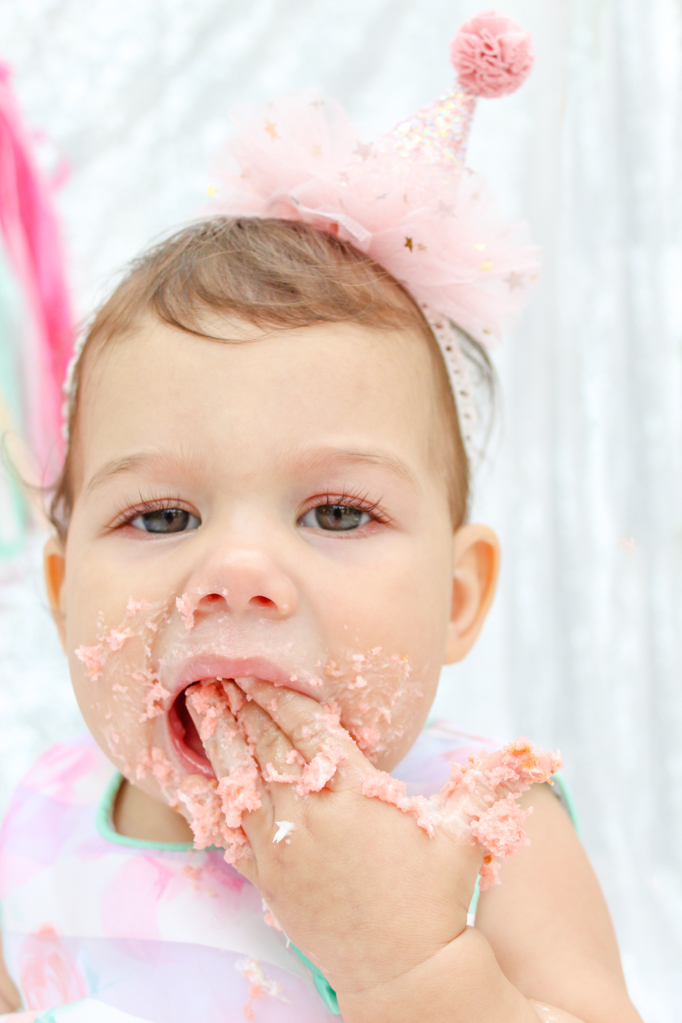
Now that your scene is all set up, it’s time to commence the cake smashing! All that’s left to do stick your little baby at the back of the cake, grab your camera and get ready to take pictures. I recommend taking all sorts of angles and distances. For example, you want to take a picture of the cake before I get smashed, a picture of the baby with the cake before they smash it (if you can!) and then a picture of their full body. After that, you want to get in on some details. The little hands grabbing at the cake, the little foot covered in icing and cake, and their little mouth. Take all sorts of angles and get in on those little details! This is how you would have a nice, well rounded session. Try to make your baby smile, but also acknowledge that they may just be so into eating the cake they don’t even bother to look up at you. For my shoot, it was difficult because as soon as she saw the cake she was happily eating, although she still mad at me for having ignored her. Because of that, her face is still a little bit blotchy from the crying and I feel like her eyes say it all.

How to Edit Cake Smash Photos
Once you’ve taken your photos it’s time to edit them! I always say it but I’ll say it again, the magic is in the editing! I really want to make sure that you take the time to go in and edit your pictures. Pick out your favorites, And load them into your favorite editing program. My favorite is Lightroom (or the LR app),but you can also use a ColorStory, Snapseed or PicMonkey. From there, you want to do things like lift the shadows, add some brightness, and increase the vibrancy (if you like your photos bright and colorful like I do!). Then you want to export them from there and save them into a folder on your computer somewhere you can easily access them in the future.


DIY Milk Bath Photoshoot
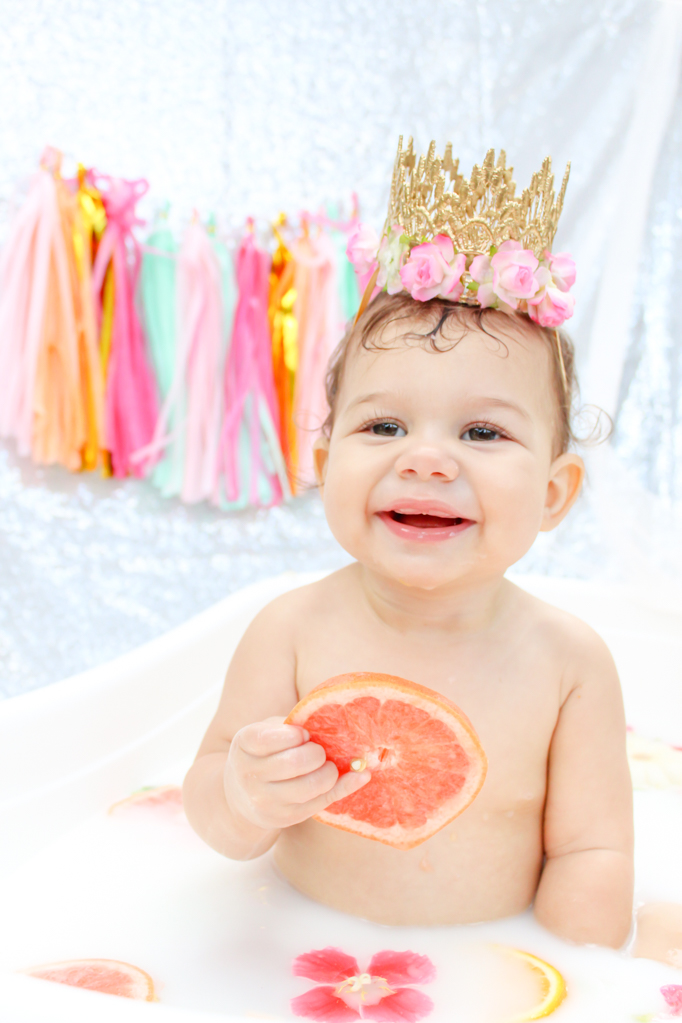
After the cake smash, you can also do a really cute cleanup session! Keep everything set up as it is, just add a milk bath and a few flowers, fruit, toys or rubber duckies. I used warm water and heavy cream to get a nice, milky bath without using a gallon of milk. We used her regular bathtub, but I would say that a round tub would probably be nicer. Then, I added a crown and placed her in the tub. At that point, I added in all my pre-sliced fruit (oranges and grapefruit) plus my flowers. I trimmed the stems and they floated nicely at the top of the water. The fruit was perfect because Hailey ate it while I took pictures. She LOVES citrus, especially lemons!



So, that’s all there is to it! It’s actually really simple to do a great DIY cake smash session with your baby. Even if you cannot hire a professional photographer, I think it’s really important to capture the special moments with your baby. If you’re interested in improving your pictures further, I have an extremely affordable class for moms so they can learn how to take professional photos of their baby. It’s called Dreamy Baby Photography and teaches you how to set up a great shoot, how to make sure you got the best lighting in your home or outside, and how to keep your baby happy. Additionally, I go over how you can sort your photos with ease and edit them in a flash. I’ll even teach you how to “copy and paste” your edits! You can find that right here.