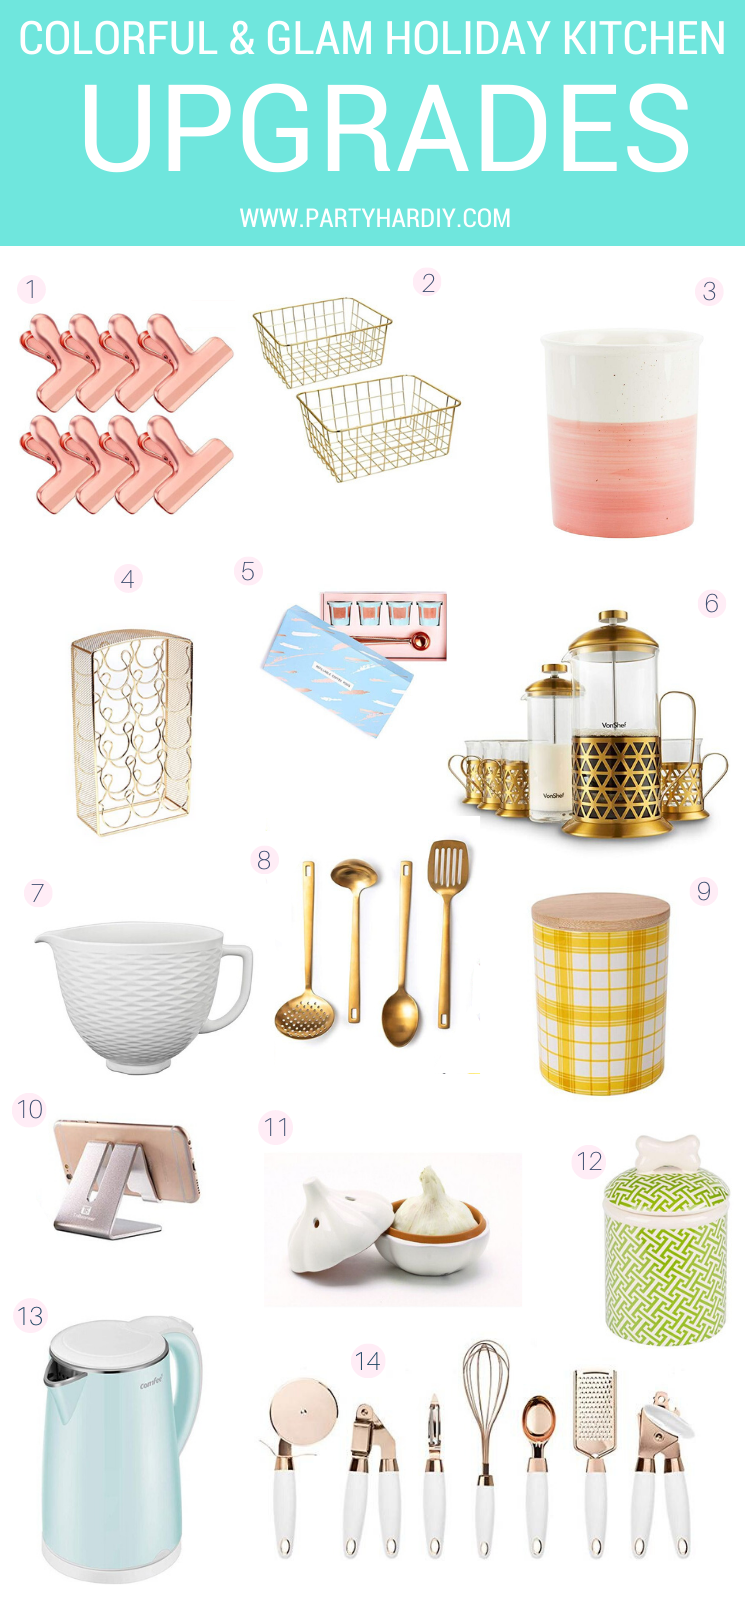
Gift Guide: Balloon Animals
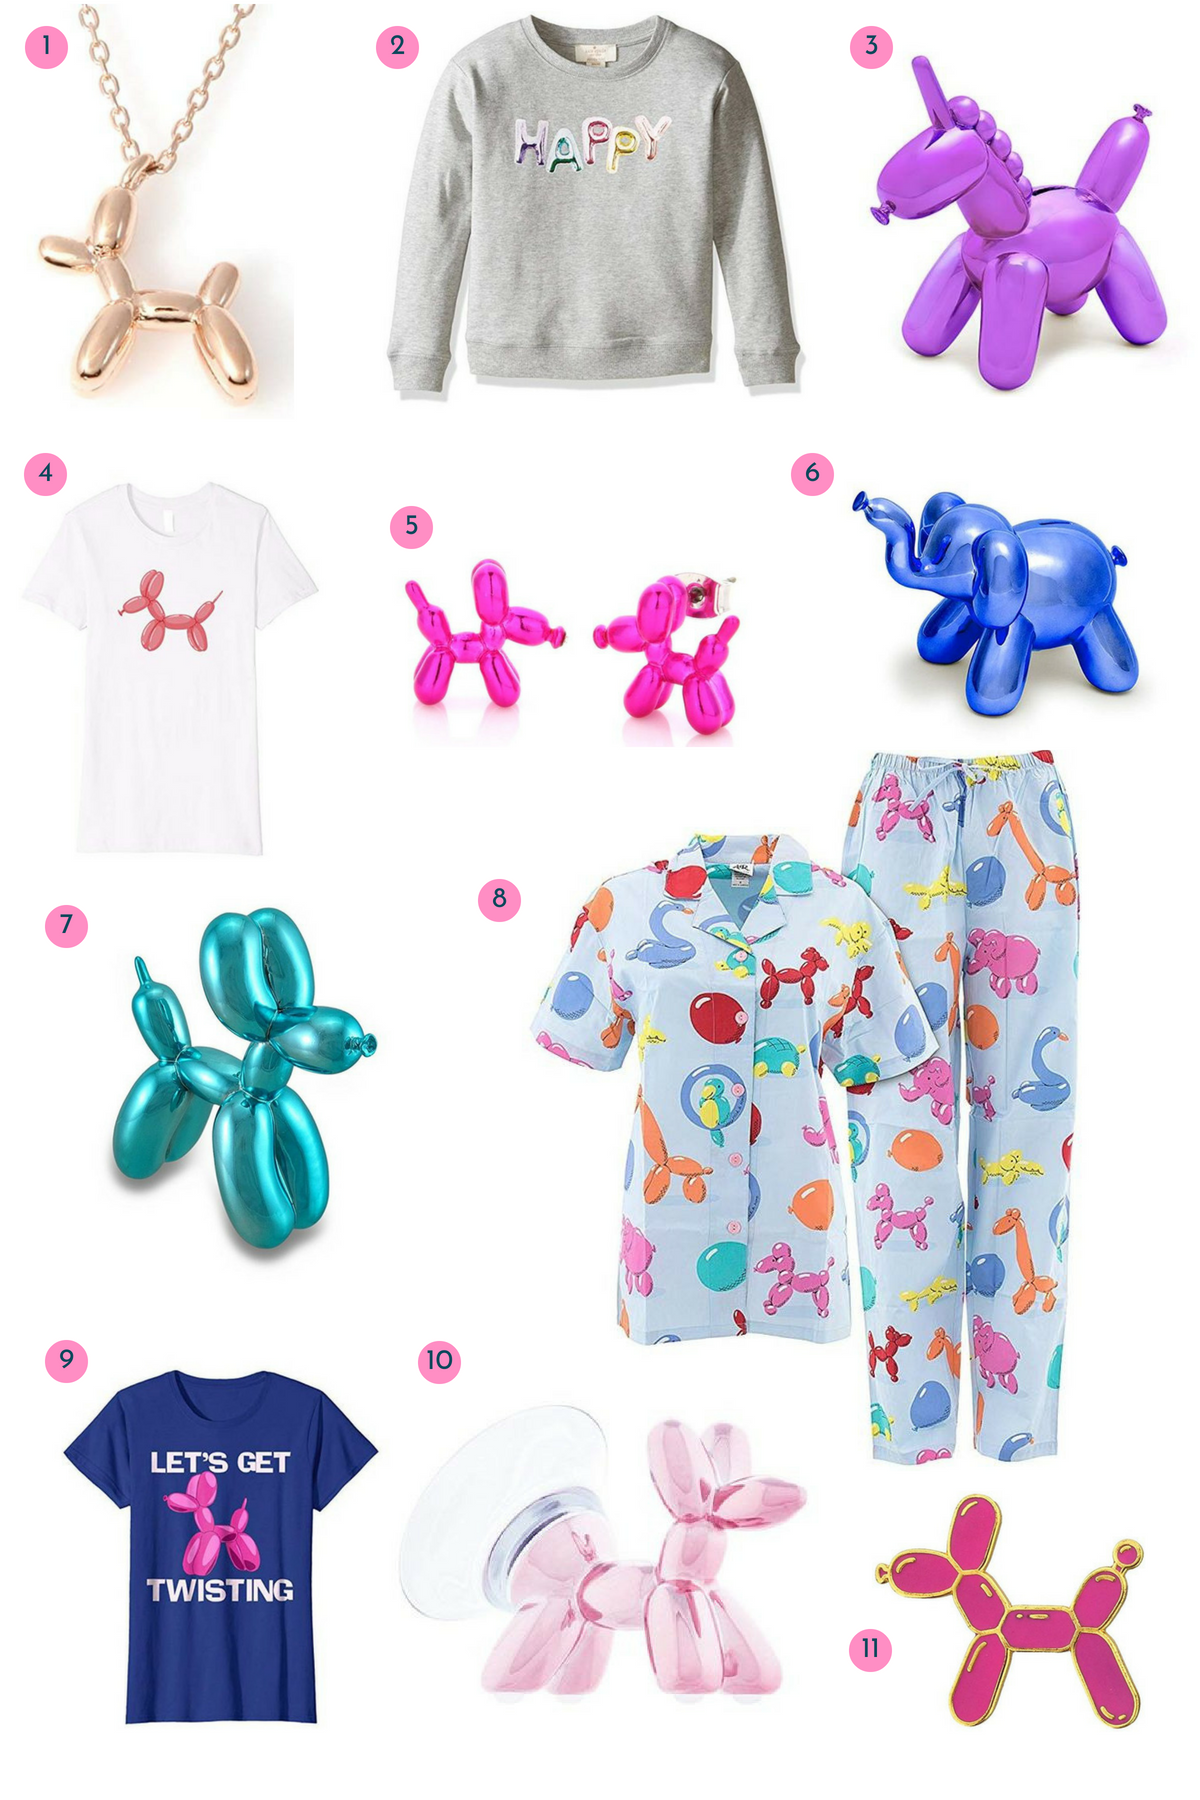
Not sure if it's just me, but I have a slight obsession with balloon animals. As I had mentioned, I am looking to reduce my waste when it comes to parties so I'm going to abstain from using real balloons. However, these cute balloon animal items are meant to be re-used, reworn, and displayed for years to come! If you're got a soft spot for balloon animals, check out my gift guide on all the best items to get! We've got jewelry, clothing, statues, piggy banks and more!

*This post contains affiliate links

Balloon Animals.png

1. Rose Gold Necklace 2. Happy Girls Sweatshirt 3. Purple Unicorn Piggy Bank 4. White T-Shirt 5. Pink Dog Earrings 6. Blue Elephant Piggy Bank 6. Teal Dog Statue 7. Balloon Animal PJ’s 8. Let’s Get Twisting T-Shirt 9. Blush Dog Phone Holder 10. Pink Dog Pin

Am I alone in this obsession with balloon animals? I just love them! What do you think about balloon animals? Love em? Hate em? Let me know in the comments below!

DIY Animal Sweater Necklace

Last month, I made some awesome Animal Sweater Ornaments for my pink mini-tree and I just couldn't bear to put them away! So, what's a girl to do? Re-purpose them into something that can be worn year-round! (or, at least, all winter long.) These animals in sweaters are so cute that everyone wants them. I only wore these twice and I had several questions about where I got them! They would also make a great gift for a winter or animal/dinosaur-themed party, or even as party favors! Overall, I think they're the freakin' cutest and they're so much fun to make!

These animals in sweaters are so cute that everyone wants them! They would make a great gift for a winter or animal/dinosaur-themed party, or even as party favors! Click for the DIY. #diyjewelry #handmadejewelry #diygifts

You will need:

Plastic animals (here and here)
Acrylic paint (here)
Felt (similar here)
Screw eyes (similar here)
Glitter (here)
Nylon cord (here)
Jump rings & clasps (similar here)
Beads (From Joann, like these but in pink & orange) 
Toothpicks
Gluegun
Jewelry tools (here)
Scissors (here)

Directions:

These animals in sweaters are so cute that everyone wants them! They would make a great gift for a winter or animal/dinosaur-themed party, or even as party favors! Click for the DIY. #diyjewelry #handmadejewelry #diygifts

1. Paint a sweater onto your animals using your acrylic paint. I did it freehand, but you can always use some artist's tape if you don't have a steady hand. I did 2 coats.

2. While they dry, cut a few thin strips of felt for the scarf. Try to be mindful of how large the animals' necks are in comparison to the length and width of the scarf.

3. Paint your scarves with either a thin paint brush or a toothpick. I used the pointy side for the polka dots, and the edge for stripes. I used a paintbrush for the thicker stripes, but overall I mostly used toothpicks.

4. Once the animals are dry, add glitter to the edge of the sweater to jazz it up and provide a clean edge. I used glitter paint, but you can achieve a similar look by using a small amount of equal parts glue and glitter to create your own paste/paint. I found that a toothpick was the perfect tool to get the glitter paint on in a thin line.

5. Glue your scarf in place. I used a small dab of hot glue on the scarf to shut it. If it moved around too much, I added a small dab of glue on the animal to secure it in place.

6. Using your pliers, screw the screw eye into place. I first took the pointy screw side and twisted in to make a small hole, then I used my pliers to twist the screw eye into place. When it gets to a point that it's mostly in, I recommend using your hand to twist it all the way in, so that your pliers don't scratch the paint.

These animals in sweaters are so cute that everyone wants them! They would make a great gift for a winter or animal/dinosaur-themed party, or even as party favors! Click for the DIY. #diyjewelry #handmadejewelry #diygifts

7. Cut your string the length you want it to be plus a little extra. Create a Larks Head Knot to secure the thread to your animal pendant. I also added a regular knot after, so that it stayed in place, nice and snug and secure :) 

8. Add your beads. I only wanted a few, so I did 3 neon pink and orange on each side. Be sure your bead hole is big enough for your string, and trim as you go along so that you have a nice, compact edge to thread the beads with. I found that mine got "fat" after a bead or two and needed to be trimmed off.

9. Attach your clasp to one crimp, and your jump ring to another crimp, and attach them to your cord. 

These animals in sweaters are so cute that everyone wants them! They would make a great gift for a winter or animal/dinosaur-themed party, or even as party favors! Click for the DIY. #diyjewelry #handmadejewelry #diygifts
These animals in sweaters are so cute that everyone wants them! They would make a great gift for a winter or animal/dinosaur-themed party, or even as party favors! Click for the DIY.
These animals in sweaters are so cute that everyone wants them! They would make a great gift for a winter or animal/dinosaur-themed party, or even as party favors! Click for the DIY. #diyjewelry #handmadejewelry #diygifts

How cute are these necklaces?! I'm so glad I get to re-use those ornaments and be able to see them daily! I really love re-purposing little animal toys, as exhibited by my Circus Animal Drink StirrersZebra Party Tray, and Animal Sweater Ornaments.  

So, what else would you like to see these animal toys made into? Let me know in the comments below!

DIY Animal Sweater Ornaments (Perfect for Mini-Trees!)

It's beginning to look a lot like Christmas! While I usually decorated in traditional red and green growing up, my dad got us a little 3-foot PINK tree one year. It was the cutest thing! We decorated it with a few small ornaments, and basked in its pretty pink glow. 

Although I don't think I could EVER get my husband to agree to a pink tree in our living room (unless I have 7 daughters, and we all take a vote!) I did get myself a tiny pink mini-tree for the attic. And this mini-tree needed some fun ornaments to go with it. I had stumbled upon this puppy ornament from Neiman Marcus while browsing Pinterest, and knew I needed to make my own version! A few days, 2 coats of paint, and some glitter later, I was ready with an army of festive little animals! The best part (aside from how adorably colorful they are) is that they're not breakable! Plus, you can make them in any color scheme you'd like. So, pop on a Christmas movie, grab your supplies, and get crafting!

You need these festive friends on your tree! The best part (aside from how adorably colorful they are) is that they're not breakable! Plus, you can make them in any color scheme you'd like. So, pop on a Christmas movie, grab your supplies, and get c…

You will need:

Plastic animals (here and here)
Acrylic paint (here)
Felt (similar here)
Screw eyes (similar here)
Glitter (here)
Toothpicks
Gluegun
Scissors
Pliers
Embroidery floss (similar here)

Directions:

You need these festive friends on your tree! The best part (aside from how adorably colorful they are) is that they're not breakable! Plus, you can make them in any color scheme you'd like. So, pop on a Christmas movie, grab your supplies, and get c…

1. Paint a sweater onto your animals using your acrylic paint. I did it freehand, but you can always use some artist's tape if you don't have a steady hand. I did 2 coats.

2. While they dry, cut a few thin strips of felt for the scarf. Try to be mindful of how large the animals' necks are in comparison to the length and width of the scarf.

3. Paint your scarves with either a thin paint brush or a toothpick. I used the pointy side for the polka dots, and the edge for stripes. I used a paintbrush for the thicker stripes, but overall I mostly used toothpicks.

4. Once the animals are dry, add glitter to the edge of the sweater to jazz it up and provide a clean edge. I used glitter paint, but you can achieve a similar look by using a small amount of equal parts glue and glitter to create your own paste/paint. I found that a toothpick was the perfect tool to get the glitter paint on in a thin line.

5. Glue your scarf in place. I used a small dab of hot glue on the scarf to shut it. If it moved around too much, I added a small dab of glue on the animal to secure it in place.

6. Using your pliers, screw the screw eye into place. I first took the pointy screw side and twisted in to make a small hole, then I used my pliers to twist the screw eye into place. When it gets to a point that it's mostly in, I recommend using your hand to twist it all the way in, so that your pliers don't scratch the paint.

7. Add a small piece of embroidery floss to hang.

You need these festive friends on your tree! The best part (aside from how adorably colorful they are) is that they're not breakable! Plus, you can make them in any color scheme you'd like. So, pop on a Christmas movie, grab your supplies, and get c…

Dinosaur ornaments!! I mean, how stinking cute are these?! I know that dinosaurs could never exist among the other animals, but maybe a sweater and a cute scarf could have saved them from extinction.

You need these festive friends on your tree! The best part (aside from how adorably colorful they are) is that they're not breakable! Plus, you can make them in any color scheme you'd like. So, pop on a Christmas movie, grab your supplies, and get c…

How cute are these ornaments?! This has become one of my favorite and most fun projects to make on the blog! I really love re-purposing little animal toys, as exhibited by my Circus Animal Drink Stirrers and Zebra Party Tray. You can also use larger toys for a regular-sized tree, but these were perfect for my tiny pink mini-tree! Oh, and did I mention that they make a great necklace? Because they do!

You need these festive friends on your tree! The best part (aside from how adorably colorful they are) is that they're not breakable! Plus, you can make them in any color scheme you'd like. So, pop on a Christmas movie, grab your supplies, and get c…

Will these ornaments be joining your tree this year? Or, perhaps your kids' tree?! Let me know what you plan to make in the comments below!

DIY Zebra Party Tray

Did you know that in high school, there was a period of time that I wanted to be an interior decorator? I imagined myself creating gorgeous, perfectly curated homes filled with amazing goodies. I was eventually talked out of it, but I still have a desire to create a unique and beautiful home for my fiancé and myself. Although it's been a learning curve, I'm starting to figure out my style and realizing what works and what doesn't. I love to fill my home with one-of-a-kind, whimsical purchases. The kind of stuff that makes people want to look around and wonder where the heck I found this amazing item. But, my absolute, very FAVORITE thing to put inside my home is anything I made myself. I love telling people I made things. There's no better feeling in the world.

DIY Zebra Party Tray. Click for the full how-to!

The reason I love this zebra tray is because there really isn't anything else like it out there! I think it adds such a fun feel to any room. You can use it on your desk to hold your paperwork, on your coffee table to hold magazines, or in your kitchen to hold flowers and a notepad. It's also a great party tray for holding cocktails! The best part of all is that it's super easy (and cheap!) to make.

*This post contains affiliate links.

DIY Zebra Party Tray. Click for the full how-to!
DIY Zebra Tray. Click for the full how-to!

You will need:

DIY Zebra Tray. Click for the full how-to!

Aluminum baking tray (mine was from the dollar store, similar here)
Spraypaint (similar here)
Primer & gloss top coat (similar here and here)
Zebra figurines (here
E6000 glue (here)

How To:

DIY Zebra Tray. Click for the full how-to!

1. Purchase a tray. You'll want to look for something with a wide handle on either side, so that you can adhere your plastic animal. Also, be sure to avoid any trays with holes for hanging or too much branding. If you want to save a step, purchase a tray that you don't need to spray paint. For me, purchasing a baking tray ended up being the cheapest route.

DIY Zebra Tray. Click for the full how-to!

2. Spraypaint your tray using the color of your choice. I chose a glossy medium pink, but I think this tray would look AH-MAZING in yellow. I just didn't have any yellow spray paint on hand, and it was one of those rare 60 degree days in February, so I had to work with what I had. Be sure to prime it first and use a topcoat. If not, it'll be easy to scratch, and the paint won't adhere as well. Trust me... I speak from experience!

DIY Zebra Tray. Click for the full how-to!

3. Using E6000 glue, put a drop of glue on each hoof/foot, and wait for it to cure for 2 mins. Then place it down on the widest part of your handle. Let dry 24-48 hours before handling.

DIY Zebra Tray. Click for the full how-to!

This tray is the perfect size for holding paperwork on your desk! I have a love/hate relationship with paper, so I love that this cute tray keeps everything organized while making me smile.

Psst- Interested in the printable above? Just fill out this form to get our FREE Anatomy of a Pinterest Party guide!

DIY Zebra Tray. Click for the full how-to!

And, when it's time to party, you can kick those papers out and grab your drinking glasses! Let's take a moment to say RIP to the adorable pink ombre cup. My fiancé's brother accidentally broke one yesterday :(

DIY Zebra Tray. Click for the full how-to!

The teal glasses are from Pioneer Woman and are awesome! The cotton candy garland, party hats, and animal drink stirrers are all projects from the blog.

DIY Zebra Tray. Click for the full how-to!
DIY Zebra Party Tray. Click for the full how-to!

So what do you think of this zebra tray? You can create it with any animal. I also bought some schnauzers, and can't waittt to make another tray with them! Do you have any DIY projects in your home decor? Let me know about them in the comments below!

DIY Circus Animal Drink Stirrers

2017 is off to a wild start, huh? Call me psychic, but I see a lot of drinking in our future. It's best that we get prepared and start crafting the cutest barware, starting right here with these circus animal drink stirrers. These party animals are sure to brighten up your day, no matter what's going on. As a bonus, they're so easy to make that you can create a set for yourself, and a few additional sets to give your friends as gifts. These are easy enough to make on your own, but I had the assistance of my handy fiancé. If you've got a guy (or gal!) in your life, this could be a fun bonding experience and a cool thing to whip out at parties. You'll excitedly proclaim "we made these!" as all your friends ooh and ahh. It'll be magical. Ok, enough talk already. Let's get to crafting, shall we? ;)

*Contains affiliate links

These party animals are sure to brighten up your day, no matter what's going on. As a bonus, they're so easy to make that you can create a set for yourself, and a few additional sets to give your friends as gifts. Click for the full tutorial!

You will need: 

These party animals are sure to brighten up your day, no matter what's going on. As a bonus, they're so easy to make that you can create a set for yourself, and a few additional sets to give your friends as gifts. Click for the full tutorial!

Plastic circus animals (here)
Clear plastic stir sticks (here)
Glossy acrylic paint (similar here)
Drill (here)
11/64 inch drill bit (here)
Slip joint pliers (here)
E6000 glue (here)
Electric tape (here)
 

These party animals are sure to brighten up your day, no matter what's going on. As a bonus, they're so easy to make that you can create a set for yourself, and a few additional sets to give your friends as gifts. Click for the full tutorial!

Step 1: Take your circus animal and place the drill bit against it at desired depth. Put a small piece of tape at the stop point to make sure you don't drill too far.

These party animals are sure to brighten up your day, no matter what's going on. As a bonus, they're so easy to make that you can create a set for yourself, and a few additional sets to give your friends as gifts. Click for the full tutorial!

Step 2: Using your slip joint pliers, hold the circus animal steady.

These party animals are sure to brighten up your day, no matter what's going on. As a bonus, they're so easy to make that you can create a set for yourself, and a few additional sets to give your friends as gifts. Click for the full tutorial!

Step 3: Slowly and carefully drill a hole in the middle of your circus animal until you hit the tape marker. Repeat for all your animals.

These party animals are sure to brighten up your day, no matter what's going on. As a bonus, they're so easy to make that you can create a set for yourself, and a few additional sets to give your friends as gifts. Click for the full tutorial!

Here's a little behind the scenes sneak peek of my fiancé in action. He's so handy and I'm so lucky to have him! All I did was briefly explain what I needed. He led me to the garage (his version of my studio), searched around his workbench and collected a few supplies. Then we did one drink stirrer as a test and bam! It came out perfectly :)

These party animals are sure to brighten up your day, no matter what's going on. As a bonus, they're so easy to make that you can create a set for yourself, and a few additional sets to give your friends as gifts. Click for the full tutorial!

Step 4: Paint your circus animals using glossy acrylic paint. You can also use spray paint (which would be faster and probably better coverage), but I'm in NYC and it's freakin freezing outside haha.

These party animals are sure to brighten up your day, no matter what's going on. As a bonus, they're so easy to make that you can create a set for yourself, and a few additional sets to give your friends as gifts. Click for the full tutorial!

It took me about 2-3 coats of paint to cover them. I did one overall coat, then a thicker coat on each side. Finally, I did touch-up where I covered any missed spots, or anywhere that I accidentally touched.

These party animals are sure to brighten up your day, no matter what's going on. As a bonus, they're so easy to make that you can create a set for yourself, and a few additional sets to give your friends as gifts. Click for the full tutorial!

This reminds me of that scene in The Lion King where all the animals gather at Pride Rock to see Simba for the first time. But the much more colorful version. The circle of life.

These party animals are sure to brighten up your day, no matter what's going on. As a bonus, they're so easy to make that you can create a set for yourself, and a few additional sets to give your friends as gifts. Click for the full tutorial!

Step 5: Assemble your stir stick by putting the smaller side into the hole you drilled. It should be a fairly tight fit and not even need glue! If you prefer them to be in more permanently, put a tiny dab of E600 glue on your stir stick before assembling. Let dry according to directions. 

These party animals are sure to brighten up your day, no matter what's going on. As a bonus, they're so easy to make that you can create a set for yourself, and a few additional sets to give your friends as gifts. Click for the full tutorial!

And now you're ready for a day at the circus! I think these stirrers would make a perfect gift for friends, along with a couple of cute drinking glasses. I'm also trying to stop myself from bringing some to work so that I can have a party with my morning cup of tea ;) So what day you think of these drink stirrers? How do you plan to use them?