DIY Metallic Painted T-Shirt

For my first project on My Magic Mess, I painted a t-shirt. I wasn't 100% happy with the project but it's easy to do and still pretty cute. So, I figured why not do a blog post about it?! This is a project that anyone can do, which I think is the best part. It's the perfect way to give an old t-shirt a new look! I think we all have a few old ones lying around that could use an update.

Metallic Tshirt-3.jpg

You will need:

T-Shirt (similar here)
Paintbrush (similar here)
Metallic Paint (here)
Cardboard
Iron or Dryer

Directions:

1. Put a piece of cardboard inside your shirt to protect it.

2. Paint the collar of your shirt using 2 coats of paint. I started in the back then moved to the front.

3. Let dry for 24 hours, then heat set it using an iron or the dryer.

Metallic Tshirt-6.jpg

This project is so easy to do that literally anyone can do it! If you find that you can't keep the edge straight, then keep going. Otherwise, you can make the line "messy" intentionally and it'll still be cute. What do you think about this easy project? Will you be making one?! Let me know in the comments below!

Rhinestone Ribbon Headband

As a mom, it seems like I’m constantly rocking that mom bun. Whether it’s because my hair is dirty, or because I throw it up in a bun to focus, it always somehow ends up on top of my head. For this week’s My Magic Mess Challenge I decided to make something easy and fun to cover up all those baby hairs I now have. You know, the joys of postpartum hair loss, hah! In addition to being very easy to make, these headbands are super affordable. Pop on a movie while you make it (I watched The First Wives Club on Netflix for the first time!) or grab a few girlfriends and get to crafting together. Either way, you’ll easily have a favorite new hair accessory!

Rhinestone-Headband-6.jpg

You will need:


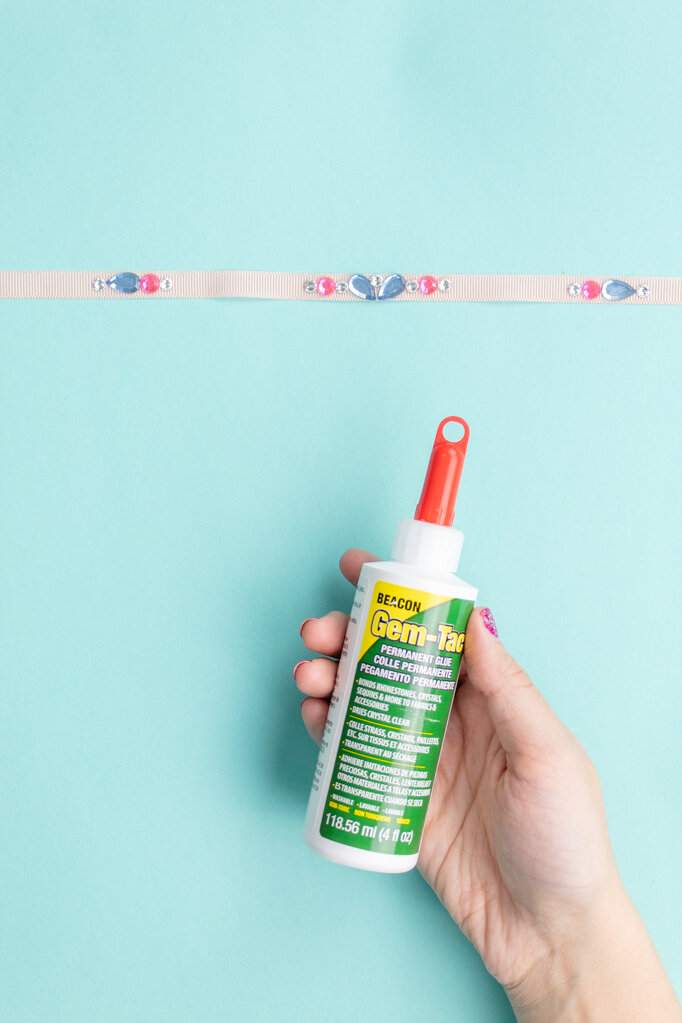
Beacon Gem-Tac (here)
Rhinestones (similar here and here)
Ribbon (similar here)
Scissors (similar here)

Rhinestone-Headband-1.jpg

Directions:

1. Measure out enough ribbon to make a headband and tie a bow. I used 42 inches.

2. Create a fun pattern with your rhinestones. I added a main design in the middle, with a matching design on the sides for extra sparkle.

3. Glue the rhinestones on with Beacon Gem-Tac. If too much comes out, you can use a toothpick to add a small dot of glue onto your rhinestone.

Rhinestone-Headband-2.jpg

To tie the headband, I recommend placing it on your head, tying it once, and placing a bobby pin at the back to hold it in place. Then you can tie a bow and remove the bobby pin!

Now you can add some extra sparkle to every outfit.

DIY Monogram Christmas Stocking

About 6 years ago, my husband I grabbed some stockings from Target to hang up on our TV unit. They were cute and simple- red and white stockings with a letter for each of our names. As our family grew, we added additional stockings for cats, babies and a dog. The result was 7 matching stockings that I didn’t even necessarily like anymore! It seemed silly to buy new stockings when I had 7 perfect good ones, so I’ve just been putting them up year after year. However, this year I decided I would give them a bit of an update so that they can match my style more! This is something you can easily do to update any stocking, include those ordinary cheap red and white ones you can find anywhere. And it’s SO affordable that it’s almost free- I bet you have most of this stuff at home already!

*This post contains affiliate links

diy-monogram-stocking-12.jpg

You will need:


Yarn (similar here)
Glitter paper (similar here)
Felt (similar here)
Scissors (similar here)
Glue gun (similar here)
Pencil & wax paper /printer (similar here)
Pom-pom maker (here)
Cardboard 
Old stocking (similar here)

collage 1.png

Directions:

  1. The first step is to create your letter for your stocking. You have 3 options:

    • If your stocking already has a letter: Trace over your current letter by using wax paper.

    • Already has a letter, option 2: Print out a template on your computer of a similar sized font that will cover it completely.

    • If your stocking doesn’t have a letter: Print out a template of a letter you like and a slightly larger version of it. A great option for this would be to use a font with an outline, since it will naturally have 2 sizes within it. Something like this.

  2. Cut your glitter paper slightly larger than your felt. In the end, you want to create a felt letter that is slightly larger than your original letter on your stocking.

  3. Glue your felt letter onto your glitter card stock.

  4. Place a piece of cardboard inside your stocking to prevent the glue from seeping to the backside. Glue your letter in the center or over your old letter.

  5. Create pom-poms using a pom-pom maker. You can find directions for that here. You can also create tassels by following this this tutorial here. Feel free to embellish using jingle bells too!

  6. Attach the pom-poms, tassels and any other embellishments to the hook that is used to hold your stocking up. You can also either glue or sew them onto the inside flap, or use a safety pin!

before after.png
diy-monogram-stocking-10.jpg

Then, hang up your fancy “new” stocking and admire your handiwork. You can totally change up your old holiday decor with this! I was able to take my traditional stockings in basic Christmas colors and change them to match my more colorful and fun aesthetic. They definitely feel more “me” now!

And that’s all there is to it! Now you’re got a great monogram stocking, or spruced up an old stocking to have a new look! Will you be giving your old stockings a new look? What colors do you use to decorate? Let me know your plans in the comments below!

DIY Jingle Bell Christmas Tassel Earrings

As soon as it’s socially acceptable (aka, right after Thanksgiving!) I go into full-on Christmas mode. I can be found wearing a Christmas sweater, reindeer antlers, or Christmas accessory at any given moment. Sometimes, all of the above! A great way to add some Christmas spirit is to wear some holiday earring. One of my favorite types of earrings is tassel earrings! They always add such a fun pop of color to an outfit. They add a LOT of drama but weigh practically nothing. They’re perfect! Since I love decking myself out for the holidays, especially Christmas, I created this fun DIY project so you can jingle everywhere you go!

*This post contains affiliate links.

jingle-tassel-earrings-6.jpg

You will need:

Embroidery floss (similar here)
Jingle bells (similar here)
Earring hooks (similar here)
Jump rings, optional (similar here)
Jewelry tools (similar here)
Scissors (similar here)

collage.png
  1. Make your tassel earrings by following these instructions. If you want thicker tassels, follow these instructions. Also, a note: if you try to use the first method (where you use the entire spool) and it gets tangled up, you can try using the second method (where you use cardboard) instead!

  2. Brush out your tassels to give them a nice fluff. I recommend using a comb although I used what I had handy- a Barbie brush!

  3. Now that your tassels are made, it’s time to make them into earrings! Attach a jump ring to the top of your tassel by looping it through the first string you tied at the top. Then, loop your earring hook through and close it. You want to make sure that the knots are at the back, so figure that out before you put the earring hook on. You can also skip the jump ring altogether and attach the earring hook directly to the string at the top.

  4. A note: I’d recommend getting a set of these clear earring backs so you don’t lose your earrings. I sadly lost one of the Halloween ones I made!

  5. Using a piece of embroidery floss, thread on your jingle bells. You can either use floss that is the same color (or similar color) or an alternating shade.

jingle-tassel-earrings-7.jpg
Cathy-Christmas.jpg
jingle-tassel-earrings-8.jpg

These are a great stocking stuffer or even something to add to an advent calendar! If you want a fun way to display them, try this tutorial to turn them into fun ornaments!

What do you think about these tassel earrings? Will you be having a Christmas movie marathon and make them with your girlfriends? Let me know in the comments below!

DIY No-Sew Wine & Liquor Bag

It’s no secret that I love to make Christmas crafts! I’ve got a whole bunch of projects here on the blog but I’m always on the lookout for more! This time, I decided to make a bag for your wine and liquor gifts. It’s so easy to make and the best part of this project is that it’s NO SEW! Because as crafty as I am, sewing is NOT my strong suit! This project is a great way to use up all that fabric and ribbon in your stash. Because let’s be real- we all have a giant stash of fabric that we hoard!

no-sew-wine-bag-11.jpg

You will need:

Fabric (a fat quarter from Joann Fabrics makes 2 bags)
Ribbon (similar here)
Fabri-Tac (here)
Scissors (similar here)
Iron (similar here)

collage.png

Directions:

  1. Cut your fabric in half or approx 11 x 18 for a standard small bottle of wine. If you’re gifting a larger or double bottle, you’ll need to adjust for that.

  2. Iron out all the wrinkles on your fabric, using water or steam for any deep folds.

  3. Fold your edges down and iron it for a smooth edge. I started with the sides and then did the top and bottom. You don’t want to fold too deep on the sides since it’ll be a little tight already.

  4. Glue the top fold closed using your fabric glue. This is so that it has a nice edge when you put the bottle in.

  5. Use your fabric glue in a zig zag pattern along the folded edge and fold shut so that the WRONG side is on the outside.

  6. Glue your bottom edge shut with a zig zag of glue.

  7. Once it’s all dry, turn it right side out.

  8. Place your bottle inside and tie a ribbon bow at the top. Double sided ribbon works best for this, since you can see both sides when you tie the bow.

Add a gift tag and place the bottle bag under your tree. The best part about this project is that the bag can be reused again and again! WAY better for the environment than a paper bag that gets tossed away after its first and only use. Also, these are SUPER cute and also double as Christmas decor! I can totally see making them for your wine bottles on your bar cart, and even making tiny versions for mini wine bottle favors at your holiday party!

no-sew-wine-bag-9.jpg
no-sew-wine-bag-14.jpg
no-sew-wine-bag-10.jpg
no-sew-wine-bag-16.jpg

So, what do you think about these wine bottle bags? Will you be making them for friends and family? I’ve never wanted to gift liquor more! Let me know who will be getting these in the comments below.