DIY Animal Sweater Necklace
/Last month, I made some awesome Animal Sweater Ornaments for my pink mini-tree and I just couldn't bear to put them away! So, what's a girl to do? Re-purpose them into something that can be worn year-round! (or, at least, all winter long.) These animals in sweaters are so cute that everyone wants them. I only wore these twice and I had several questions about where I got them! They would also make a great gift for a winter or animal/dinosaur-themed party, or even as party favors! Overall, I think they're the freakin' cutest and they're so much fun to make!


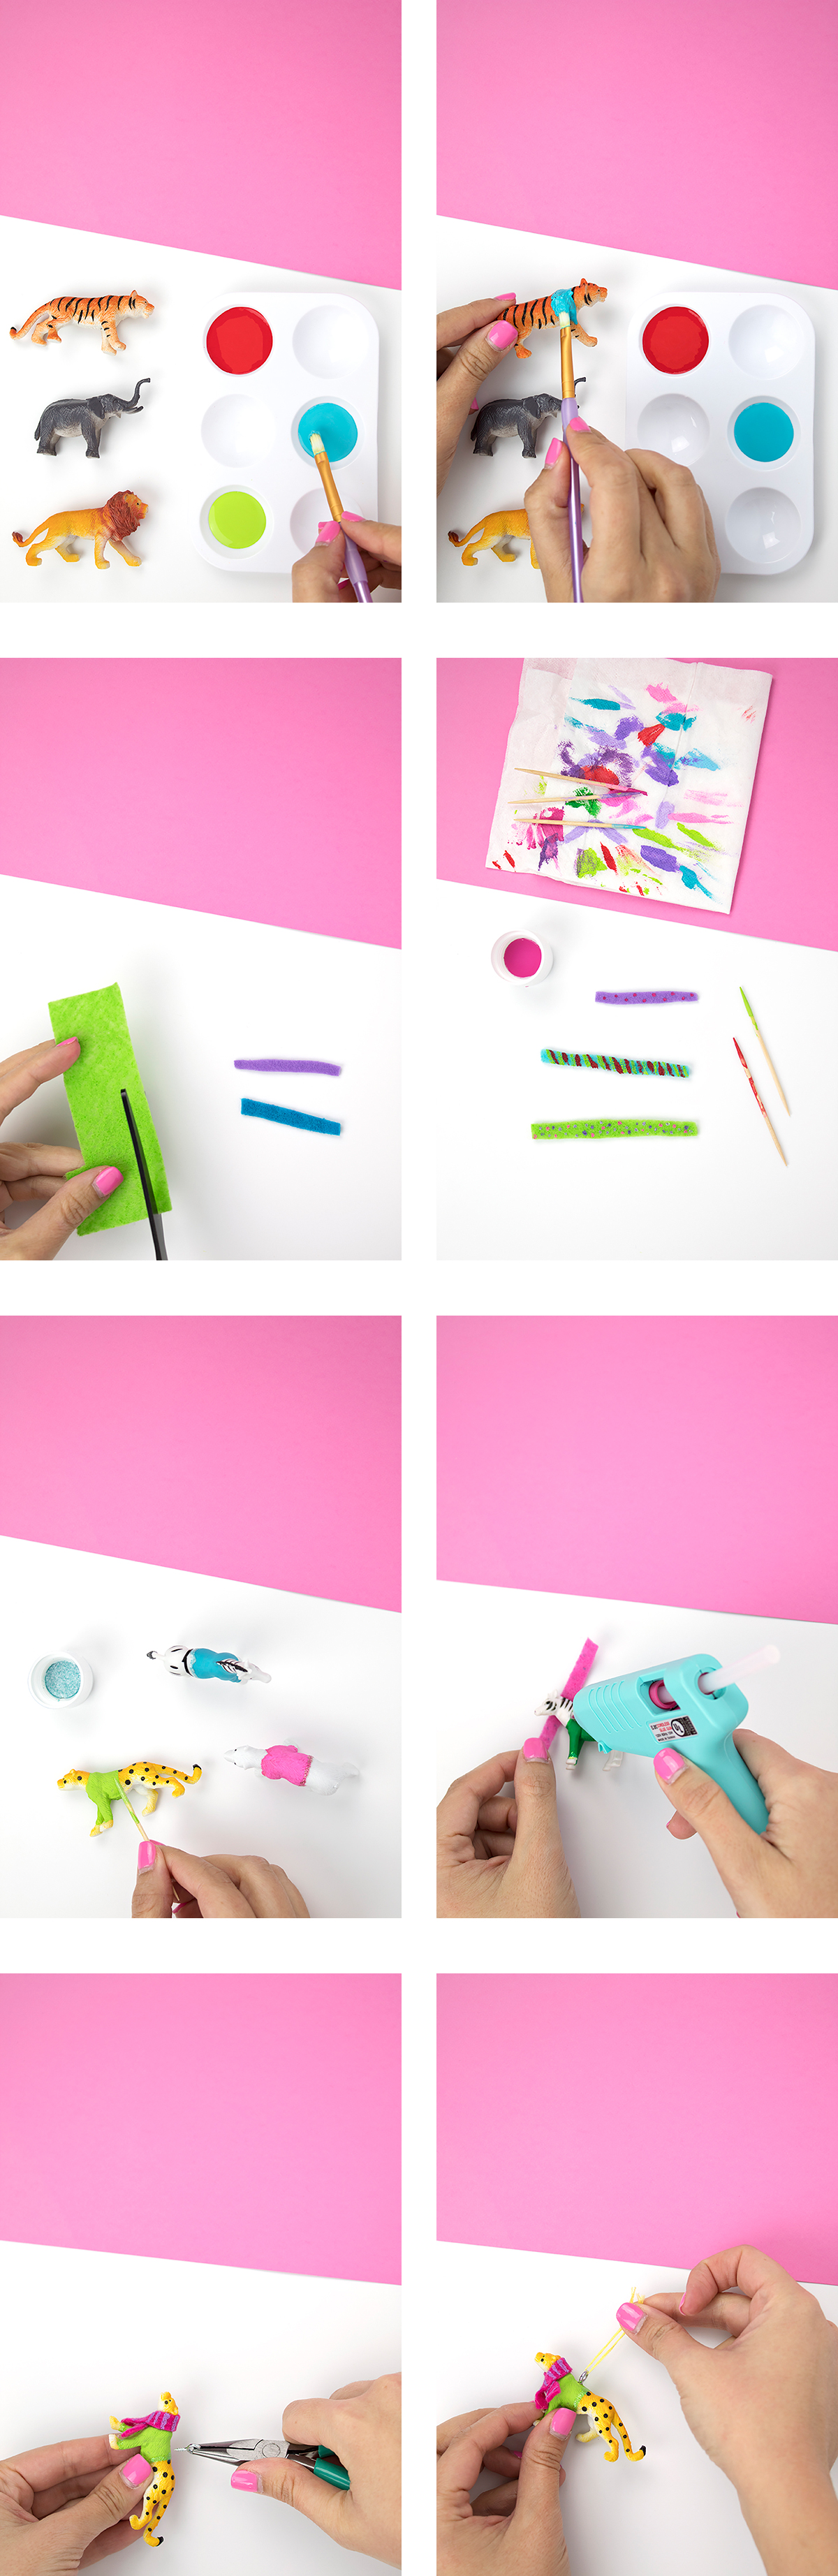
1. Paint a sweater onto your animals using your acrylic paint. I did it freehand, but you can always use some artist's tape if you don't have a steady hand. I did 2 coats.
2. While they dry, cut a few thin strips of felt for the scarf. Try to be mindful of how large the animals' necks are in comparison to the length and width of the scarf.
3. Paint your scarves with either a thin paint brush or a toothpick. I used the pointy side for the polka dots, and the edge for stripes. I used a paintbrush for the thicker stripes, but overall I mostly used toothpicks.
4. Once the animals are dry, add glitter to the edge of the sweater to jazz it up and provide a clean edge. I used glitter paint, but you can achieve a similar look by using a small amount of equal parts glue and glitter to create your own paste/paint. I found that a toothpick was the perfect tool to get the glitter paint on in a thin line.
5. Glue your scarf in place. I used a small dab of hot glue on the scarf to shut it. If it moved around too much, I added a small dab of glue on the animal to secure it in place.
6. Using your pliers, screw the screw eye into place. I first took the pointy screw side and twisted in to make a small hole, then I used my pliers to twist the screw eye into place. When it gets to a point that it's mostly in, I recommend using your hand to twist it all the way in, so that your pliers don't scratch the paint.

7. Cut your string the length you want it to be plus a little extra. Create a Larks Head Knot to secure the thread to your animal pendant. I also added a regular knot after, so that it stayed in place, nice and snug and secure :)
8. Add your beads. I only wanted a few, so I did 3 neon pink and orange on each side. Be sure your bead hole is big enough for your string, and trim as you go along so that you have a nice, compact edge to thread the beads with. I found that mine got "fat" after a bead or two and needed to be trimmed off.
9. Attach your clasp to one crimp, and your jump ring to another crimp, and attach them to your cord.


How cute are these necklaces?! I'm so glad I get to re-use those ornaments and be able to see them daily! I really love re-purposing little animal toys, as exhibited by my Circus Animal Drink Stirrers, Zebra Party Tray, and Animal Sweater Ornaments.

So, what else would you like to see these animal toys made into? Let me know in the comments below!