The Simple Solution For Ruined Chairs

When we first purchased our house, I was going through a very gray phase. I had seen some cool homes that were very monotone and I liked the idea of purchasing neutral furniture so that I could add any color through my decorating. I figured, if I had gray furniture, I could add some colorful rugs, throws, pillows, etc. and swap them out for the seasons. But I mean… everything I got was gray. And I mean EVERYTHING. Couches, chairs, curtains, even the wall colors! It was never-ending and earned my home the nickname “50 Shades of Gray”. I couldn’t even be mad at that nickname… I’d earned it and within just a couple of months, I started to hate all the gray in my home. 

I sat there for 3 years, dreaming of a day when we could re-decorate. Getting all new furniture wasn’t in the plans so I just had to wait. In the meantime, I loathed my home and my furniture, especially my dining chairs. You see, we have 3 cats who were very well behaved in our apartment. They never scratched anything. However, as soon as we moved into our home, they decided they loved to scratch. Their top choice? My brand new (very grey) dining chairs. Within a few months, they went from pretty, fancy-ish chairs to destructed Western chic. My cats had shredded the edges which looked like bad fringe. Some of the chairs even had the foam sticking out! 

Looking to fix your upholstered chairs? I’ve got the perfect solution for you! Whether you need to pet proof your home or protect dining room chairs from kids, you’ll be able to do it in style. Click to see how I transformed my dining room for less …

Once again, I planned for a day when I could replace the chairs I had JUST spent several hundred dollars buying. And every time I would walk by that table, I would think about it. One day, I was perusing Amazon for a couch cover since our dog Lexie had been getting our (gray) couch super stinky, and that’s when I stumbled upon these awesome chair covers. I was so excited- I could get new chairs, without having to buy new chairs?! WHAT?!! The price was right, the style was perfect, and now I just needed to pick a color. 

Looking to fix your upholstered chairs? I’ve got the perfect solution for you! Whether you need to pet proof your home or protect dining room chairs from kids, you’ll be able to do it in style. Click to see how I transformed my dining room for less …

Oh, I forgot to mention the reason why my house was gray. You see, I went through a period where I was afraid I’d regret picking something in a specific color. I vividly remember it starting one time in college. I was trying to figure out which awesome iPod nano color I wanted, only to settle on the gray one because I was too afraid I’d end up regretting the blue. It only got worse from there, as I always picked a neutral color from then on. It was almost a way that I hid myself and my childish nature. The truth was that I loved colors, I just lacked the confidence to pick one.

Fast forward to the chair covers. I didn’t know which way to go. Did I choose gray again? But ugh… how about aqua blue, like the rest of our home? Meh. White? Taupe? Nothing in my house is taupe. So, I bookmarked it and put it aside for later. Here’s the thing- these chair covers are easily removable and affordable. So you know what I did? I BOUGHT THE FREAKIN PINK ONES. I thought they were so pretty and I imagined my husband being annoyed but I did it anyway. I figured, worst case, I can buy another set later to replace it with. I thought the pink would be SO cute with all my holiday decor!

Looking to fix your upholstered chairs? I’ve got the perfect solution for you! Whether you need to pet proof your home or protect dining room chairs from kids, you’ll be able to do it in style. Click to see how I transformed my dining room for less …

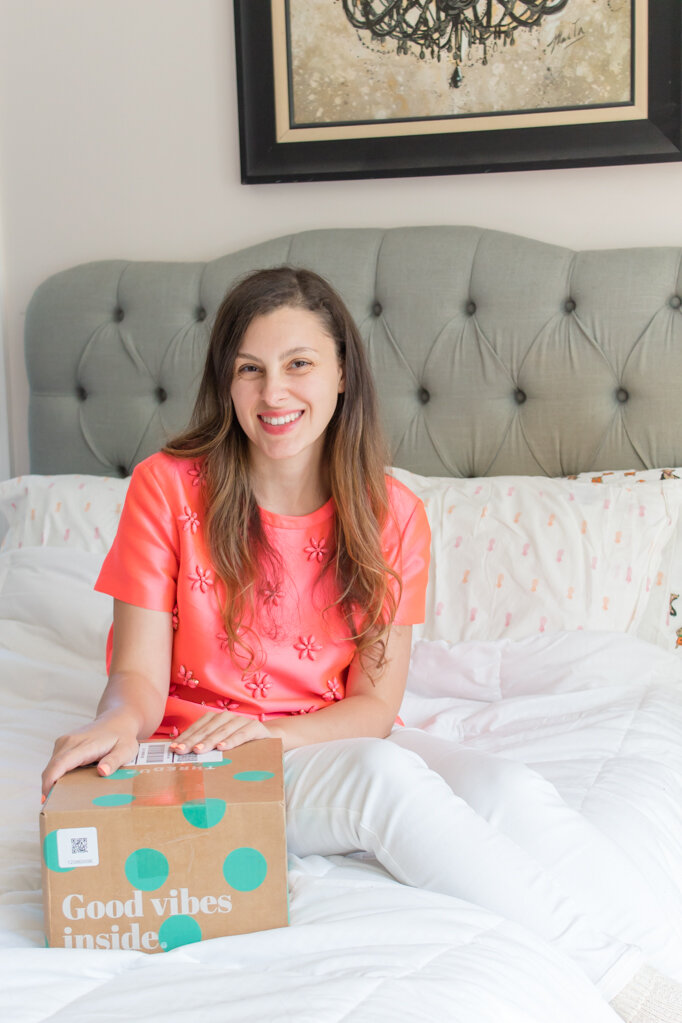
When the covers first arrived my husband was a little confused by the pink. But, once they were on, he said that it already looked so much better than before. No longer did we have shredded chairs that informed everyone that came to our door that we had 3 naughty cats. Instead, we were classy folks again.

These chair covers are machine washable, easy to put on, and come in so many colors. They’re really affordable (about $8/chair) and so soft! I no longer have to worry about guests coming over and dripping on the chairs, or having Hailey wandering around with her sticky fingers. If a cat lays down on the chair and covers it in fur? Eh, that’s ok too! I feel like I not only got a new look for my dining room, but I got some peace of mind too. If one cover gets horribly ruined, I can replace it. Much cheaper than if a chair gets ruined!

Looking to fix your upholstered chairs? I’ve got the perfect solution for you! Whether you need to pet proof your home or protect dining room chairs from kids, you’ll be able to do it in style. Click to see how I transformed my dining room for less …

I love our “new” dining room now. I’ve been covering our black Ikea table (that I also hate!) with a sequin tablecloth which is breaking up some of the darkness over there too. Slowly but surely, I am making changes to our home with a small budget. Although I may dream of having my amazing, Pinterest-worthy home some day, I can make small steps to improving the one I have. I guess from seeing everyone overhauling their furniture regularly, it made me feel like that was the only way to get a new look. Turns out, I could find my own way. A much more affordable way ;)

PS- You can find the DIY table runner here and the floral pumpkin DIY here!

I do plan to go back and smooth out some of those wrinkles, since I think I pulled them down a little too much which left a bunch of excess at the bottom. But overall, I’m SO happy with how they look! And, I love that I can give my living room a new look with ease.

So what do you think of these chair covers? Will you be getting a set for your chairs? They’re honestly great for cat owners and parents!

DIY Colorful Leaf Runner

My table is a constant dump zone at my house. Pretty much any flat surface becomes a place to put things down “just for a minute” aka a month. Because of this, I decided that my flat surfaces didn’t need to be clear, but they did need to not have clutter. The best way for me to do this was to decorate them! Since everything for fall has pretty much the same orange and brown color scheme, I figured I’d make my own table runner this year. Would you believe I made it with some leaves I got from the Dollar Tree?! Yep, just $3 for 3 packs of these bad boys, plus some acrylic paints that I had on hand. I say it all the time, but my favorite way to do crafts is by popping on a seasonal movie after everyone has gone to sleep and getting to crafting! This time, I watched The Object of My Affection (streaming on Hulu and HBO Go) with a glass of wine. In case you’ve never seen it, it’s The One Where Rachel Falls in Love With Phoebe’s Second Gay Ex-Husband, Mike. Just kidding- kinda. This project was a great way to get in the spirit, but I also think this would be fun to make while watching all the Friends Thanksgiving episodes in a row! You all know I’m a huge Friends fanatic, and I love to watch the holiday episodes.

The final result is a pretty (but not stuffy) table runner that you can use in your decor every year. I don’t recommend putting food on or near it, since it’ll probably stain the leaves. But, it’s perfect to use leading up to Thanksgiving dinner on your table, buffet or entry table!

Since everything for fall has pretty much the same orange and brown color scheme, I figured I’d make my own table runner this year to go with my colorful thanksgiving decor. Would you believe I made it with some leaves I got from the dollar store?! …

You will need:

Approx 300 leaves (from Dollar Tree or similar here)
Fabric glue (here)
Tulle roll (from Dollar Tree or similar here)
Wax paper (here)
Acrylic paint (similar here)
Scissors (similar here)

Since everything for fall has pretty much the same orange and brown color scheme, I figured I’d make my own table runner this year to go with my colorful thanksgiving decor. Would you believe I made it with some leaves I got from the dollar store?! …

Directions:

  1. Paint your leaves in your choice of colors. I used Martha Stewart paints because they’re nice and thick. The colors I used were Pumpkin, Mermaid Teal, Strawberry, Pink Raspberry, Mango and Moonstone Purple. I used lighter colored paints for lighter leaves, and moved up with the colors from there. I did 2 coats for the purple because it was light.

    • Note: I tried a few different methods for painting the leaves. The fastest method is to take a large box (like an amazon box!) unfold it, and place it across your table. Lay out your leaves in sections, and paint each section in your choice of colors. This allows for less thinking (just keep painting until you run out of leaves in your section) and also goes faster because you don’t have to stop to make more space or shuffle things around.

  2. Once your leaves have dried, assemble them on your tulle or fabric. You want to come up with a general plan for them, and then start gluing as you go! I used fabric glue so that it was still flexible to fold up and store away easily. Put down your wax paper as a buffer to protect your surfaces.

    • *Note #1: don’t use Fabri-Tac on varnished furniture.

  3. To get the same look I had, you’ll want to glue your leaves facing outwards along the edge of your tulle. Do this for the full perimeter. I didn’t cut my tulle (yet) because I wanted to make sure I had enough leaves!

    • *Note #2: Fabri-Tac took my nail polish off and kinda melted it. Be careful when using it with a manicure! I was wearing regular polish, not gel.

  4. Put a row of leaves going in between the leaves you just glued down, alternating the colors. I didn’t follow a pattern so that it looked natural.

  5. Put a leaf in the middle, alternating the direction. I wasn’t too cautious about bald spots or gaps because it added to the “tossed leaf” look. If you dislike that, you can pile them on but be sure you have enough leaves!

  6. After you glue down your leaves, peel it off the wax paper so it doesn’t get stuck on when it dries. I let mine dry laying flat, glue side up.

Since everything for fall has pretty much the same orange and brown color scheme, I figured I’d make my own table runner this year to go with my colorful thanksgiving decor. Would you believe I made it with some leaves I got from the dollar store?! …

That’s all folks! The most time consuming part of this project is painting the leaves. If you want to save time, you could always spray paint them instead! Personally, I find painting to be somewhat therapeutic which is why I always go for acrylic paint. Spray paint would also go on with better coverage, if you’re interested in more vibrant colors!

What do you think of this project? Will you be making it for your Thanksgiving decor? Where will you put it? Let me know in the comments below!

The DIY Holiday Photos Toolkit

Ho Ho Holy Poopsicles, the holidays are coming! If you're thinking that it seems like just yesterday you put that Christmas tree away, you're not alone! The holidays seem to sneak up on me every single year. I am definitely excited for them, but somehow never quite prepared. One thing that definitely gets pushed off is my holiday card photos! This year, I decided to take matters into my own hands and get those pictures done before Halloween even rolled around! If you're unsure how to even go about taking your own photos (that don't look as pathetic as a homemade gift that you whipped up at the last second) then I've got just the thing for you! I've rounded up 12 items I love using for my family photos, so you can shoot for success. Ya see what I did there?

*This post contains affiliate links

Looking to take your own holiday card photos? I’ve got my 12 essentials for DIY holiday photoshoots that will ensure success! #diyholidayphotoshoot #diyfamilyphotos #familyphotography

1. Tripod- If you want to try and take your own photos, I would highly recommend this tripod! It folds up really small, plus you can tilt the head so that you can take landscapes or portraits! It's light, compact and folds up small. It's perfect for taking on the go and storing in a closet when it's not in use. This is the exact one I use for my photos!

2. Phone Tripod Mount- If you want to attach your phone on this tripod, you'll need a special adapter. I use this one, which does the trick! You just swap out the head it comes with and then expand it for your phone. The great part is that it's adjustable, so you can use anyone's phone. I'd recommend checking the measurements if you have a newer iPhone though. Those things just keep getting bigger and bigger, so I'm not sure if this particular one will get big enough.

3. Mini Tripod- If you want a tiny tripod for a tabletop or even easier portability, try this one! I haven't used this one personally, but it had great reviews on Amazon. I'm considering getting one myself, especially since I like to take videos of Hailey doing cute stuff. She always stops when she sees me holding the camera, so with this I can go into stealth mode! If you want something more affordable, try this one instead.

4. Box Lights- These are a bit of an investment, but I honestly can't recommend them enough! I use them for practically all my blog photos and occasionally whip them out when the lighting isn't ideal for portraits. Another option is these umbrella lights, which aren't quite as bright. Both of them fold up super tiny and can take up just a corner of a closet! It's actually pretty remarkable how mighty yet tiny they are. Just a note that these won't make a dark room bright, but they will assist in compensating when the room just isn't bright enough for a good picture.

5. Holiday Blanket- You always need a great blanket for holiday photos! Use it for an accent on the couch or bed, to add warmth to a photo, or to snuggle and wear in your pictures. Either way, you really can't go wrong with a holiday blanket! I used one in my photoshoots, then towards the end my sister wore it on her head to try to get a laugh out of Hailey. She did smile, but not nearly as much as I did. I truly wish I had taken a photo from my angle. It was quite comical. If you don’t celebrate Christmas, try this more seasonal snowflake blanket instead or try this fun puppy blanket if you like something more whimsical!

6. Stockings- Some cute stockings hung on the chimney with care, or held as a prop, are essential for a fun Christmas photo! I also love seeing them hung at the foot of a bed. I love these because they' look so soft and cozy with the knit pattern and fur. For a little added sparkle, try a set of these!

7. Small Tree- If you're not ready to whip out the giant Christmas tree and the whole shebang, get a smaller tree that you can put in the background of your photos! This one is a nice small size but also decorated, which means less work for you! After the photo session is over, you can place it near your fireplace for some fun festivity, or put it in your kitchen, dining room, or kids' room to keep the holiday fun going in the whole house!

8. Antler Headbands- I love holiday themed accessories and I cannot lie, you other sisters can't deny. When a girl walks in with an itty bitty babe, and some antlers in your face you get sprung. Ok, things got a little cheesy there for a moment #sorrynotsorry but I love Christmas antlers. I can be found sporting them for every holiday themed event, from Holiday photos to Christmas parties to actual Christmas day. Oh, plus trimming the tree, seeing the holiday lights, baking cookies... They're my favorite! I just bought this fun pastel set but you can always go more traditional with a gold set.

9. Christmas Book- This makes a great prop and distraction for your photos! If your kids won't sit still, try giving them a brand new or favorite book to read. Maybe even add something silly on the pages to get a laugh out of them! Hailey loved this book because Santa has furry beards! You can also go more traditional with The Night Before Christmas, a Disney book, or a Hanukkah book.

10. Wreath or Garland- Whether you're holding a wreath for a pop of color, or place a garland at your headboard, they're perfect for adding some holiday spirit without much effort! I used a white garland from Michael's for my holiday photos, and didn't even have to attach it to the wall. I just stuffed it behind the headboard and made sure it was as close to the wall as possible! The best part is that adding these wreaths or garlands can really help you to bring in or enhance your color scheme. I knew I wanted my photos to be colorful and airy, and my garland did that! You could also go more traditional or fun and festive.

11. A Great Camera- You can definitely use your phone for your pictures, but I would highly recommend getting a camera if you’ve been on the fence! I personally have the older version of this Canon EOS Rebel (mine is the T6) but this newer one has such great features! Touchscreen is a newer feature, plus this set includes a remote which means super easy shooting!

12. Stepstool- If your friendtographer is short, you’ll definitely want to have a tripod! This one is SUPER light but also very sturdy. Perfect for taking on the go and being super safe while you’re at it! Why do you want a step stool, you may be asking? Because taking a photo from slightly above= very flattering. Taking one from below means all the chins. You’re welcome!

With these items, your holiday cards are sure to be a hit at the dinner table, unlike Aunt Sally's figgy pudding. If you're unsure how to even go about planning and executing your holiday photo shoot, I have a treat for you! I've developed a course that gives you my step by step system for planning, shooting, and editing your holiday photos! It's called Sleigh Your Holiday Photoshoot, and it's a game changer for the "I'll just do the photos myself, thanks" crowd!

It's the exact method I use for taking my blog and family photos, which I've perfected over the years. You'll be able to take your holiday photos in 5 days or less, with step-by-step videos and checklists to help you along the way! Everything is short and sweet, but super actionable and helpful. You'll be able to match those Pinterest inspiration photos in no time.

What's an essential for you when taking family photos? Is it a toy, a gadget, or maybe snacks for bribing the kids? Let me know in the comments below!

Hailey's Disney World Themed First Birthday Party

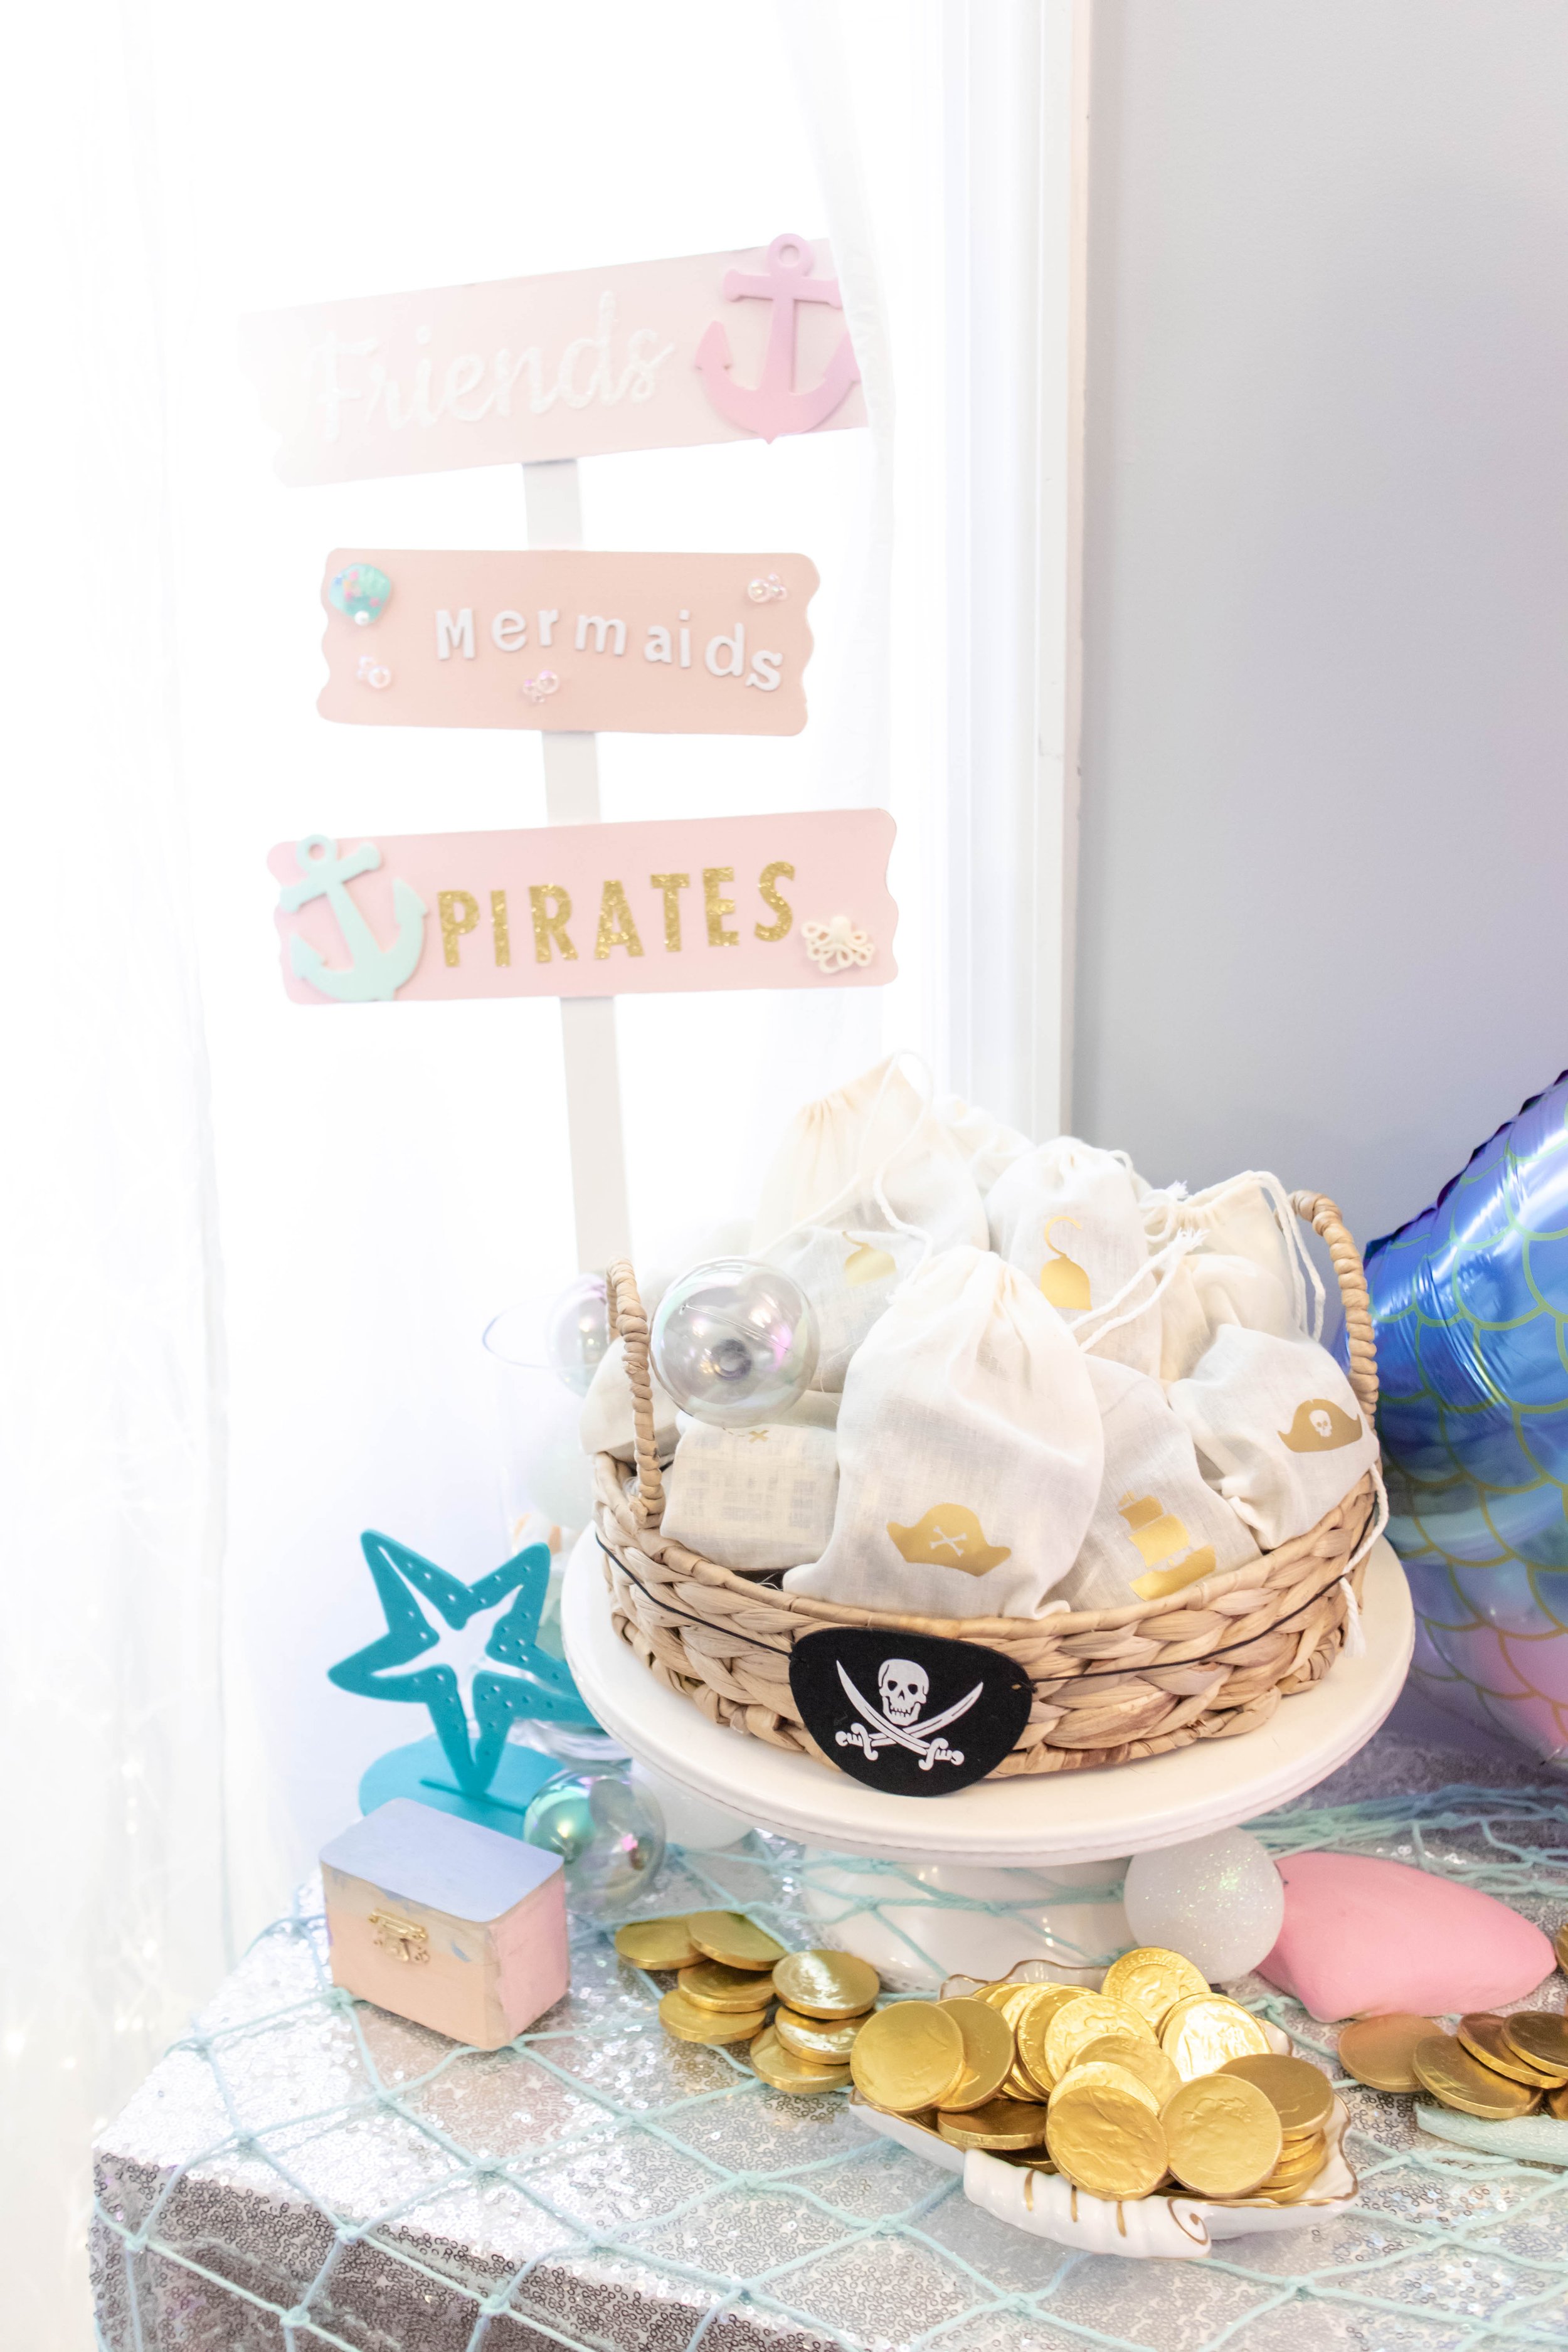
Last month, we celebrated sweet Hailey’s first birthday! It seems like just yesterday she was born and my greatest adventure began. But now she’s already a person with a tiny personality and my very best friend. I wanted her first birthday party to be something simple but memorable, and hopefully something where she would have fun! As I had shared last month, we did a Disney World themed party, mostly because I LOVE Disney! This theme was a little bit challenging but I relied on the color scheme to keep it all cohesive- as usual! 

Here are some more details about the party plus some planning tips if you’re interested in throwing a Disney World party of your own! I’ll provide sources for everything I had as well, so you can copy and paste this party for yourself!

*This post contains affiliate links

Looking for a unique first birthday party theme? How about Disney World?! Here are some more details about the party plus some planning tips if you’re interested in throwing a Disney World party of your own! I’ve provided sources for everything I ha…

This party was different than most others because I had help! My SIL and sister stayed over the night before to help me set up. We mostly cleaned, prepared a few decorations and chatted over a glass of wine. However, that was a nice change over the usual pre-party prep where I’m running around the house setting up, baking, or trying to finish a project. Sometimes simultaneously! It was also super helpful to discuss the plan the night before so that the next day, I didn’t have to explain things as I was hurriedly trying to set up. I’ve realized my brain gets overloaded during times of pressure, and trying to explain what I need help with takes twice as long as doing it myself. Mostly because I can’t find the words! I’m not perfect, even though I may appear to be sometimes. Anyone who’s come to a party I’ve thrown can attest to that, hah! 

For more info about planning a party, I’ve got a whole series! You can learn more about how to plan a party in 10 steps, my favorite places for supplies, and 5 easy steps for party setup.

Looking for a unique first birthday party theme? How about Disney World?! Here are some more details about the party plus some planning tips if you’re interested in throwing a Disney World party of your own! I’ve provided sources for everything I ha…

We bought a tent! Since this was the third large party we threw in our yard, I figured we should probably have the supplies we need. In the past, John’s amazing cousin has lent us tents, tables and chairs. He’d pack up his pickup truck and come early to help us set up, driving hours each way and staying until the end of the event to clean up too. We’ve appreciated it SO much but it seemed like a good time to get some supplies of our own. So, we got this great pop-up event tent on amazon plus 2 sets of these white folding chairs. We already had several of these folding tables that we got from family, bar height tables and a folding indoor/outdoor serving cart so now we are ready for any party that comes our way! 

Looking for a unique first birthday party theme? How about Disney World?! Here are some more details about the party plus some planning tips if you’re interested in throwing a Disney World party of your own! I’ve provided sources for everything I ha…

For the food, we kept it simple with pizza. I orginally planned to print out a Pizza Planet logo for it, but that went out the window. I totally forgot, and pre-kids Cathy would probably have done it during the party, scrambling to find the right size logo and print out 3 copies until it was just right. After-kids Cathy said oh well. The little things in life add up and I’m trying to be less of a perfectionist these days!

Looking for a unique first birthday party theme? How about Disney World?! Here are some more details about the party plus some planning tips if you’re interested in throwing a Disney World party of your own! I’ve provided sources for everything I ha…

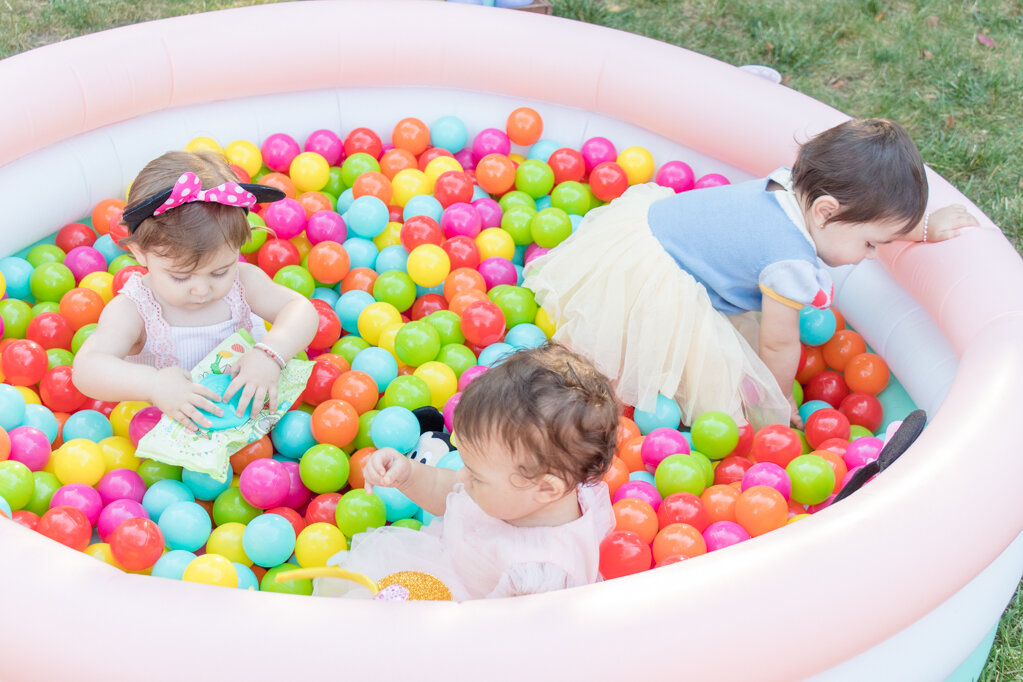
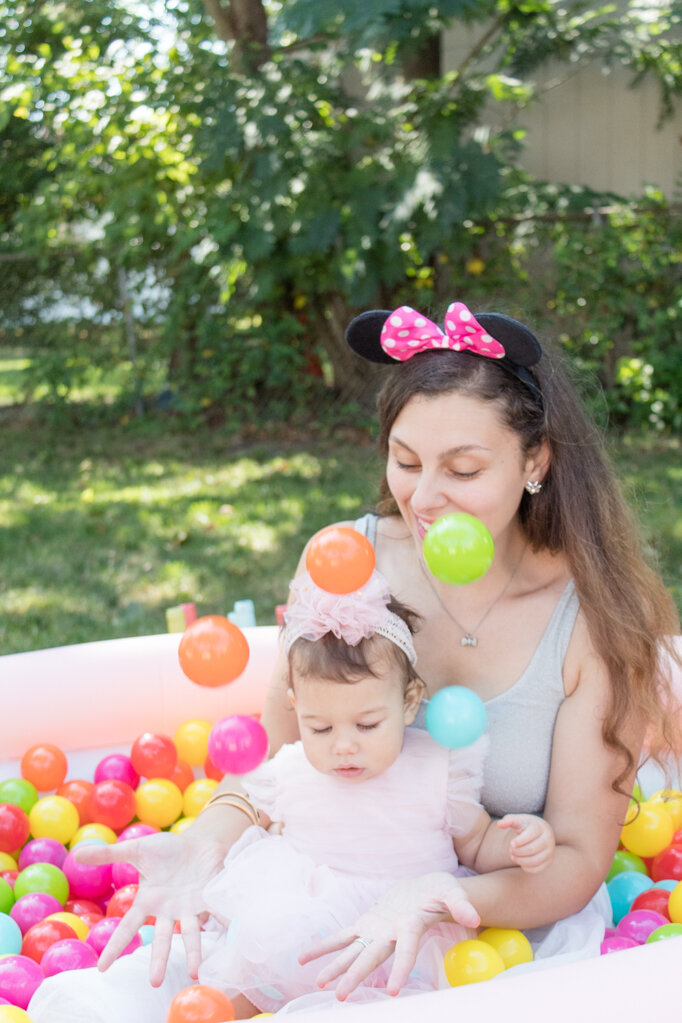
The hit of the party was the inflatable pool filled with balls! I knew I wanted to do a ball pit, but I kinda went back and forth on whether it was worth the money or not. We already had the pool and used it all summer long, but I knew I’d need a lot of balls to fill it. In the end, I’m SO glad I got it! The kids loved them and it was so cute to see everyone playing together. Hailey especially loved it! I originally wanted to get pink balls but picked this set for future kids that may end up being boys! It just seemed better for long term, plus I thought these colors were still pretty cute- a slight change from the regular rainbow! For reference, I purchased 1200 balls for a 3-person pool. 

Looking for a unique first birthday party theme? How about Disney World?! Here are some more details about the party plus some planning tips if you’re interested in throwing a Disney World party of your own! I’ve provided sources for everything I ha…

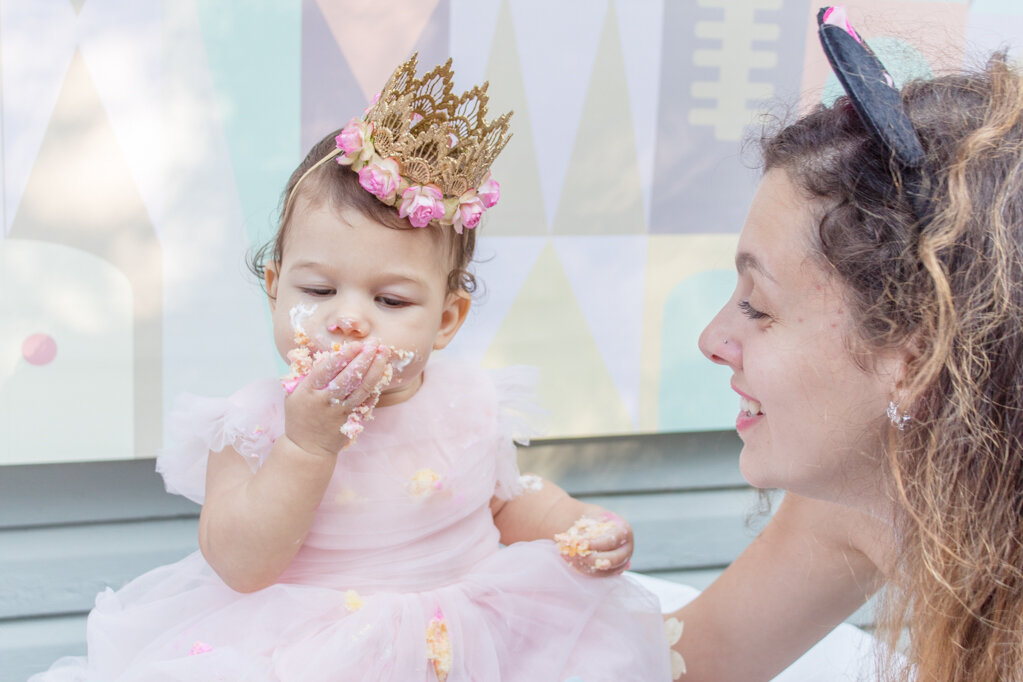
I loved the dress we got for Hailey for her party! I orginally wanted a Disney themed dress (for both of us) but they were too big. So, I went back to the drawing board and ordered a few options including a Cinderella dress, a Minnie dress, and this sweet pink tulle dress. I loved the layers, so I picked this one! It also came with the cutest hat that we used for her cake smash session and for wearing during the party!

Looking for a unique first birthday party theme? How about Disney World?! Here are some more details about the party plus some planning tips if you’re interested in throwing a Disney World party of your own! I’ve provided sources for everything I ha…

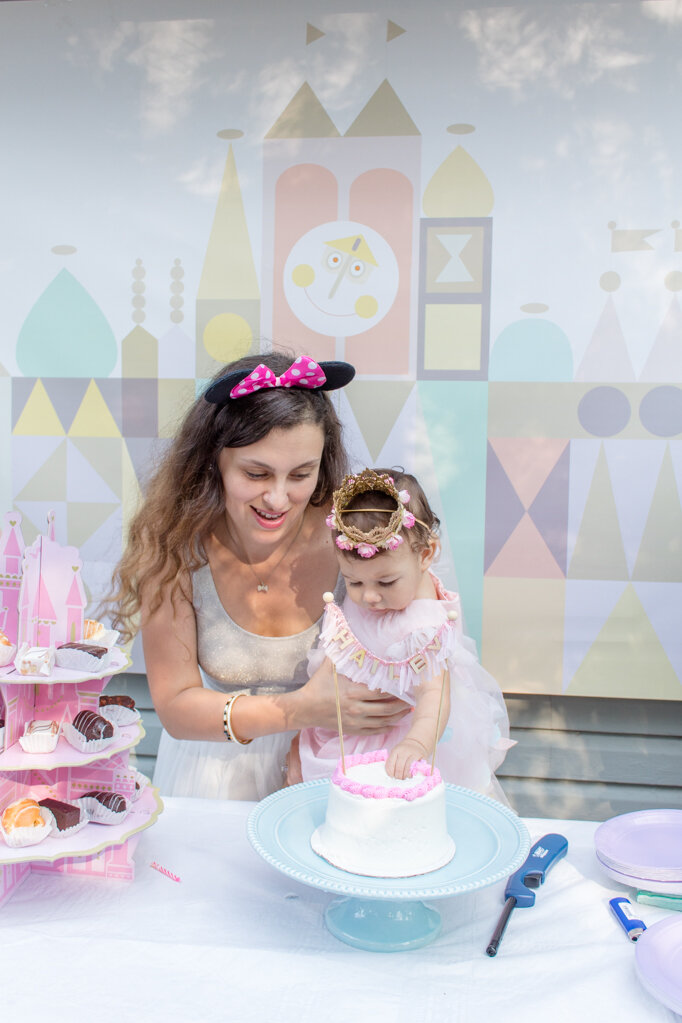
Speaking of cake smash, we ended up doing an impromptu cake smash during the party! I went to BJs to get some cakes for the party and saw a small one. I figured I’d get it because Hailey went wild during her cake smash photoshoot and I was a little nervous she’d do it again during the party. I don’t mind eating her smashed up cake, but others might! She turned out to be very well behaved with her cake but her cake smash session was so cute that I ended up letting her have another. After all, you only turn one once! She went wild and everyone loved it. We got some great photos and videos, including her feeding John some cake. When I asked for some, she gave me side eye. 

Looking for a unique first birthday party theme? How about Disney World?! Here are some more details about the party plus some planning tips if you’re interested in throwing a Disney World party of your own! I’ve provided sources for everything I ha…

We did the cake smash in front of this awesome It’s A Small World backdrop that I rush ordered from Etsy. I was originally planning to get it printed myself but then decided against it. The seller was SO nice and responsive, and I ended up getting the background just in time for the party! I plan to put it up in either Hailey’s room or a future playroom someday. It’s also got a great memory attached to it now!

On the invitation (which I made myself on Canva), I told people to feel free to Disneybound. Since I love dressing for a theme, I went with a Minnie Mouse vibe unintentionally! I usually wear Minnie ears at Disney World, so that was a given. I had bought a T-shirt for the party but I ended up disliking the way it looked with my tutu skirt. I headed back up to my closet for an alternative and decided on a sparkly tank. As I was turning to leave the closet, I saw my pink bow boots and knew I HAD to wear them! And thus, a golden princess Minnie Disneybound was born. PS- This is my husband “being happy”

Looking for a unique first birthday party theme? How about Disney World?! Here are some more details about the party plus some planning tips if you’re interested in throwing a Disney World party of your own! I’ve provided sources for everything I ha…

Other people were just as creative in the outfit dept. We had a lot of Snow Whites, Minnie Mouses, and even 2 dwarves! A friend of mine dressed up as the white rabbit from Alice In Wonderland which was pretty awesome! She had ears, a vest and everything. I love when people dress up with me. I’m always looking for an excuse!

Looking for a unique first birthday party theme? How about Disney World?! Here are some more details about the party plus some planning tips if you’re interested in throwing a Disney World party of your own! I’ve provided sources for everything I ha…

Overall, the party was super fun and casual which is exactly what I wanted. Gone are the days where I can’t enjoy the party because I am so concerned with everything being perfect, and fretting over the things that didn’t get done. Nowadays, I’m happy if the decor is cute and the bathroom is clean! 

Sources:

Setup: event tent. white folding chairs. these folding tables. bar height tables. folding indoor/outdoor serving cart. Ball Pit Balls.

Decor: It’s a Small World Backdrop. Carousel. Pastel Fans and Paper Poms. Striped Fans. Once Upon A Time Banner. Tablecloth. Princess Kit. Gold Minnie Ears. Black Ears.

Tableware: Napkins. Napkins. Castle Cupcake Stand. Pink and Gold Cups.

Hailey’s outfit: pink tulle dress.

My outfit: tutu skirt. Gold Minnie Ears. Pink Boots (similar). Sparkly Tank Top.

I hope you enjoyed seeing the pictures from Hailey’s birthday party! What do you think of a Disney World theme for a party? I can definitely see SO many more ways to make it big if you wanted to! Let me know in the comments below.

The Perfect Accessory for Every Outfit (under $14!)

I’ve got the accessory that will make every outfit look even better and the best part is that it costs less than $14. Oh wait did I say accessory? I meant accessories because this is a pack of 12 headbands for only 14 bucks. Yep you read that right and I’m excited about it too! I recently purchased a headband from Five Below and I wasn’t sure if I’d ever even wear it. I’ve always liked headbands but felt silly wearing them. However, I found that I wanted to add a punch to my outfits and cover up those baby hairs that popped up with my postpartum hair loss. Since then, I’ve been wearing headbands multiple times a week! Since I really only have 3, I went onto Amazon to see what I could find. That’s when I found this awesome mixed pack!

Although I can’t say I love every single headband in this pack, it’s so affordable that it’s worth it. There’s definitely several styles I would wear for less than the cost of buying just one in a store. For the few headbands I won’t wear, I’ve decided I’m going to give them out to friends that I think would love them so that hopefully I can encourage them to add a little pizzazz to their outfits too.!

I’ve always liked headbands but felt silly wearing them. However, I found that I wanted to add a punch to my outfits and cover up those baby hairs that popped up with my postpartum hair loss. Since then, I’ve been wearing headbands multiple times a …

When it comes to wearing headbands, people may ask how to wear them. Well I’m gonna start by saying the way to wear a headband is by just wearing it. I know that sounds silly and probably not the answer you were looking for, but it’s the truth. Just wear it! It’s going to feel silly at first (I know definitely did for me!) but soon enough you’ll realize that it’s really not a big deal and you actually love wearing them. You can wear them with pretty much any outfit or add them to any hairdo. Just give it a shot!

Personally, I love wearing my headbands with a little bit of my hair towards the front, or to hold all those little baby hairs when my hair is in a bun. They can also jazz up a braid which is really fun since braids can sometimes seem a little stuffy. 

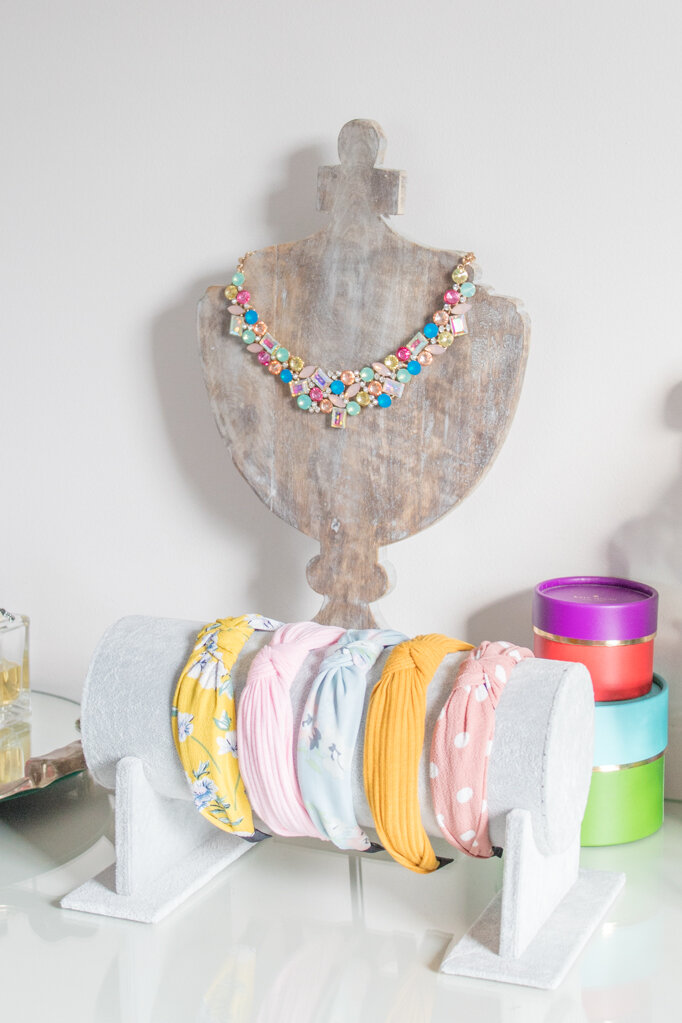
One of the things that been struggling with lately is how to store these headbands, because if you stuff them away somewhere you’ll probably never wear them again. Out of sight, out of mind- you won’t even know they exist anymore. So I’ve come up with a solution for you! I bought one of these headband holders that I can put on my dresser or in my closet for only $16. If you own headbands, you need this organizer! It’s non-negotiable friends. Just add it to your cart already.

If this set isn’t the exact style that you like, don’t worry – I’ve got a solution for you.

I’ve always liked headbands but felt silly wearing them. However, I found that I wanted to add a punch to my outfits and cover up those baby hairs that popped up with my postpartum hair loss. Since then, I’ve been wearing headbands multiple times a …

If you like soft headbands, try these out. I love wearing these when my hair’s in a bun, since they slip right on. I think it’s a lot harder to use these when you have your hair down. Personally, I don’t love that there’s essentially a scrunchie on me and they seem to move a lot, which is why I prefer the hard ones!

If you prefer a bow headband, try this pack. I have a similar pink striped one which I love. I think it’s so cute for adding a slightly preppy touch to an outfit, like my varsity sweater

I’ve always liked headbands but felt silly wearing them. However, I found that I wanted to add a punch to my outfits and cover up those baby hairs that popped up with my postpartum hair loss. Since then, I’ve been wearing headbands multiple times a …

If you’re a simple person who thinks this is way too many headbands, try a smaller three pack. They all have a gold trim which looks super elegant and since it comes in a range of colors, you’ll still have a headband for every outfit! I’m super tempted to buy this one too!

And, if you think that all these patterns are way too much and will clash with your outfits, try this pack of solid colored headbands. I love the lighter colors like the yellow and the coral, which I think would be great for fall!

I’ve always liked headbands but felt silly wearing them. However, I found that I wanted to add a punch to my outfits and cover up those baby hairs that popped up with my postpartum hair loss. Since then, I’ve been wearing headbands multiple times a …

No matter which pack you buy, it’s so much fun to add a headband to your outfits for a little bit of extra fun. It’s also great for wearing them around the house, even if you’re just wearing your PJs! I’d like to try to look put together, especially as a SAHM/WAHM, since getting out every day can be a challenge. Also, at this price point you don’t have to worry about breaking the bank! Even if you only wear four or five of the headbands out of the pack, just to be getting them for a steal compared to the cost in stores. And I really love the idea of giving these out to friends so they can accessorize their outfits too. You could even have a friend get in on it, where you buy one of the packs and they buy another, and then you share all the headbands and pick out all your favorites. 

I’ve always liked headbands but felt silly wearing them. However, I found that I wanted to add a punch to my outfits and cover up those baby hairs that popped up with my postpartum hair loss. Since then, I’ve been wearing headbands multiple times a …

So pick your favorite pack, and make the purchase right now so that you don’t forget. Or even worse, before you convince yourself that you can’t wear a headband! And, send this post to a friend that you think would love to accessorize her outfits too. I really think that it’s important to try new things, especially when it’s love to keep her off it’s pretty simple on the daily. Doing something like adding a headband can make an outfit feel so much more glam, even if it’s just a tee and jeans. Plus, if you pop that headband storage in your cart, you’re still under $30 and you’ll know that you have a place to keep them where they won’t be hidden or an eyesore!

So what do you think? Have I convinced you? Did I save your life by finding the perfect solution for your overflowing headband collection? Let me know in the comments below!