10 Reasons Why I Love thredUP
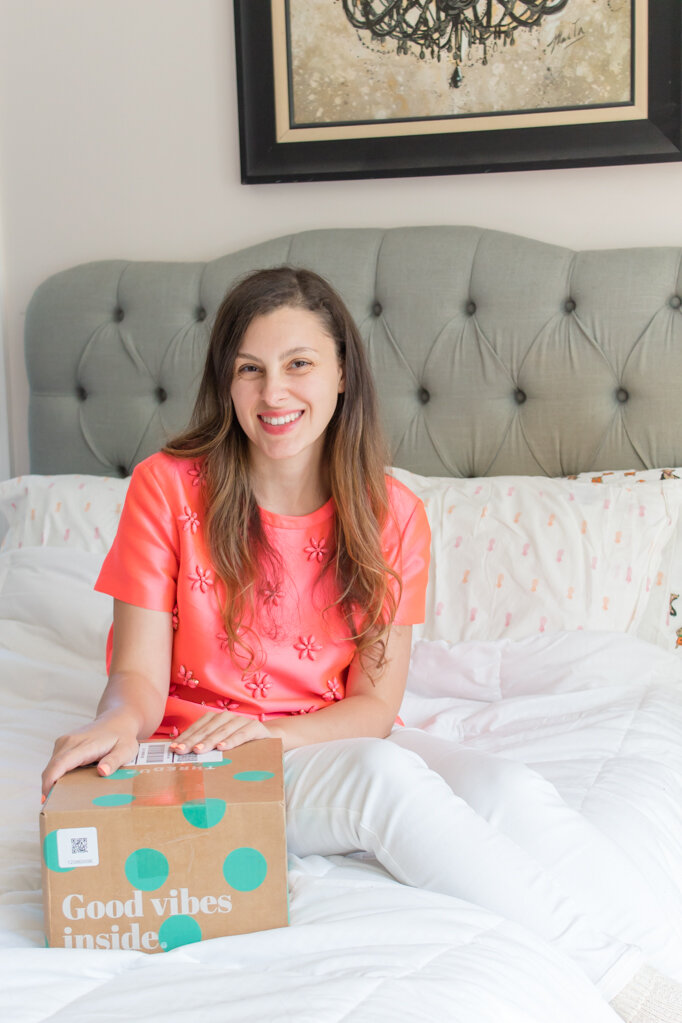
I’ve recently started shopping on thredUP and I am hooked. Like, head over heels, can’t-sleep-cuz-I-keep-thinking-about-you in love with them. At night I find myself on their app, scrolling for hours and dreaming about our future together. It’s because thredUP has some amazing deals. Like, “holy crap can this be right?” type of deals. As someone who loves a deal we’re a match made in heaven.  

Before I share why I love thredUP sooo much, I want to share my special link that will get you $10 off your first order with thredUP. Depending on what you purchase, this can be equal to a free item! Click here to get $10 off your first order.

Without further ado, here’s 10 reasons why I love thredUP so much!

Keep hearing about thredUP and wonder what all the fuss is about? I’ve got 10 reasons why I love shopping on thredUP. #thredupoutfits #thredup

1. You can find name brand stuff for way less than in stores.

What are your favorite brands and places to shop? Kate Spade? Yep, they’ve got it. J. Crew? Yep, got that too. Looking for luxury designer brands? Yep, got that as well! From $10 Old Navy dresses to Burberry pullovers, they have what you want. I got a Kate Spade shirt that retailed for $298 for under $40 and a J. Crew skirt that retailed for $148 for less than $20. You don’t have to sacrifice style or quality with thredUP!

2. You can hone in on your style

Because thredUP has so many different brands, you can very easily discover your personal style by favoriting items you love. Then, when you go back through your favorites you’ll probably start to see a pattern developing that will shape your personal style. For example, I saved a lot of pink (duh!) but I also realized that I prefer solids instead of patterns and stripes over polka dots. I also realized I saved a LOT of baby blue striped items, which I never would have expected. I’m not drawn to that in stores, so it surprised me! My favorites section is filled with colorful, simple yet fun clothes. I realized for me it’s also about the silhouette and while I like items in solid colors, I like them to have something fun about them. I like my clothes to be interesting, like me! I also found that this helped me to see the items in a mix-and-match way since they all go together so well. It helps to know I won’t just wear an item once!

Keep hearing about thredUP and wonder what all the fuss is about? I’ve got 10 reasons why I love shopping on thredUP. #thredupoutfits #thredup

3. You can shop all your favorite brands 

This goes hand in hand with point #1. With thredUP’s search functionality, you can filter results based on what brand they are! From J.Crew to Old Navy to more luxury brands like Kate Spade, pretty much anything you want you can find it on thredUP! This is also great for when you love an item in stores, but they ran out of your size. Check back on thredUP and you may be able to find it again! That’s what happened to me with this Old Navy shirt.

4. You can buy brand new clothes

If the thought of wearing clothes that someone else wore before skeeves you out, don’t you worry- you can shop for BRAND NEW clothes that still have the tags on! We’ve all had those items in our closets that sat there for years, and now you can snag your favorite items that came out of someone else’s closet and give them new life.

5. They offer the ability to bundle

This is another of my favorite features that thredUP has! Since you only have 24 hours to keep an item in your cart, you’ve gotta shop with speed. You can get free shipping when you spend $79, but not everyone intends to spend that in one sitting. So, you can start a Buy & Bundle and you can add items as you go for up to 7 days! They hold a $5.99 shopping deposit, and once your order hits $79 it’s automatically refunded. If you decide that you don’t want to add any more items before the 7 day mark, don’t you worry- you can choose to have your items shipped at any time, even if you haven’t hit that $79 threshold! This is a game changer so you can shop leisurely and avoid that shipping fee we all hate so much!

Keep hearing about thredUP and wonder what all the fuss is about? I’ve got 10 reasons why I love shopping on thredUP. #thredupoutfits #thredup

6. You can shop a person’s items

If you found an item you love, you can scroll down and see the More From This Seller section, where they show additional items that this seller sent them. If you like one item, there’s a chance that you found your style bestie and they’ll have even more items you like! Plus, they’re very likely to be in your size too. 

7. They recommend similar items you may like 

Just below the More From This Seller section, you’ll find a whole list of similar items to the one you’re looking it! Let’s say you’ve got a red pullover sweater. They’ll show you other, similar red pullover sweaters. This is great for if an item looks nice but maybe isn’t 100% your style. Let’s say you wanted a crew neck but it’s a neck. This section is great for finding alternatives! I love scrolling through this section to find items like the one I’m looking at. Sometimes there are some real gems here!

Keep hearing about thredUP and wonder what all the fuss is about? I’ve got 10 reasons why I love shopping on thredUP. #thredupoutfits #thredup

8. They’re always running promotions and specials.

I love a good sale! When you shop on thredUP, you can always find a deal but very often there’s also coupon codes on top! That’s savings on top of savings. I’ve seen them offer free shipping, 15-40% off coupons, and they even did a BINGO game in the summer that was super fun! It had different squares with different deals inside and you got points for each one you filled in, with a chance to win a shopping spree when you got BINGO!

9. They offer 3 monthly payments with no interest

You can break up your order into 3 payments if you want to. By partnering with Affirm, thredUP allows you to shop now and pay later! This might not be practical for everyone or in everyday use, but here’s an example of where it could be useful. Let’s say you get a new job and want new clothes. By shopping on thredUP with Affirm, you can buy these items now, wear them and ROCK your new job, then pay them off once your new paycheck starts coming in. It’s also great for buying back to school clothes for the kids, seasonal clothes, or vacation clothes! I’ve never used this before so I’d do some research into it before applying, but it can be super useful if you need some new clothes right now but can’t pay all at once.

10. Their interface is great

I guess you can say I left the best for last, but their interface is AMAZING. Unlike most places where you shop used clothes, it looks so clean and practically brand new. No more sifting through piles of clothes, no more trying to push over a hanger jammed in a small space, and no more horrible photos of clothes laying flat and lifeless. Each item is professionally photographed on a mannequin in accurate lighting. This means you can see EXACTLY what you’re getting and imagine wearing it! Looking through their items is actually enjoyable because everything looks so pretty. For me, one of the worst parts about shopping for used clothes is how gross everything can feel. Between the icky smells and the crappy shopping environment, it doesn’t seem worth the hassle. With thredUP, you don’t have any of that! You’ll actually love using their app since it’s so easy to navigate and pretty. 

Keep hearing about thredUP and wonder what all the fuss is about? I’ve got 10 reasons why I love shopping on thredUP. #thredupoutfits #thredup

So, there you have it! 10 reasons why I LOVE thredUP. I’m planning to write another post about how I used thredUP to narrow down my style and how I find the very best deals on their site. Let me know if this is something you’d be interested in by commenting below!

Be sure to sign up for thredUP now using my link and get your $10 to spend on your first order.

Have you ever shopped on thredUP? Let me know your thoughts and your favorite parts in the comments below!

DIY Halloween Tassel Earrings (with Googly Eyes!)

Eye have great news for you- Halloween is coming! Don’t turn a blind eye- add a little flair to your everyday outfits! You’ll SEE how many people enjoy it. Ok, I’m done with all the eye puns, but I have something really fun for you today! I always love adding some holiday accessories to my outfit, and it’s even better when they’re easy to make! These tassel earrings are so fun and easy that you can make a Halloween pair and then some basic ones for everyday. Don’t forget to pin them for later!

*This post contains affiliate links

LOOKING for a great halloween craft? EYE have a great one for you! These googly eye tassel earrings are the perfect halloween accessory. Plus they’re an easy craft! #halloweenearringsdiy #diytasselearrings #googlyeyecrafts

You will need:

Embroidery floss (similar here)
Beacon Gem-Tac (here)
Googly eyes (similar here and here)
Earring Hooks (similar here)
Jump ring (similar here)
Jewelry tools (similar here)
Scissors (similar here)
Toothpicks
Tweezers

LOOKING for a great halloween craft? EYE have a great one for you! These googly eye tassel earrings are the perfect halloween accessory. Plus they’re an easy craft! #halloweenearringsdiy #diytasselearrings #googlyeyecrafts

Directions:

  1. First, let’s create your tassels. For starters, pull a bit of embroidery floss out and cut 4 small-ish pieces. Mine were probably slightly longer than my pointer finger.

  2. Thread one of the strings through the loop at the top of your embroidery floss and tie a knot. I made a double knot to ensure it didn’t come loose. Repeat for the bottom.

  3. Take off the paper packaging that’s holding your embroidery floss in shape, and tie a knot at the top. Mine was about a fingertip’s width (not length) from the top. Repeat on the other bottom, making sure that they are the same size.

  4. Fold the embroidery floss in half to find the center, and then carefully cut across in a straight line to create two separate tassels.

  5. Optional: Comb out your embroidery floss so that your tassels are a little bit thinner and it looks less like embroidery floss! You can see how that looks here.

  6. Now that your tassels are made, it’s time to make the earring! Attach a jump ring to the top of your tassel by looping it through the first string you tied at the top. Then, loop your earring hook through and close it. You want to make sure that the knots are at the back, so figure that out before you put the earring hook on.

  7. Get a scrap of paper, and place some GemTac on it. Take a toothpick and place a small dab of glue on your tassels, then use tweezers to place your tiny googly eye onto your glue. Repeat until you have enough tiny google eyes to fill the top. For the larger googly eye, you can probably just use hot glue.

LOOKING for a great halloween craft? EYE have a great one for you! These googly eye tassel earrings are the perfect halloween accessory. Plus they’re an easy craft! #halloweenearringsdiy #diytasselearrings #googlyeyecrafts

So, what do you think? Can you SEE yourself wearing these earrings? Will you be making a pair for yourself and everyone you know? I made these two pairs and I’m kinda wishing one of them was orange so I could have rotating pairs! Don’t forget to pin the DIY for later or share with a friend who LOVES halloween!

Cute and Comfy Fall Uniforms

When it comes to getting dressed, there are three things I need my outfits to be- cute, comfortable, and colorful. And most of all, I need getting dressed to be easy. There are some days when I’m literally throwing on clothes at the time that we were supposed to be leaving the house! So, I decided to create a handy checklist for myself with easy outfit ideas that I can mix and match in my closet. It’s actually been really helpful for getting dressed, so I decided to share this list with you guys so that you can get dressed easily too! 

I’ve also created a free printable that’s available in my resource library (sign up below!), but here are a few sneaky peeks of what’s inside. I hope this will help you find new outfit ideas that you can wear all through the fall, and maybe even into the winter!

*This post contains affiliate links

When it comes to getting dressed, there are three things I need my outfits to be- cute, comfortable, and colorful. And most of all, I need getting dressed to be easy. So, I decided to create a handy checklist with easy outfit ideas that can be mixed…

The printable is available in my resource library, which you can get totally FREE access to, just by signing up. What exactly do you get? Access to all my printables, including party planning guides, checklists, and my projects. By signing up, you'll have access to all projects- past, present and future! 

gimme access

Sweatshirt + Sporty Skirt + Sneakers

I’ve been wearing this sweatshirt since I made it because it’s so comfortable. When it’s paired with a sporty skirt, it’s a really cute and casual outfit that’s perfect for hanging out on a cool day. My skirt is from J. Crew and so comfortable! My favorite sneakers are from Old Navy, and even though I wear them a lot they still look brand new!

When it comes to getting dressed, there are three things I need my outfits to be- cute, comfortable, and colorful. And most of all, I need getting dressed to be easy. So, I decided to create a handy checklist with easy outfit ideas that can be mixed…

Colorful Jeans + Chambray + Sweater + Wedges

This is the outfit that started it all! I like that the bright orange jeans add a pop of color to a fairly neutral outfit. Fun fact: the day of this shoot was suddenly extremely hot and I was SWEATING. But, now that the temps have cooled down again, I can wear it over and over! It’s a great way to stay warm but still look cute without a jacket. To accessorize, I added a headband and some pom pom earrings plus a statement necklace that matched the pants. PS- you can find the DIY for the floral pumpkin here. It’s one of my fave fall decor items!

When it comes to getting dressed, there are three things I need my outfits to be- cute, comfortable, and colorful. And most of all, I need getting dressed to be easy. So, I decided to create a handy checklist with easy outfit ideas that can be mixed…

Chambray + Skirt + Tights + Boots

For this one, I wore a chambray tank top from Old Navy with an orange cardigan on top! Layering is perfect in the fall because the weather can go from cold to hot in 3 seconds flat. I wore gray tights under my skirt, which I normally would think was too dark but I think it complimented the outfit well. I wore this outfit when we went apple picking and decided that the whole fam should match so we could do out own little photoshoot! My SIL came with us and took this shot. Hailey was SO happy to be walking on her own.

When it comes to getting dressed, there are three things I need my outfits to be- cute, comfortable, and colorful. And most of all, I need getting dressed to be easy. So, I decided to create a handy checklist with easy outfit ideas that can be mixed…

I hope this helps you to find some outfits for fall that are colorful and cute, but still really comfy. You can chase your kids in these outfits, or walk around the pumpkin farm, and be 100% comfortable in style! Don’t forget to download your printable too for even more fall outfit combos. There’s 13 on that list!

The printable is available in my resource library, which you can get totally FREE access to, just by signing up. What exactly do you get? Access to all my printables, including party planning guides, checklists, and my projects. By signing up, you'll have access to all projects- past, present and future! 

gimme access

So, what do you think about these outfit combos? Are you into a colorful look for fall, or do you prefer a more muted wardrobe? Let me know in the comments below!

DIY Varsity Letter Sweatshirt

The other day, I was sitting in the car in a mini mall parking lot, and suddenly had this great idea to create a varsity letter themed sweater. Maybe it’s because of all the back-to-school stuff or the fact that it’s fall, but suddenly I wanted nothing more than a cozy sweater with a cute fluffy letter on it. So, I bumped all the other blog posts I had out of the way so that I could show you guys this cute sweater that I made for myself! The best part is that it’s super affordable, so you can definitely make one for yourself! I was able to get everything I needed on Amazon so I didn’t even need to leave the house or go shopping at the mall for the right supplies. However, if you want to live out your back to school shopping days and go to the mall, don’t let me stop you. Shop til you drop honey!

Maybe it’s because of all the back-to-school stuff or the fact that it’s fall, but suddenly I want nothing more than a cozy sweater with a cute fluffy letter on it. This varsity sweater is really easy to make- so easy, it almost isn’t a DIY! Click f…

I feel silly calling this a DIY but technically it is. Lucky for you, it’s an easy one!

You will need:

Sweatshirt (here)
Iron-on letters (here)
Vanishing ink marker or chalk (here or here)
Iron (similar here)
Piece of cotton fabric

Maybe it’s because of all the back-to-school stuff or the fact that it’s fall, but suddenly I want nothing more than a cozy sweater with a cute fluffy letter on it. This varsity sweater is really easy to make- so easy, it almost isn’t a DIY! Click f…

Directions:

  1. Try on your sweatshirt and mark where you want your letter to go. I used fabric chalk, but you can also use vanishing ink markers or even regular chalk if that’s all you have.

  2. Place your letter on the sweater in the desired spot and place a piece of cotton fabric on top to prevent burn on the patch.

  3. Iron it on, making sure to focus on the edges so it doesn’t peel. My directions said to iron on high for 30 seconds, but follow what your directions say.

  4. Turn your sweatshirt inside out and iron underneath the patch for another 30 seconds.

Maybe it’s because of all the back-to-school stuff or the fact that it’s fall, but suddenly I want nothing more than a cozy sweater with a cute fluffy letter on it. This varsity sweater is really easy to make- so easy, it almost isn’t a DIY! Click f…

To style your new sweater, try it with a sporty skirt or a pair of jeans and booties. It’s perfect for giving your outfit a sporty touch. There’s nothing better in the fall than a cozy sweatshirt, especially if it’s slightly oversized and therefore super duper comfortable. 

Maybe it’s because of all the back-to-school stuff or the fact that it’s fall, but suddenly I want nothing more than a cozy sweater with a cute fluffy letter on it. This varsity sweater is really easy to make- so easy, it almost isn’t a DIY! Click f…

That’s all there is to it! Now you’ll have a cute and comfy sweater to tote around with you during the fall. It’s perfect for chilly nights or for wearing during fun activities like apple picking or football games! You could even match it to your team colors or school colors. I went with pink because, you know…. those are my team colors! Haha.

Maybe it’s because of all the back-to-school stuff or the fact that it’s fall, but suddenly I want nothing more than a cozy sweater with a cute fluffy letter on it. This varsity sweater is really easy to make- so easy, it almost isn’t a DIY! Click f…

So, what do you think? Will you be slapping one of these bad boys on this fall? How would you style your sweatshirt? Let me know in the comments below!

DIY Tassel Halloween Pins

Halloween is coming. This is not a drill! I am SO excited since it’s one of my favorite holidays. Did you know that my husband hates Halloween? So, that means that I need to pick up the slack and celebrate twice as hard. As you’ve probably realized, I’m not a huge fan of black and spooky things, so I need to work a little harder to fulfill my Halloween desires in my chosen color palette. That results in a whole lot of DIY’s and I ain’t complaining about it! I also love love love tassels, so I figured why not bring them together? This little pin is perfect for Halloween but can also be adapted to basic fall colors! It would also be really fun to make for your child’s teacher or a coworker that loves fall. 

*This post contains affiliate links.

This little pin is perfect for Halloween but can also be adapted to basic fall colors! It would also be really fun to make for your child’s teacher or a coworker that loves fall. #halloweenpin #halloweenaccessoriesdiy #pumpkintassels

You will need:

Wood Halloween shapes ( here or similar here)
Acrylic paint (similar here)
Embroidery floss (similar here)
Glue gun (similar here)
Scissors (similar here)
Pin backs (similar here)

This little pin is perfect for Halloween but can also be adapted to basic fall colors! It would also be really fun to make for your child’s teacher or a coworker that loves fall. #halloweenpin #halloweenaccessoriesdiy #pumpkintassels

Directions:

  1. Paint your wood pieces in your choice of colors. I did just one coat, then let it dry. I recommend doing the edges first, then placing it down and painting the front. For one of the pumpkins, I painted only the edge and I left another natural wood. The choice is entirely yours!

  2. While the paint dries, create your tassels. I used a 7/8” piece of cardboard for mine. To learn how to make tassels, refer to this blog post. Remember, you don’t want them to be too thick/chunky so that they lay flat against your pumpkin and, therefore, your shirt. Make sure you don’t trim the little string at the top- we’ll need some length to glue it on! *In the blog post I linked, I had combed the tassels but for this one I didn’t. The choice is yours!

  3. If you want to add some faces to your wood shapes, now is the time! Use a toothpick and dab the paint on. For the ghost, I keep it simple with tiny dots for eyes and cheeks, with a small smile. On the cat, I just added a pink heart for the nose. You can also add googly eyes if you prefer!

  4. Decide on the order you want, then glue your tassels onto the back of your pumpkin using your glue gun. Trim down the excess floss at the top.

  5. Glue your pin onto the back of your pumpkin, covering the excess floss from the tassels.

This little pin is perfect for Halloween but can also be adapted to basic fall colors! It would also be really fun to make for your child’s teacher or a coworker that loves fall. #halloweenpin #halloweenaccessoriesdiy #pumpkintassels

Wear and enjoy. Show off your Halloween love to everyone you meet!

You’ll probably be finding this pin on my lapel until October 31, when I’ll take it off and switch to a Halloween costume! I’m so excited to celebrate this second Halloween with Hailey. Her first Halloween she was only a month old and definitely wasn’t aware of anything that happened. I can’t believe a year has already gone by and she’s so big!  You’re definitely tired of hearing me say that, but I probably won’t stop. It’s insanity. I mean, look at how tiny she was in her first blog post debut

So, how do you feel about Halloween? Are you into the cute and colorful trend, or do you follow the traditional spooky-ness? Love to dress up or hate it? Let me know your feelings in the comments below!