2016: The Year in Review

Wow, so 2016 is over, huh? It seems like it was a pretty crazy year for everyone, and people didn't exactly hide their desire for it to go away once and for all. For me, 2016 was an ok year. It had its ups and downs, but I'm pretty glad it's over. I'm ready for a fresh start, so even though technically the only thing that changed is one little number, it feels like anything is possible. Let's hop into our time machine now and travel back through my memory as I look at the year in review.

2016 Posts-7.png

2016 has been one crazy ride. I moved into my house on New Year’s Eve last year, so I essentially started the new year in a brand new place. Its our first home and we are loving it so far.

It’s also been my first full year being engaged and planning a wedding. That hasn’t exactly been fun or easy. It’s not really affordable, and so it’s been a struggle to try to have the wedding of my dreams on a shoestring budget. The budget has grown and it’s overwhelming!

I started this blog to chronicle my life as I planned my wedding and decorated my home. However, it’s become so much more than that. I have big plans for this little blog, and pretty soon you’ll start seeing what’s been going on behind the scenes.

The topic changed, but the reason behind starting it is the same. I’ve always wanted to start my own business. I’ve always wanted a creative outlet. And I’ve always wanted to flexibility to be home with my kids when I have them. I’m hoping with this little blog, I can do all those things and more. I am hoping that I can show what I am truly capable of, proving to myself that I can achieve anything. I already kinda feel like I can (thanks mom and dad!) but I want to show that it’s not all unjustified confidence. I want to put my money where my mouth is.

This blog helped me to do so much I never was able to. For starters, I broke my toe taking pictures for the blog. Breaking a bone is something I have never done before, and frankly, I hope I never (ever) do it again. It’s also encouraged me to learn things that I’ve always wanted to be better at, like photography. It’s challenged me to find out what I am and what I like without being influenced by what others are doing. Which, surprisingly, is really hard! And it’s also encouraged me to focus on bettering myself and not focusing on where I am in relation to others. We are all on our own journeys, and if we focus on our goals, there’s no reason why we can’t catch up (or surpass!) the people we are admiring.

Let's take a look at 2016 month by month.

January: On Dec 30, 2015 we closed on our house, so we spent New Year's Eve moving in. It was exhausting and thrilling at the same time. Most of January was spent unpacking, purchasing furniture, and trying to settle in.

February: In February, I started looking into starting a blog. I suddenly had a 3 hour commute round trip, so I had a LOT of time to spend on Pinterest. I'm not sure how I started looking into blogging, but once I did I became addicted and realized I needed to start one. I had always wanted to start blogging, but it finally seemed like the time was right.

March & April: Most of March and April was spent behind the scenes as I started creating my blog and coming up with content. I decided to go with SquareSpace because their interface was the easiest for me to use. I wanted something that I could edit easily myself and was relatively simple.

May: In May my blog finally went live! I didn't know what exactly my blog would be about, so I wrote about home organization tips, DIY's and party planning. I made my first and most popular DIY tutorial, a donut party platter with sprinkles. I also did my first party post, for my Sugar Sweet 27th Birthday Party. I created the most blog posts this month, a whopping 11 posts!

June: In June things quieted WAY down and I wrote my first holiday blog post, Fourth of July on a Budget. I also enrolled in Blog to Biz Hive by Melyssa Griffin and began working on creating a business for my blog. There was a lot of soul searching during June as I tried to decide what my blog should be about. I decided to forego the lifestyle category and instead focus on DIY's and party planning! I also had my Disney-themed engagement party in mid-June.

July: Some of my favorite blog posts happened in July. I started with my Nautical Notecard Banner Tutorial, which I came up with on the fly at Michael's and ended up really loving. Then, I had my first party supply haul post from Michael's using their fun tropical themed stuff. And one of my favorites to date, my TGIF 90's-Themed Slumber Party. This was seriously the most fun ever to plan, and I loved hunting for 90's themed supplies. Plus I got to eat the lunchables and candy after the shoot, so that was pretty epic.

August: The end of July and beginning of August were AMAZING because I got to go to Greece for the first time! It inspired me to write a post on What Greece Taught me About Being a Great Hostess. It was also a great excuse to show off some of my photos from Greece, including the amazing purple and yellow mermaid dream home I found there by accident. Once I got back, I posted another fun tutorial on a DIY Pineapple Garland that's so easy to make. I also created a blog post & amazing freebie on How to Plan a Pinterest Worthy Party. This guide shows you how to plan a great party that's gorgeous, and the guide itself is super pretty as well! I was so happy with how it turned out.

September: On September 2, I had my most emotional day ever. It started with being teary-eyed as I excitedly realized that in a year I'd be walking down the aisle and marrying my fiancé. Then, I spent the afternoon working on some fun new blog posts. I was standing on a chair while taking some overhead shots, and Humpty Dumpty went tumbling down. I spent the rest of the day in the ER, then spent the rest of the MONTH unable to walk with a fractured toe. That was not fun! This seriously made all my plans come to a screeching halt. I couldn't go up 2 flights of stairs to the attic, so I couldn't really do any DIY or party blog posts. However, I did my first collaboration with Paperless Post for How to Plan a Summertime Christmas Party, which was so much fun to do! And, I spent the rest of the month researching proper equipment so that I would never hurt myself taking photos again.

October: By early October, I was able to get back into the swing of things. I wore a walking cast and was finally able to move around on my own. I dove right into Halloween (one of my favorite holidays!) and spent a day decorating my house while hobbling around in my walking cast (the Boot, as I called it). I utilized one of my favorite websites, Oriental Trading, to create two awesome Halloween tutorials. The first was DIY Faux Pinatas using inexpensive papier mache pumpkins and some streamers. The second was a Colorful Halloween Party that featured spiderwebs, black and white striped plates, and a whole lot of colorful paper fans. Plus, this party had ME in the photos! I'm working on being more present in my work next year, so that you guys can start to recognize me as the face of my blog. October was also the first month that I started using Instagram daily and I was able to increase my engagement.

November: In November, after finally getting to walk around in normal shoes once again, we went full-on Thanksgiving here on the blog. I started with 9 Tutorials to Help you Build the Best Thanksgiving, featuring some of my favorite colorful Thanksgiving and Friendsgiving ideas from around the web. I created a colorful and classy disposable Friendsgiving Tablescape that's sure to wow your guests, and a DIY Colorful Leaf Garland that's so easy to do. After YEARS of using Pinterest, I finally got 1k followers at the end of November! I remember having about 300 or so at the ER in September when I fractured my toe, so this was HUGE.

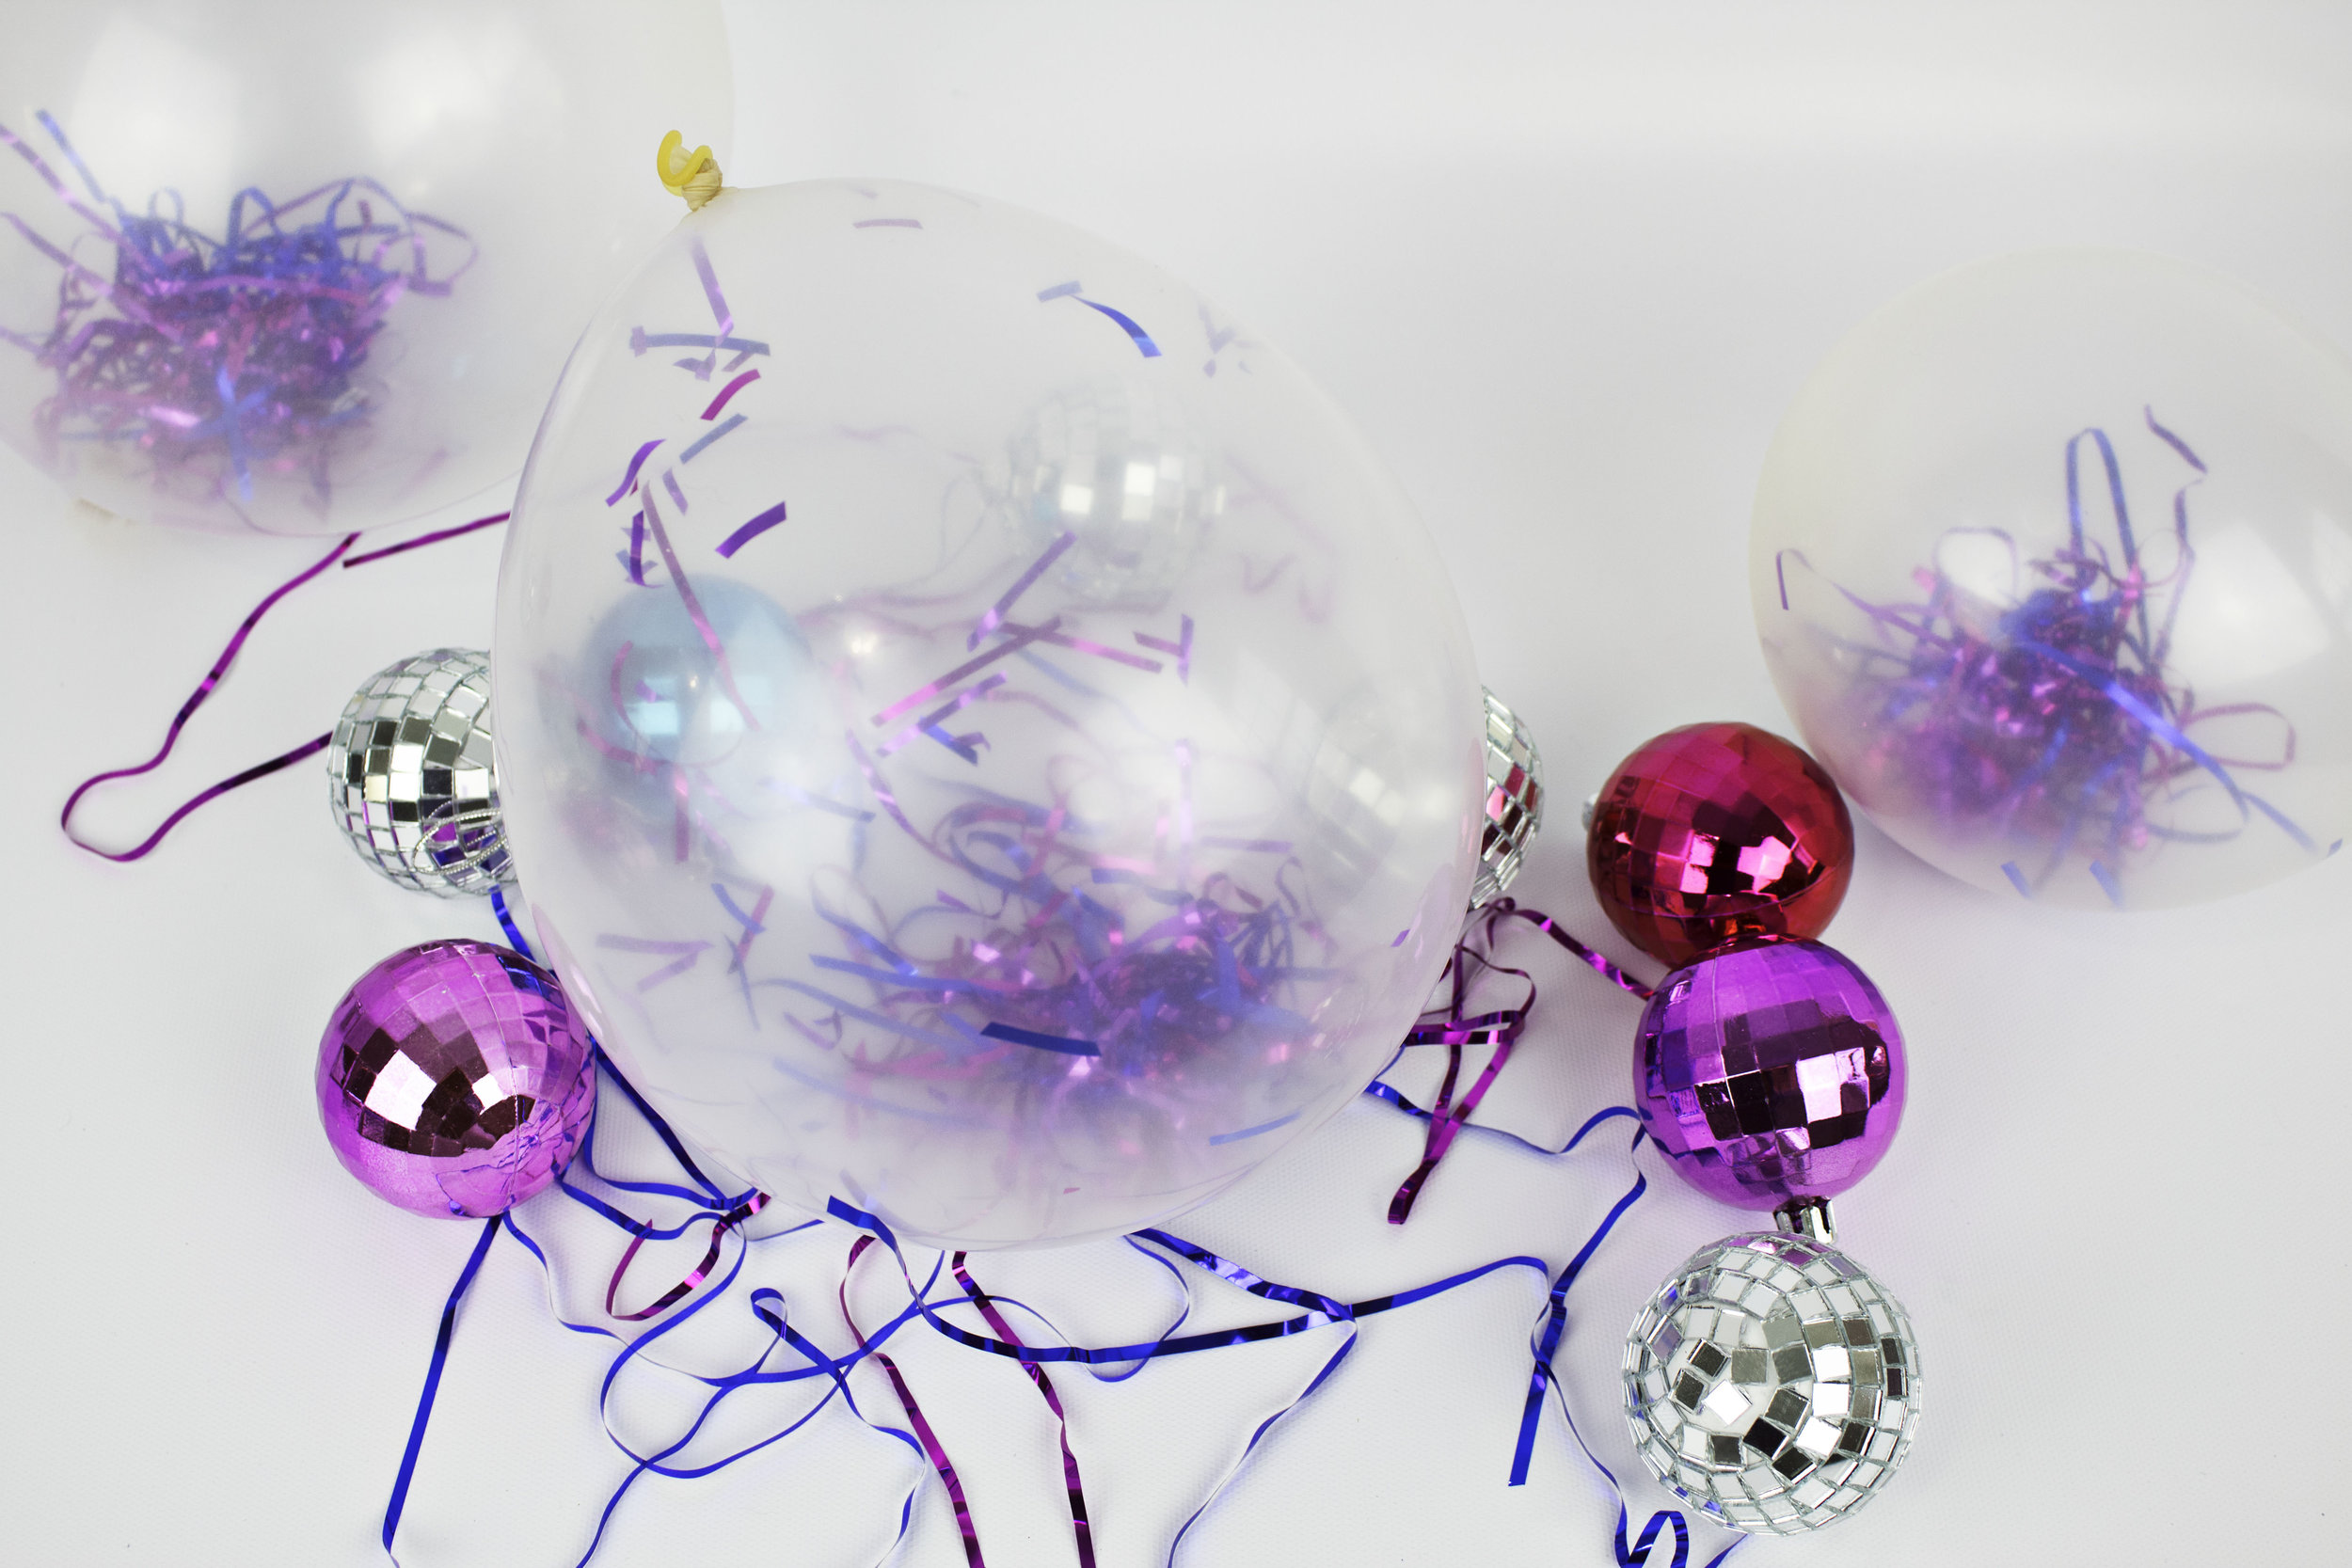
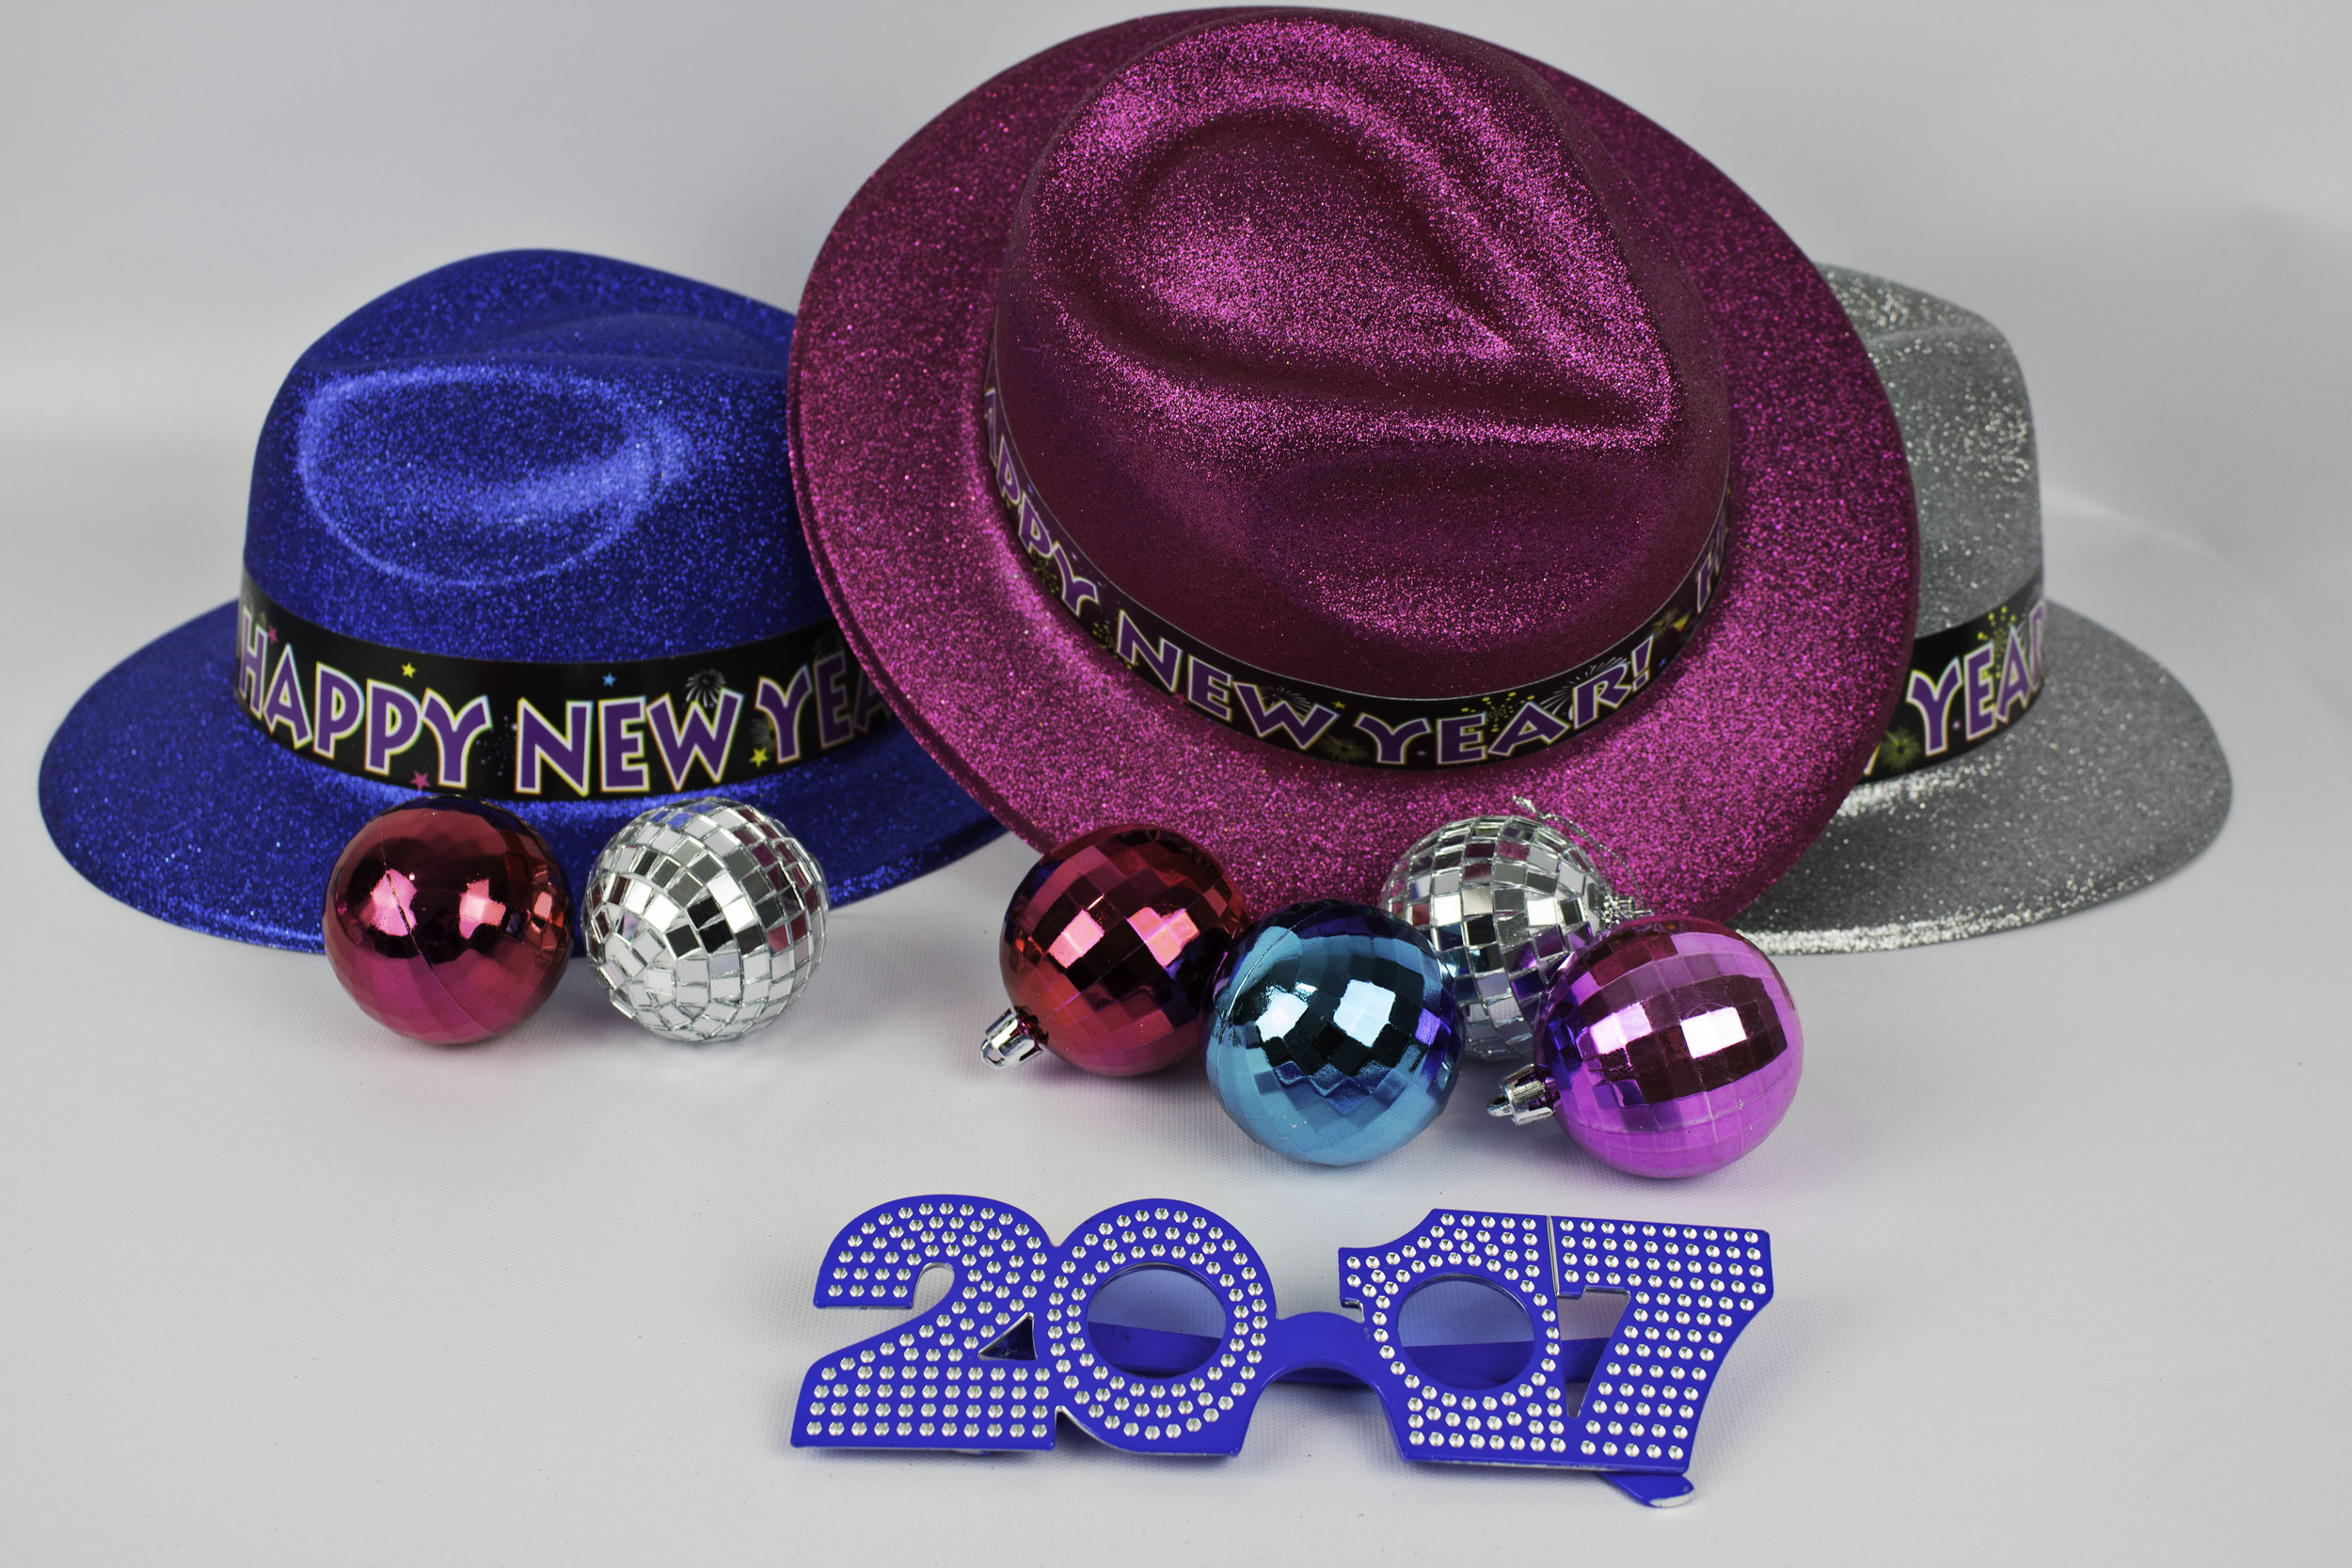
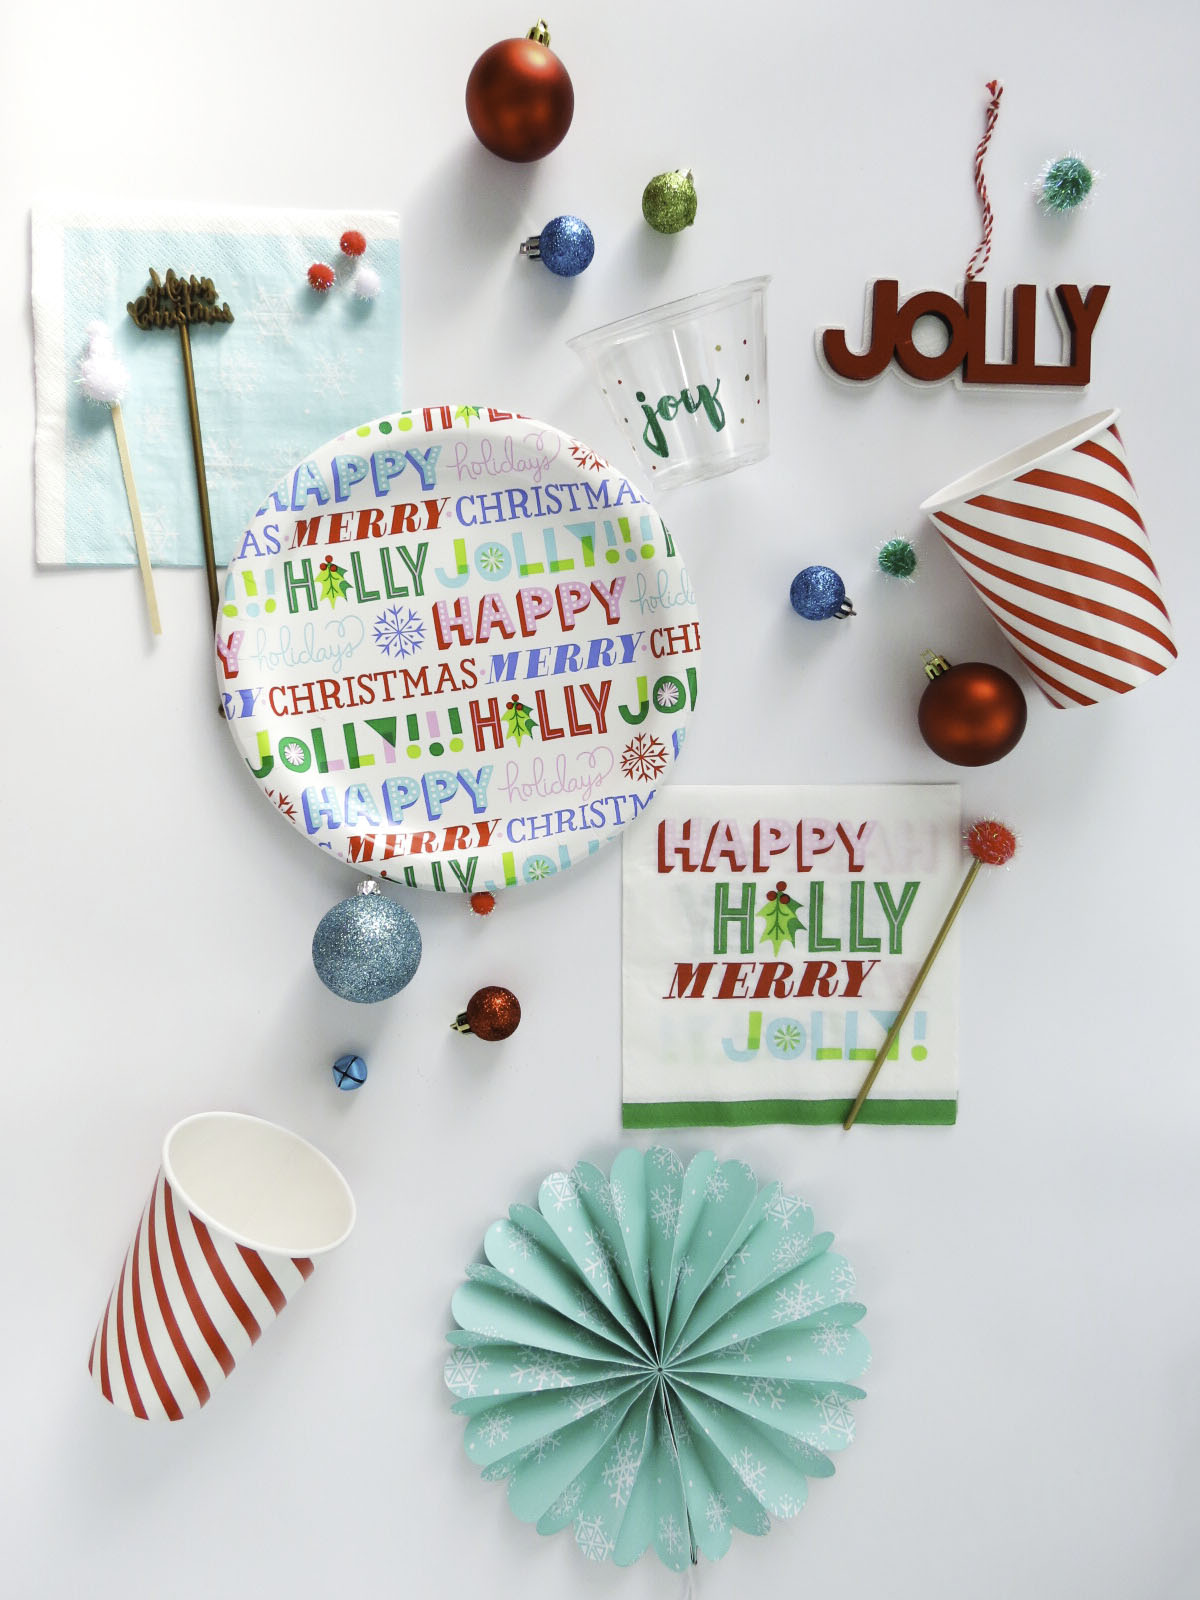
December: Ah, good old December. This is always a SUPER busy month for me, since I have my sister's birthday (Dec 13), my mom's (Dec 16), and my fiancé's (Dec 23) followed by Christmas. This left me with practically no time for blog posts! I was, however, pretty active over on Instagram. I was really bummed because I had some amazing DIY projects I wanted to do, but I did some other great blog posts. I started with How to Save Time and Money on Holiday Gatherings, a guest post on the Crazy Busy Happy Life blog. We also rounded up some fun and colorful DIY Christmas Ornament tutorials and discussed How to Mix and Match Party Supplies using gorgeous tableware from Target. I also created my very first Gift Guide for hostesses, and it's filled with some great stuff that any hostess would love. By this point, I own pretty much half the items on the list, so I mean it when I say it ;) We closed out December with a Last Minute Dollar Store New Year's Eve Party.

So, what does 2017 have to bring? A free 4-week party planning e-course is coming to the blog soon, along with virtual party planning services! I also have plans to open up a shop, and there may be a redesign happening as well. So what's the new blog name going to be?! Well a girl can't reveal all her secrets, but I can tell you that it's going to be amazing. Be sure to follow me on Instagram, where I'll be sharing updates, sneak peeks, and behind the scenes photos and videos!

Welcome 2017- I'm ready for you!

Last Minute Dollar Store New Year's Eve Party

New Year's Eve is just 2 days away. There's barely enough time to shop Amazon Prime, so you've got to do something different. How about checking out your local dollar store? They've got everything you need to throw a really cool party on a budget. Don't believe me? Check out the loot I got from my local dollar store!

Looking for last minute party ideas for New Year’s Eve? How about checking out your local dollar store?! I’ve created new year’s DIY projects that are cute, easy, and adorable! #newyearseve #dollartreediy

Note: not everything in this post cost me $1, but they were all under $3 at the local dollar store. I've also linked some items on Amazon in case you can't find them at your dollar store. This post contains affiliate links.

Light up the New Year

Sometimes when you're browsing the dollar store, you'll find some cool items that can be repurposed. 

For instance, I found these really cool flashing number cake toppers, intended for kids' birthday parties, that would fit in perfectly with New Year's decor. They're meant to hold candles, but I think they look fine on their own. They'd probably look really cool with sparklers in them, but I never use sparklers (I'm scared of them!) so I'm not sure how that would work ;)

DIY Metallic Confetti Balloons

At the dollar store, I found these metallic shreds that go in gift baskets, but I thought of a much prettier use for them- confetti balloons!

You will need:
Clear Balloons
Metallic Shreds
Funnel or rolled up paper (here)
Scissors
Drink Stirrer or pen
Helium Tank or Balloon Pump

1. Take your clear balloons and give them a stretch, especially the neck.

2. Grab a few strands of the metallic shreds and roll them up. Squish them into the opening of the balloon, using the drink stirrer to carefully push them through the neck and into the balloon area. 

3. Repeat this a few times until you fill up the balloon. Remember that once it's blown up, the shreds will take up a lot less space.

4. Optional Confetti: Take a funnel or rolled up piece of paper and place it in the neck of the balloon. Cut up the shreds to create a confetti and use the drink stirrer to push them into the balloon. I used a paper funnel, so I pushed the confetti down, then used the neck of the balloon to pull the confetti into it. This was easier than trying to shove it all through the tiny hole.

5. Blow up your balloon using the helium or a balloon pump. Remember that air will escape, so it's best to blow these up on New Year's Eve, but you can pre-fill them so they're ready to go :) Then you can pop them at midnight for a fun confetti explosion!

DIY New Year's Eve Hair Accessory

This is probably THE EASIEST New Year's Eve hair accessory tutorial you'll find. All you'll need are some alligator clips and self-stick foam numbers!

To make these clips, peel the backing off the numbers and stick them onto the hair clip. Didn't I tell you it was easy?! If you want to jazz them up a little more, you can put a piece of ribbon on the alligator clip so it isn't silver, but I don't think it's necessary and I like the extra shine of the metallic silver.

NYE hairclip.jpg

New Year's Eve Accessories

We are going to step away from the DIY projects to focus on the stuff that you can purchase from the dollar store. This stuff is MUCH cheaper than what you can find at Party City or similar stores. I think these hats were $1.29 but at Party City, similar ones were $3+. 

My local dollar store also had a lot of really cool 2017 glasses. I thought these two styles were the nicest and made it obvious that it was 2017 (not 2007) so I picked 'em. Also those rhinestone ones had the nicest pink color plus they're so Y2K that I couldn't resist. They also kinda remind me of the Times Square ball drop.

I got 2 different types of noisemakers. These small streamer ones in pink and blue (above) and the traditional cone shaped ones (below). The cone ones were cheaper and came with twice as many for just a little more than the small ones. Plus they're appropriately themed! 

I also got some nice trays, cups, plates, etc. for the table, plus all the silver and multi-colored disco balls. They're cheaper than the ones on Amazon and a decent size, so that was a win! I've been wanting to do a fun color scheme for New Year's Eve for a few years now, so I'm really excited that I get to try it this year.

Have you tried any fresh color schemes for NYE? What color palette do you usually use? Let me know in the comments! And don't forget to follow my NYE board on Pinterest :)

How to Mix and Match Party Supplies

Who doesn't love going to a store and seeing a sale?! I think one of my favorites is the mix and match ones. You know, like when you go Victoria's Secret and get underwear 5 for $25. It can cost a little more than a regular pack of underwear but why do you buy that one? Choices! Everyone likes to pick and choose the items they like best. You do it for your panties, why not do it for your parties too? (See what I did there? Hah.)

This Christmas I decided to challenge myself by creating a completely unique party scheme using easy to find, store bought supplies- and you can too! #christmasparty #partyplanning #holidayparty

This Christmas I decided to challenge myself by creating a completely unique party scheme using easy to find, store bought supplies- and you can too! I went to my local Target and picked up nearly everything in their Christmas party supplies aisle. I also added in some other items I loved, like this star banner I got from Old Navy and some napkinsI got from Marshall's (similar). I also added in some cups and stirrers I made. 

Matchy Matchy

First let's take a look at all my supplies while they hang out in their clique. 

Santa round plates. Santa shaped plates. Santa letter place cards. Santa paper fan. Striped cups. Santa beverage napkins. Striped napkins. Jolly ornament. Merry Christmas stirrer from Target. Red Pom Pom stirrer and clear cups made by me.

Snowflake napkins. Snowman plate. Snowflake cups. Merry Christmas stirrer from Target. Pom Pom  stirrer, bell stirrer, and clear cups made by me.

star banner. Jolly napkins (similar). Merry Christmas stirrer from Target. Pom Pom stirrer, bell stirrer, and clear cups made by me.

Paper fan. Polka dot tablecloth. Paper ornament garland. Happy Holidays plate. Colorful writing plate. Colorful writing napkin. Holly jolly napkin. Pom Pom stirrers, bell stirrers, and clear cups made by me.

Aren't they a little boring? Nothing stands out and they feel a little cookie cutter, especially the Santa and the snowman. 

Mix it Up

Simply by trying different combinations of store items, you can create a one-of-a-kind look. So, what's the secret to successfully mixing and matching supplies? 

You need to have a plan.

In an ideal world, you'd just grab all the things you like the most, and they'd come together in perfect harmony. This, however, is the real world. Sometimes you grab your favorite items and they don't mesh together... at all. Take a look at the supplies offered and think about what you like and why. Is it the design? The color? How functional it is? Think about how all these items will fit together and see which ones work best. 

Find a focal point.

Pick the piece you like the most or the one that is the most complex first. Then, see that works best with that piece.  Since this piece will be most important and/or hardest to match, you want to make sure the other items fit in perfectly with it.

Mix patterns, neutrals and solid colors.

To avoid pattern overload, balance out complex patterned pieces with solid colors or simple patterns like stripes. These simpler pieces will enhance the look of your party by complimenting your more patterned pieces instead of competing with them. People's eyes will want a place to rest! Having too many things to look at will overwhelm your guests.

Look at the big picture.

This is a little harder to do, but super important. You have to look at how each item looks as a whole, not as individual pieces. What does that mean? Well maybe you don't like that bowl pattern as much as another one at the store, but it fits in better with your whole look. It's important to recognize that not every piece has to be your absolute favorite one, but it'll have to fit in well to give you the overall look you desire.

Don't confine yourself to one store.

To get a really interesting and unique look, browse several different stores or brands to create a one of a kind party pack. This not only gives you more options, but also allows you to find pieces you really love, instead of only finding the best that one store has to offer. To see my top shops for party supplies, check out this blog post.

Don't be afraid to break the rules.

Do you like the way 2 patterns look together, even though they're technically "clashing"? Go for it! Rules are made to be broken when it comes to decorating and sometimes it's fun to try something new and different, even if it's not the trendy or traditional way to do it. Who knows, maybe you'll create your own trend! 

Check out what you have.

think the best part of mixing and matching is being able to use what you already have. Before going shopping, take a look at your inventory and see if you can enhance what you already have by mixing in some new pieces. By doing this, you can save time and money on purchasing new items. 

Try to find some consistency or pattern in your choices.

The key to being able to successfully mix and match comes from being consistent in some way. This will prevent it from looking like you grabbed any party supplies you could find. What are some factors of consistency that will help you?

Color

One way to keep a party consistent despite different patterns is by choosing a color scheme. Maybe the thing bringing all your items together is that they all have the same 3 colors in them. Or they're all pastels, metallics, etc. Color scheme is probably the #1 way to create a cohesive look. It's also the easiest, so use that to your advantage!

Shape

The shape of an item is a great way to create visual interest, but it's also a catalyst to unintentionally creating a mismatch. If all your items are rounded, a square plate may look out of place. 

Style

If all your items are somewhat upscale, using a cheap paper plate will look totally out of place. Think about the type of event and what you want the overall look to be, and go from there! 

Quality

Know where to splurge and where to save. For example, expensive straws aren't the best use of money because they'll be tossed away, and a cheaper straw will do the trick. However, it's better to spend a little more on decent plates and utensils. You don't want anyone to have trouble cutting their food or be left with a soggy, drooping plate when it's full of food. 

Saving money.

To save money, mix in some cheaper items from the dollar store to match your more expensive designed pieces. Learn more about how to save money (and time!) on party supplies by clicking here

When you've got all your items together, take a look to make sure nothing sticks out like a sore thumb. If it does, you've either got to find something to bring it together or just nix it completely. 

So what do you guys think? Are you ready to try your own mix and match party? For more party ideas, be sure to check out my Pinterest!

Holiday Gift Guide: Hostess

The holidays are full of events- parties, dinners, gift exchanges, and too many cocktail hours to keep track of. At the center of each of these events is a woman we all love and adore- the hostess. She's the woman that manages to make her tiny one bedroom apartment fit as many friends as possible, while still keeping everyone comfortable. The one that turns her house into a chic lounge, or the one that injects so much Christmas spirit into her home that you'd swear you were in a Hallmark movie. These women go above and beyond all year long bringing people together, so they deserve a gift as amazing as they are! Why not bring a smile to their face or make their lives easier by giving them one of these items? Here are some Christmas gift ideas for the hostesses in your life.

Looking for the perfect Christmas gift for the party planning friend or hostess in your life? Click to see where to get these awesome items!

1. Gold Leaf Phone Case 2. Pink Ombre Cocktail Shaker 3. KitchenAid Stand Mixer 4. Paper Mate Flair Markers 5. Celebrate Everything by Darcy Miller 6. Pink Party Straws 7. Keurig 2.0 Brewing System 8. Rose Gold Slate Drink Coasters 9. Meri Meri Birthday Candles 10. Pom Pom Marled Knit Throw 11. Gold Dot Champagne Flutes 12. Fujifilm Instax Mini (Raspberry)

1. Gold Leaf Phone Case - For a hostess that loves throwing glam parties, this phone case is a no-brainer! It'll be sure to put a smile on your friend's face, so maybe she'll be less likely to aggressively text you not to forget the pie.

2. Pink Ombre Cocktail Shaker - To get the party started, every hostess needs to have this adorable ombre cocktail shaker. It's equal parts fun and classy, so it's a perfect mood-setter for the party.

3. KitchenAid Stand Mixer - If your hostess friend is a baker, she'll love this KitchenAid mixer! If you've got a group of friends that want to get her a gift, this is the perfect opportunity to pitch in and get it for her as a Christmas gift since there are tons of sales during the holidays. I've been drooling over these for years. Here's to hoping someone purchases it from our wedding registry! 

4. Paper Mate Flair Markers - I can't survive without my Papermate Flair markers! With all the color options, budding party planners can color-coordinate their to-do lists, make grocery shopping more fun, handwrite a card, or just doodle to pass the time. They make everything a party.

5. Celebrate Everything by Darcy Miller - This book is seriously amazing. The pages are so colorful and full of interesting, useful party planning ideas. It's packed full of inspiration and does not disappoint!

6. Pink Party Straws - I don't think these need an explanation, but I'll give one anyway. They're pink, they're fun and they remind you to party. How can you NOT buy these?!

7. Keurig 2.0 Brewing System - Whether she's staying up late putting the finishing touches on her decor or serving guests, your friend needs a keurig! This off white color will match any kitchen while keeping it classy. She'll also stand out since everyone else has a black Keurig!

8. Rose Gold Slate Drink Coasters - No one likes rings on their furniture. Give your hostess a set of these gorgeous coasters so she can keep her furniture safe- in style. Plus they'd look gorgeous on a coffee table! Cute and practical, what better Christmas gift can you ask for?

9. Meri Meri Birthday Candles - These candles would make such a fun gift for any hostess or party gal! They're pink and glittery, tall and elegant. They're perfect for a birthday or just to make an ordinary meal interesting.

10. Pom Pom Marled Knit Throw - Since the hostess always makes her home nice and cozy for everyone, why not return the favor with this throw? It's soft, warm and has super cute pom poms on the ends.

11. Gold Dot Champagne Flutes - Drinking champagne makes everything an event, whether your hostess is partying it up with friends or laying on the couch watching Friends. At least this way, she can do it with her pinkies up.

12. Fujifilm Instax Mini (Raspberry) - I love instant cameras. I was fascinated with them as a kid in the 90's and still like them today! They capture a memory and print it right then and there. It's the best Christmas gift for a hostess. It'll remind her to live in the moment!

With this holiday gift guide, you can find the best Christmas present for each hostesses on your list. Christmas is the perfect time to tell her thanks for always bringing us together- in style! Which of these items is your favorite? Let me know in the comments below!

PartyHarDIY is a participant in the Amazon Services LLC Associates Program, an affiliate advertising program designed to provide a means for sites to earn advertising fees by advertising and linking to amazon.com.

DIY Christmas Ornaments for Color Lovers

O Christmas tree, O Christmas tree. I really love your colors. Ornaments are easily the best part of any tree. They are the life, the personality, and what makes each tree unique. I still remember the first set of ornaments we ever made. There was one that looked like a melted pile of boogers with some shapes, which was made from Elmer's glue. Then there was the set we made with my dad. He took wrapping paper, cut out shapes, and used colored glue to create designs. Then, we sprinkled the edges with confetti. They're still buried in my parents' garage somewhere, so maybe someday they'll get to go on my tree! In the meantime, I've rounded up the best colorful ornament DIY's so that your tree can be as vibrant and fun as you are! We know there are so many cool ornaments you can buy, but over in these parts, we like things you can make!

Ornaments are easily the best part of any tree. We know there are so many cool ornaments you can buy, but over in these parts, we like things you can make! I've rounded up the best colorful ornament DIY's so that your tree can be as vibrant and fun …

DIY Pun Holiday Ornaments by Aww Sam. Because puns are tree-iffic.

Ornaments are easily the best part of any tree. We know there are so many cool ornaments you can buy, but over in these parts, we like things you can make! I've rounded up the best colorful ornament DIY's so that your tree can be as vibrant and fun …

DIY Faux Gingerbread Ornaments by Dawn Nicole Designs. Since you can't eat gingerbread cookies for a month straight, these will (kinda) satisfy your sweet tooth.

Ornaments are easily the best part of any tree. We know there are so many cool ornaments you can buy, but over in these parts, we like things you can make! I've rounded up the best colorful ornament DIY's so that your tree can be as vibrant and fun …

Illustrated Christmas Ornaments by Hello Happy Studios. We all wish we can draw the cutest little things, but we probably can't, so it's great that these come pre-printed for us!

Ornaments are easily the best part of any tree. We know there are so many cool ornaments you can buy, but over in these parts, we like things you can make! I've rounded up the best colorful ornament DIY's so that your tree can be as vibrant and fun …

Cactus Christmas Bauble Ornaments from My Poppet. Since some of us can kill a real cactus (guilty!) we need to improvise sometimes so we can get our cactus fix.


Ornaments are easily the best part of any tree. We know there are so many cool ornaments you can buy, but over in these parts, we like things you can make! I've rounded up the best colorful ornament DIY's so that your tree can be as vibrant and fun …

Balsa Wood Diamond Ornament by A Beautiful Mess. Diamonds are a girl's best friend, and let's be honest, this is probably the only one you'll be getting for Christmas.

Ornaments are easily the best part of any tree. We know there are so many cool ornaments you can buy, but over in these parts, we like things you can make! I've rounded up the best colorful ornament DIY's so that your tree can be as vibrant and fun …

Rudolph Ornaments by Studio DIY. Why was there only one magical light up reindeer in the whole North Pole?! We will never know.


Ornaments are easily the best part of any tree. We know there are so many cool ornaments you can buy, but over in these parts, we like things you can make! I've rounded up the best colorful ornament DIY's so that your tree can be as vibrant and fun …

Painted Christmas Ornaments by Design Improvised. A little paint and some tape goes a long way with these cuties!


Ornaments are easily the best part of any tree. We know there are so many cool ornaments you can buy, but over in these parts, we like things you can make! I've rounded up the best colorful ornament DIY's so that your tree can be as vibrant and fun …

Easy Sewing Cards by Mr. Printables. While these aren't exactly Christmas ornaments, I think these would be adorable on a tree. Plus you get to practice your seeing, so win-win!


Ornaments are easily the best part of any tree. We know there are so many cool ornaments you can buy, but over in these parts, we like things you can make! I've rounded up the best colorful ornament DIY's so that your tree can be as vibrant and fun …

Glitter Dust Filled Balls by The Vault Files. You can also hand these out on New Year's Eve as the ball drops!


Ornaments are easily the best part of any tree. We know there are so many cool ornaments you can buy, but over in these parts, we like things you can make! I've rounded up the best colorful ornament DIY's so that your tree can be as vibrant and fun …

Tissue Paper Fringe Ornaments by A Kailo Chic Life. Pinatas belong in every occasion, and Christmas is no exception!

 Painted Ornaments by Tell Love and Party. If you're not too crafty, these are perfect to start with!

Ornaments are easily the best part of any tree. We know there are so many cool ornaments you can buy, but over in these parts, we like things you can make! I've rounded up the best colorful ornament DIY's so that your tree can be as vibrant and fun …

Painted Gold Leaf Ornaments by The Sweetest Occasion. These remind me of globes, if the land was made of gold.


Ornaments are easily the best part of any tree. We know there are so many cool ornaments you can buy, but over in these parts, we like things you can make! I've rounded up the best colorful ornament DIY's so that your tree can be as vibrant and fun …

Yarn Wrapped Christmas Tree Ornaments by Easy Peasy and Fun. Recycling = Awesome.

Ornaments are easily the best part of any tree. We know there are so many cool ornaments you can buy, but over in these parts, we like things you can make! I've rounded up the best colorful ornament DIY's so that your tree can be as vibrant and fun …

Glitter Scallop Ornaments by Sarah Hearts. These are simple and elegant, much like your Great Aunt Mary would like you to be (but you aren't).

I think any of these ornaments would be a super cute addition to your tree! Which is your favorite? Have you ever made any other ornaments for your tree? Let me know in the comments below!